Lithophanes are artistic creations on ultra-thin translucent porcelain that is visible only when backlit with a light source. They are etched or modeled artworks made by a 2D image. The 2D image is first processed to make its gray-scale representation, and then, depending on the color, it is then converted to a calculated 3D printed height. This process allows a specific amount of light to shine through. The darker colors block more light, and the opposite relationship stands for lighter pixels. Each pixel in the image undergoes this process and results in a very creative art piece. This varying light source is what makes lithophanes interesting to the viewer than the 2D engravings or images.
Lithophanes are a 3D representation of photos that can make creative gifts for any occasion. It’s also a way to highlight your 3D printing skills that are not familiar to everyone. The process of creating lithophanes includes initially converting a 2D image into a gray-scale and make the detail levels to maximum. The “Make Lithophane” action is also available on Adobe Photoshop that will allow you to create gray-scale images suitable for lithophanes. Then STL file is exported that is 3D printed by a high-resolution stereolithography (SLA) printer.
One of the most important aspects to keep in mind while making lithophanes is the color contrast. The selection of the right picture that has a variety of color contrast is highly critical. A dark picture (one with a lot of deep colors) might make the details of the finished product hard to see. Therefore, an image with a good combination of light and dark colors is desirable for generating an excellent lithophane. The surface of the Moon is a good choice for making a lithophane.
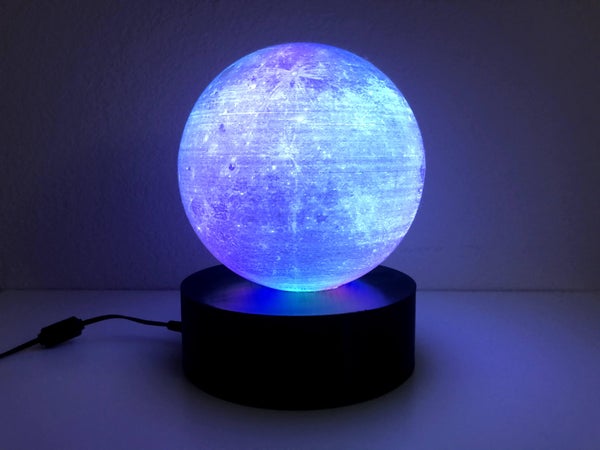
Tiffany Lo recently demonstrated by an Instructable how to make a 3D-printed Moon lithophane. The project uses Lithophane Maker’s Globe Maker and Fusion 360 design to create a colorful moon image. Tiffany combined the NASA data of the Moon and with the globe maker. The sphere was 3D printed on a typical FDM printer. Then assembled the printed globe on a base with LED strips for backlighting.
Tiffany says,
“It’s perfect as a small lamp or decoration for any person who doesn’t want to wait for the night time to see the Moon. “She further added, “If you want a beginner-friendly and inexpensive project, be sure to follow this Instructable so you can create your own moon lamp! Throughout this process, you will be able to practice your skills in learning how to 3D print for the first time and designing in Fusion 360.”
Project link: https://www.instructables.com/3D-Printed-Moon-Lithophane


