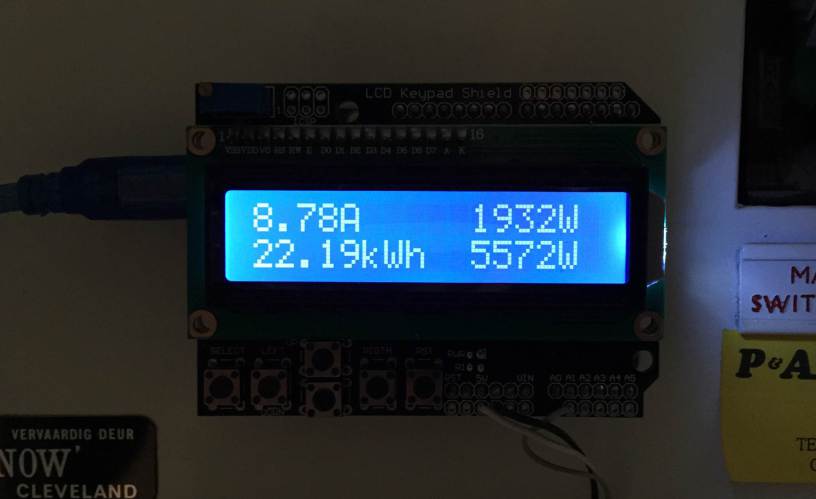
A new tutorial by The DIY Life is for building a home energy meter that provides information about power consumption and cost estimates for the month.
Using Arduino and some other components you can build your own energy meter that measure the supply current to your home through a CT (current transformer), current, power, maximum power and kilowatt hours consumed. The cost of electricity used to date can be added and displayed easily.
Electronics you need to build this project:
- Arduino Uno
- LCD Shield / LCD Screen
- CT – Talema AC1030
- 56Ω Burden Resistor
- 10µF Capacitor
- 2 x 100K Divider Resistors
If you are not familiar with Arduino or LCDs you can check these articles by The DIY Life to learn more: getting started with Arduino, connect an LCD screen
First you have to build the current sensor by connecting the CT to the Arduino and setting a right voltage reference due to the Arduino 0-5V input range. As shown below, this is the way you should connect the CT to the Arduino.
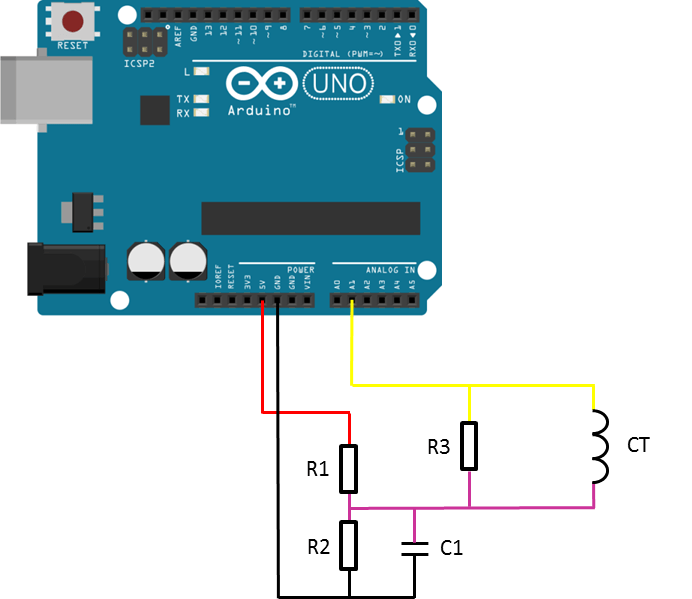
This code should be uploaded to your Arduino to run the project. It already has a scaling factor that can be adjusted due to the components you choose in your circuit.If you don’t want to use or don’t have an LCD screen, you can also modify the sketch to output to the Arduino IDE’s serial window as described in this code.
For more information on how to choose different components, how to calibrate them, and to learn more details about wiring and coding, you should check this tutorial out.
The first number displayed is the instantaneous current followed by the instantaneous power. On the bottom line, the kilowatt hours used since reset and then the maximum recorded power since reset. Check the meter in action:









Please note the code is not measuring RMS current and even less power, but peak values. Look for the OpenEnergyMonitor project for a true RMS approach.