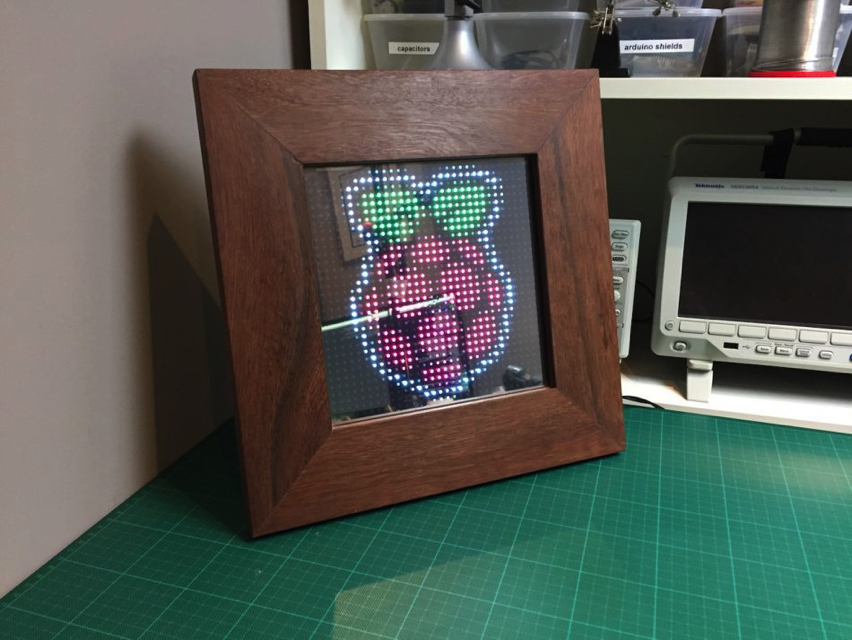
Have you ever wanted to get an interesting art frame? That can display and flip photos, scroll text, show the weather or display social media notifications?
Frederick Vandenbosch’s new tutorial is for building an art frame using 32×32 LED matrix and Raspberry Pi Zero.
Electronics used in this project
- Raspberry Pi Zero
- 32×32 RGB LED Matrix
- Adafruit RGB Matrix HAT
- USB OTG Cable
- USB Wifi Dongle
- 5V/4A Power Supply
You can watch a detailed step-by-step tutorial for assembling the frame in this video:
You can use the Adafruit RGB Matrix HAT like the tutorial to control the matrix and to make wiring simpler. But it is not mandatory, you can also wire the LED matrix directly to Pi’s GPIO. A USB Wifi adapter or dongle plugs into one of your desktop or laptop’s USB ports, allowing you to connect to a wireless network in the home, office, or a public place. You can use this connection to access shared files, devices, and documents, or to connect to the Internet. To connect this dongle with your Pi Zero you need a OTG USB cable. Connecting this dongle with your projects will open up for you doors of innovation, and that what made this frame cool!
The wiring is as described in this picture.
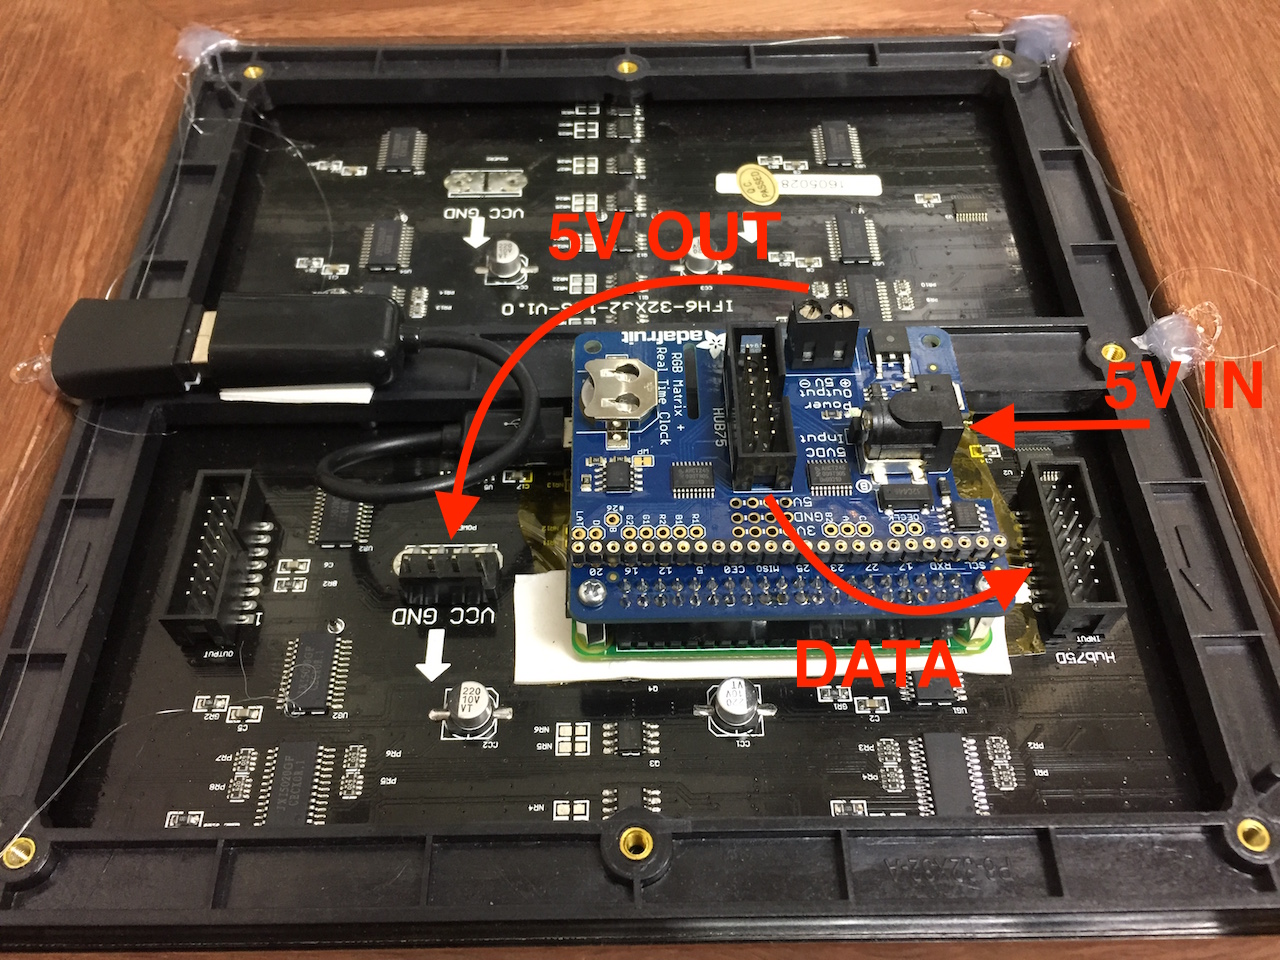
Frederick used Raspbian Jessie “lite edition” for his Zero since the application is time-critical. Because it has more improvements, he preferred using Henner Zeller’s rpi-rgb-led-matrix library instead of the regular Adafruit library – which lately seemed an old version of the same series. He wrote a code to display and scroll ppm images, you can check it out here.
You can also use Raspberry Pi 3 in order to build this project, no need to change anything in software, and no need for the Wifi dongle since you can use the onboard Wifi. Things can be displayed on the matrix are unlimited. Since you have it connected with internet, this project could be your next IoT hack!
More details about this project and other amazing tutorials can be found at Frederick website.


