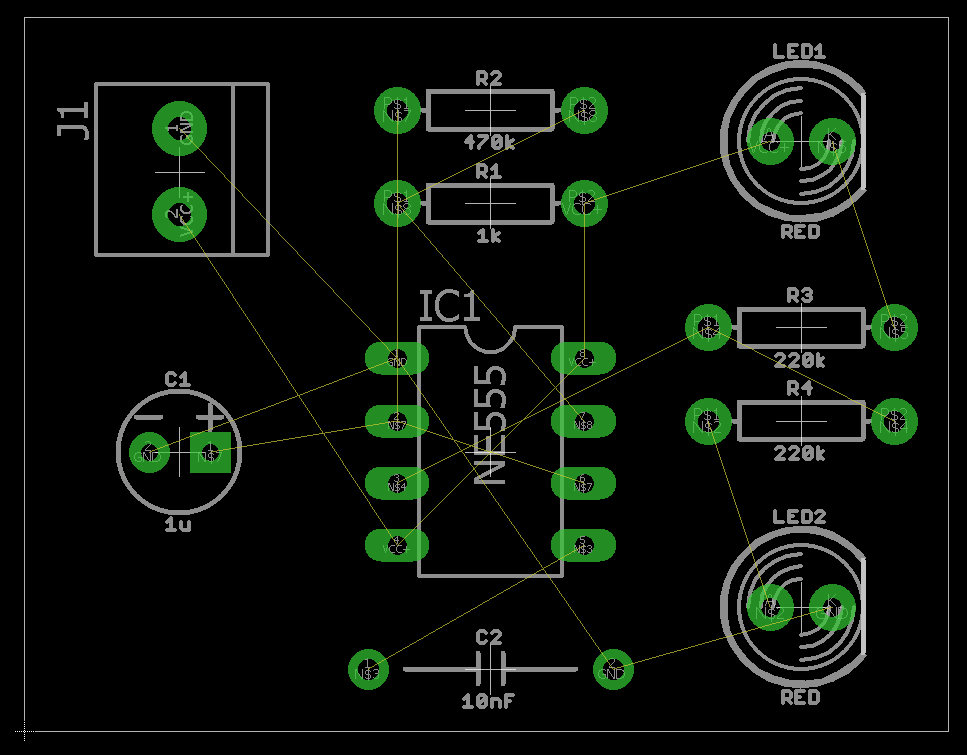
Designing a PCB layout is a work of engineering art, includes placing components and routing them through different layers. So when you assign the same job for different engineers, each one would make it in his own way. But sometimes when working on a complex design some help may be necessary to finish the work. Autodesk EAGLE provides an autorouter feature which may assist you in many cases.
The autorouter is a useful tool that creates many routing variations for the current component placement. However, it is not a completely replacement of manually routing method. It can help you in specific situations to augment your abilities, not replace them.
When to use the autorouter?
There are three main uses of the autorouter:
- Optimizing Placement
While there is no rule for placing the components of the circuits, you need to evaluate your placement to ensure that you can route all parts. Autorouter completion result could be used as an indicator of your parts placement, if it was 85% or greater this means you did a good job. If not, consider pushing your parts around. - Discovering Bottlenecks
You can also use the autorouter to identify bottlenecks and other critical connection points that you might have missed when placing your components. Maybe you packed a couple of ICs too close together. Your autorouter can show you where you might need to leave more space between components. - Getting Inspired
When you are stuck on a section and don’t know how to route your parts, then you can call the autorouter to see how it takes care of the job, then try routing that same spot yourself with your new perspective. You might just find a strategy for your traces that you didn’t see before your autorouter gave it a try.
Using EAGLE Autorouter
Now when you find yourself stuck on some area or you feel that you need to optimize your placement or discover the bottlenecks, it is time to launch the autorouter. Follow these steps to know how it works:
- Open your PCB layout (.brd) file from your Autodesk EAGLE Control Panel.
- Select the Autorouter tool on the left-hand side of your interface to open the Autorouter Main Setup dialog.
- There’s quite few settings here that you can adjust:
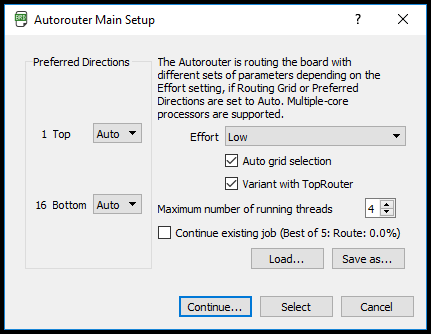
You’re in complete control of the autorouter setup with settings for effort, CPU threads, and routing directions. - Preferred direction: if you need a specific direction of the route, like vertical or horizontal, select it for each layer or you can set it to Auto. N/A means that the autorouter will not use this layer.
- Effort: this option defines how the autorouter will work, higher effort will take more time and will provide more more routing variances.
- Number of threads: how many threads of the CPU you want the autorouter to use? This surely will affect the time it takes to finish.
After selecting your settings, press the Continue button.
- Within the Routing Variants dialog, you’ll see a list of all the routing variations the autorouter will attempt. Select the Start button to begin the autorouting process.
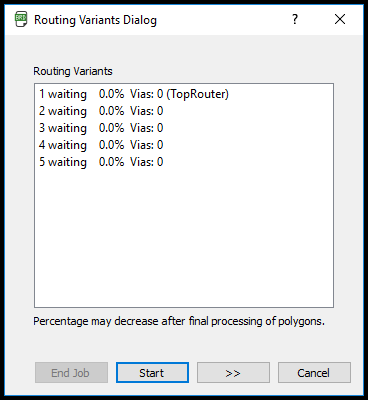
Autorouting on a low effort mode produced five potential routing variations that the autorouter will attempt. - Once the routing is complete, select the Evaluate button, and you’ll see your completion percentage in the bottom-left corner of the interface.
If you want to unroute your board you can use the Undo (Ctrl + Z), or use the RIPUP command. Just type RIPUP ; in the command line and all of your routed traces will convert back to airwires.
To learn more about routing and autorouting you can read this tutorial, it is a part of series about Autodesk EAGLE features and how to use it. You can also view the previous tutorial about placing components.


