Introduction to DigiSpark – A Smaller, Cheaper and Powerful Arduino board
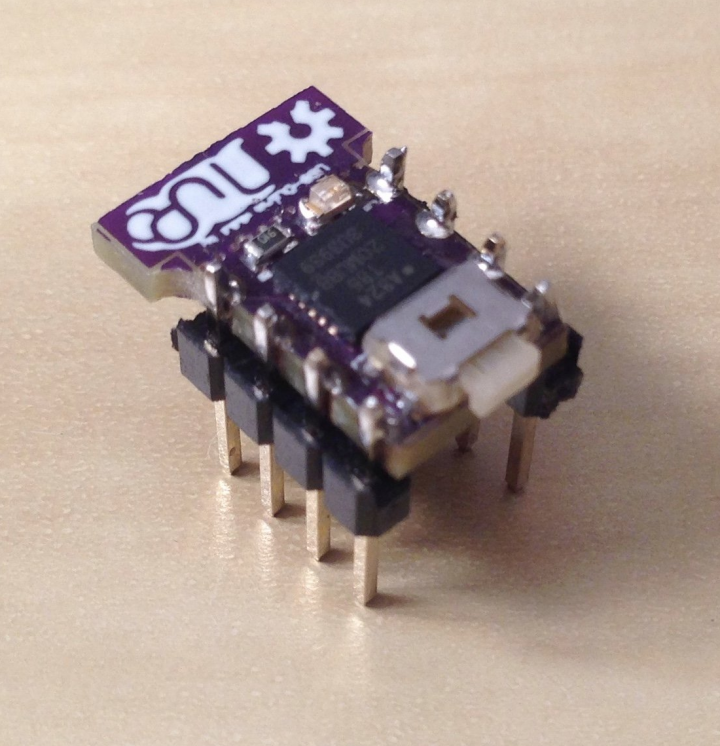
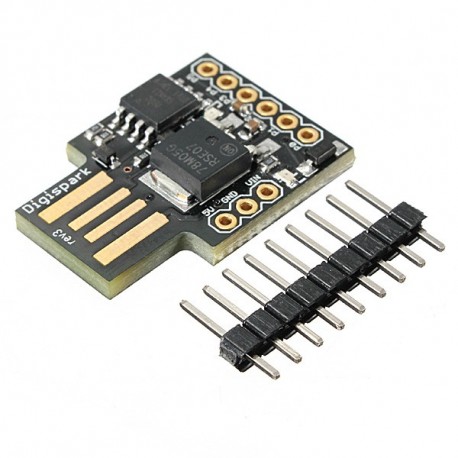
The Digispark board is one of the smallest Arduino boards ever produced and is copyrighted by Digistump LLC. Although it is tiny, it is also very powerful and powered by an ATTINY85 chip clocked up to 16.5Mhz (about the same speed as Arduino Uno boards). So Digispark is simply a microcontroller board based on an ATTINY85 MCU that can be programmed using the Arduino IDE. The Digispark is similar to the Arduino line mostly in regarding the programming way, it is cheaper, smaller, and quite powerful.
Just as most Arduino boards come with a USB port for programming and sometimes as source of power, Digispark comes with an onboard USB connector that can be plugged directly into a computer for programming of the device. The board can be powered via the USB port which will feed 5V to the board or from an external source via its VIN pin that can accept ~7 to 35V which will be regulated down to 5V through an onboard 78M05 voltage regulator.
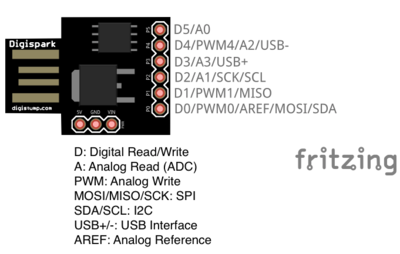
Digispark is measured at 25mm by 18mm and comes with 6 GPIO pins for input and output. Three of those pins are capable of PWM and 4 of them capable of ADC. It also comes with 2 LED indicators, 1 for indicating power while the other is connected to either pin 0 or pin 1 depending on the type of board purchased. It comes with 8k Flash Memory and about 6k left after the addition of the bootloader, this is relatively small as compared to the 32K on the Arduino UNO but it’s fine for small to medium-sized projects.
One of the great advantages of using the Arduino boards and platform is the ability to use the inbuilt Serial to print out messages to the Arduino Serial monitor, a tool that is very handy for debugging. Unfortunately, the ATTINY85 which is found on the DigiSpark board cannot support the Serial library used in Arduino, but can technically support SoftwareSerial using some hack around. Anyway, engineers at Digispark devised another user interface option which aids as a serial monitor.
Getting Started With DigiSpark
The Digispark runs the “micronucleus tiny85” bootloader version 1.02, an open source project. Of course, you don’t need to worry about burning the bootloader since the Digispark already comes with the bootloader pre-installed, but you will have to burn the bootloader yourself if you want to build your own Attiny85 digispark clone.
Furthermore, DigiSpark uses USB to communicate with the computer, so you should install the DigiSpark USB driver. To do this, you must download Arduino for Digispark which come with USB driver and extract the file (DigisparkArduino-Win32-1.0.4-March29.zip) to any folder, then execute DigisparkArduino– Win32\DigisparkWindowsDriver\InstallDriver.exe to start installing the USB driver.
Digispark is highly recommended to be used with the Arduino IDE 1.6.5+ and the Arduino 1.6.6 or 1.6.7 are not recommended. Make sure you have the Arduino IDE already installed. If you don’t have it already you can download it from the Arduino Website.
To start programming and working with Digispark, watch the full video below. If you are stuck or need some help, you can visit the tutorial page from Digispark here.
Digispark is a great way to jump into electronics, or perfect for when an Arduino is too big or too much. DigiSpark is available for purchase on the DigiStump website at a price of $7.95 and currently sold out and restocking will begin from May 2018. If you are like me that don’t like waiting that long, you can get a DigiSpark board for a relatively lesser price than the $7.95 from Aliexpress at about $1.7 or can be purchased on eBay as well.


