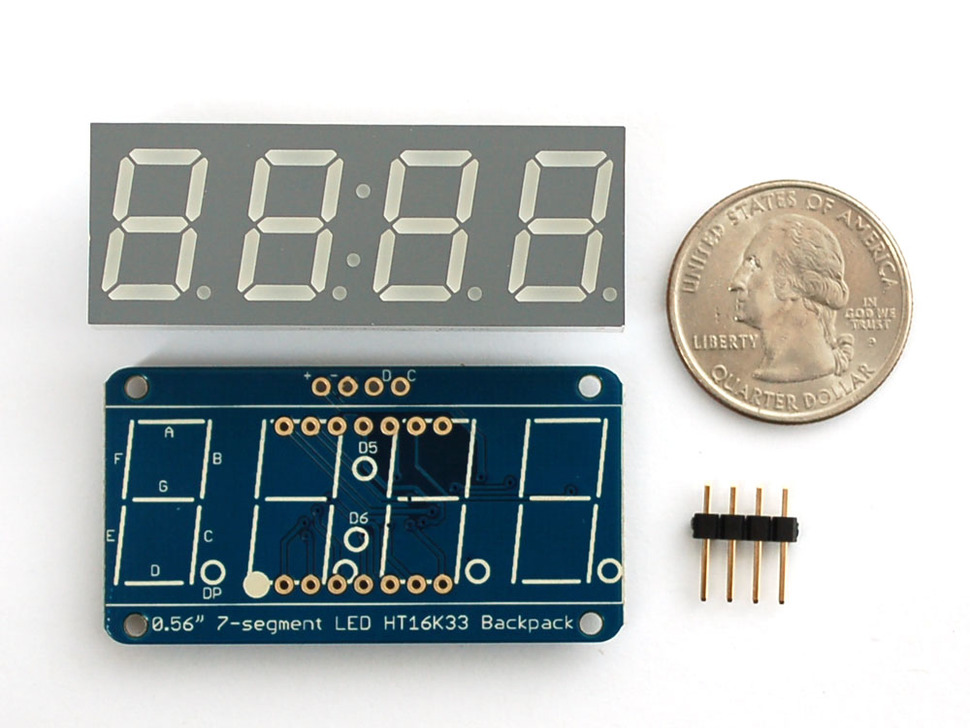
Using Adafruit’s 0.56″ 7-segment LED backpack and display and the DS1307 RTC (Real Time Clock) board, this tutorial will guide you to make a simple 4-digit clock that uses only 2 Arduino pins.
The 7-Segment Backpack is a combination of the LED display, header pins, and a PCB which need to be soldered together. The PCB contains a driver chip with a built in clock that multiplexes the display and constant-current drivers for ultra-bright consistent color.
This module uses I2C interface, which means it needs just two data pins to control the 4 digits instead of 14 pin, freeing up Arduino pins for other usages.
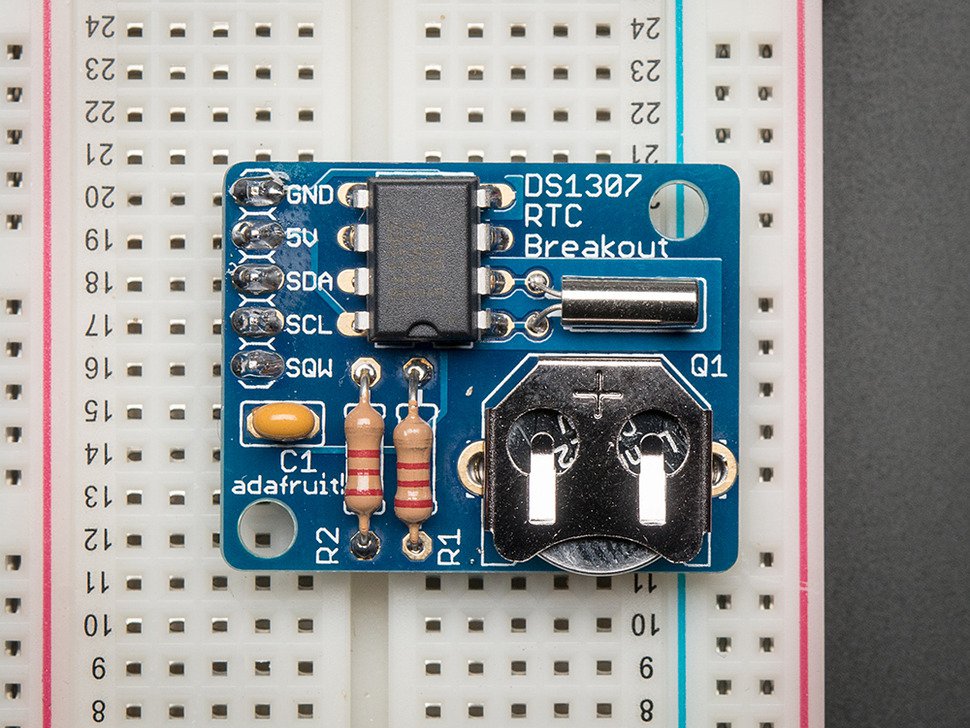
DS1307 is a battery-backed real time clock (RTC) that allows a microcontroller project to keep track of time even if it is reprogrammed, or if the power is lost. DS1307 breakout board also comes as a kit of parts to be soldered.
Building the digital clock
It is a simple process, connect the part as shown in the image, the red wire connected with 5V, black wire with GND, orange to A4 (SDA – data), yellow to A5 (SCL – clock).
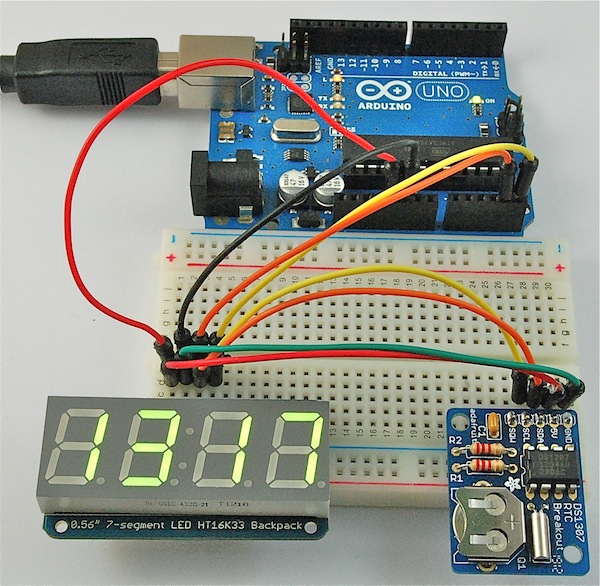
Both RTC and 7-segment modules have an Arduino library, as normal with libraries, unzip the folders into your Arduino ‘libraries’ directory and then restart the Arduino IDE for it to pick them up.
Paste the following sketch into a new Arduino window and upload it to your board. It will set the RTC to the time at which the sketch was compiled and uploaded. So, if your computer picks up its time from the Internet, that will be pretty accurate.
#include <Wire.h>
#include "Adafruit_LEDBackpack.h"
#include "Adafruit_GFX.h"
#include "RTClib.h"

RTC_DS1307 RTC;

Adafruit_7segment disp = Adafruit_7segment();

void setup()
{
 Wire.begin();
 RTC.begin();
 if (! RTC.isrunning())
 {
   RTC.adjust(DateTime(__DATE__, __TIME__));
 }
 disp.begin(0x70);
}

void loop()
{
 disp.print(getDecimalTime());
 disp.drawColon(true);
 disp.writeDisplay();
 delay(500);
 disp.drawColon(false);
 disp.writeDisplay();
 delay(500);
}

int getDecimalTime()
{
 DateTime now = RTC.now();
 int decimalTime = now.hour() * 100 + now.minute();
 return decimalTime;
}
The full documentation of the project is reachable here.


