The creator of the CircuitLab simulation software, now used in electronics courses at MIT, CMU, and other top universities, has just released the first few chapters of a new book. It’s called “Ultimate Electronics: Practical Circuit Design and Analysis,” and it’s available free online. It’s interactive because every schematic in the book can be clicked to open it, and many have a simulation that can be run and changed right in the browser. Take a look at: https://www.circuitlab.com/textbook/
Using solar energy to split water provides an efficient way for large scale renewable energy conversion and storage. A group of researchers from TUDelft and AMOLF have successfully developed an efficient and stable photo-electrode that could improve water splitting with solar energy.
Decomposition of water using solar energy
This photoelectrode absorbs light and directly decomposes water into hydrogen and oxygen. In addition to the efficiency, the system is also cheap because of using silicon wafers as the light absorbing material.
The Process
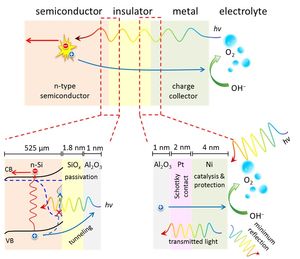
Photoelectrochemical (PEC) splitting of water is a direct conversion of solar to chemical energy to produce renewable and clean fuel. The hydrogen, for example, can be used directly in fuel cells, or combined with other molecules to create durable materials.
Together with colleagues from AMOLF (Amsterdam), we have engineered a photo-electrode, a material that absorbs light and directly splits water, that has a very high efficiency and over 200 hours of stability’, says Wilson Smith, Associate Professor in the Department of Chemical Engineering at TU Delft. ‘This is remarkable in a field where people normally show only a few hours of stability. We use silicon wafers as the light absorbing material, so the photoelectrode is also very cheap.
Researchers had also designed a new insulator layer to stabilize the semiconductor (Si) photo-electrode, while keeping the high efficiency of water splitting by using two metals. This approach known as making a metal-insulator-semiconductor (MIS) junction. It is a simple system that combines the stability and catalysis bottlenecks in photoelectrochemical water splitting.
For more information, the researchers had published this research in Nature Communications.
Despite ATtiny series is considered extremely cheap and useful, still there is a lack of projects and tutorials about it. In this tutorial, you will learn how to start building applications using ATtiny13 microcontroller programmed using Arduino IDE.
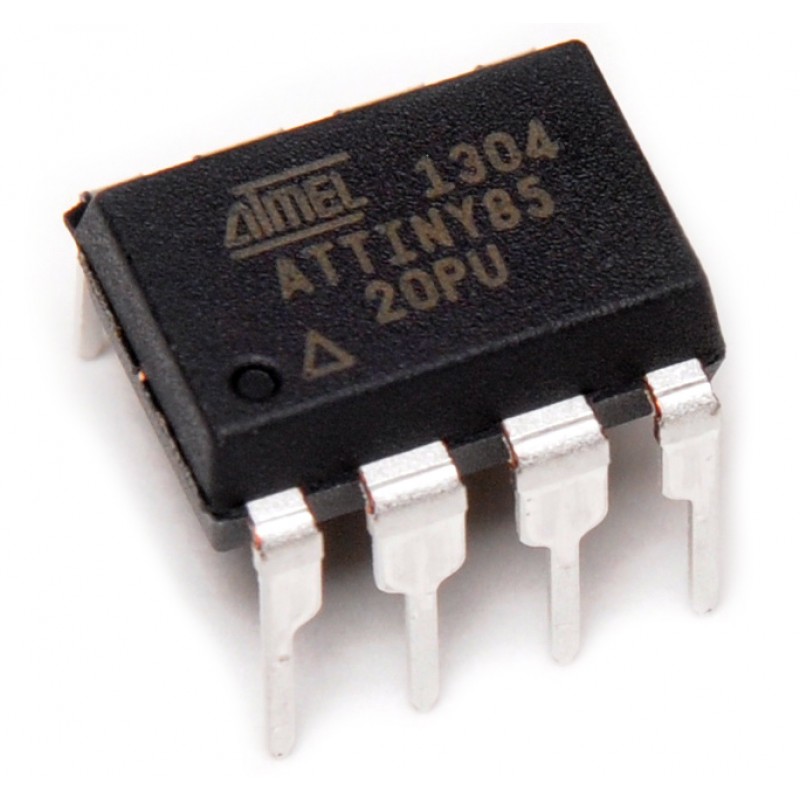
First of all, ATtiny13 is a low-power CMOS 8-bit microcontroller based on the AVR enhanced RISC architecture. By executing powerful instructions in a single clock cycle, the ATtiny13 achieves throughput approaching 1 MIPS per MHz allowing the system designer to optimize power consumption versus processing speed. After the acquisition of Atmel by Microchip, the new ATtiny13 is still in production.
How To Program ATtiny13/ATtiny13a using Arduino IDE – [Link]
Despite ATtiny series is considered extremely cheap and useful, still there is a lack of projects and tutorials about it. In this tutorial, you will learn how to start building applications using ATtiny13 microcontroller programmed using Arduino IDE.
First of all, ATtiny13 is a low-power CMOS 8-bit microcontroller based on the AVR enhanced RISC architecture. By executing powerful instructions in a single clock cycle, the ATtiny13 achieves throughput approaching 1 MIPS per MHz allowing the system designer to optimize power consumption versus processing speed. After the acquisition of Atmel by Microchip, the new ATtiny13 is still in production.
Source: NotoriousRapper2Chainz – Instructables
Parts you will need
Arduino (Uno or any other Arduino)
ATtiny13 or 13a
Breadboard
Jumper Wires
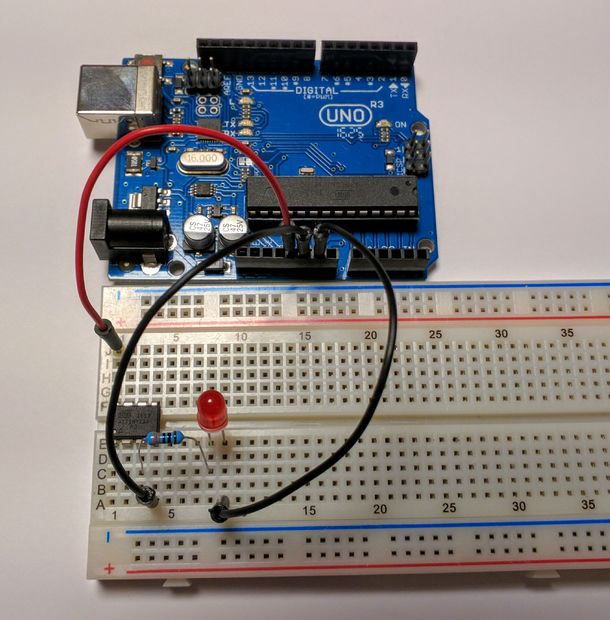
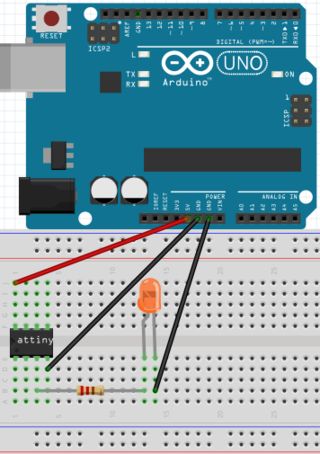
The Circuit
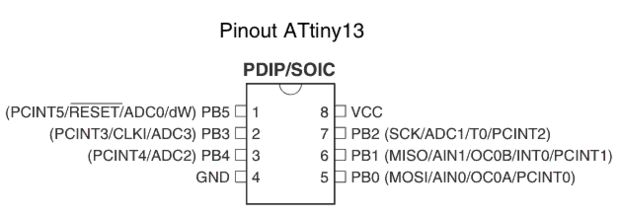
In order to connect the hardware you should first orient the ATtiny as shown in the image.
First, connect Arduino 5V to ATtiny Pin 8. Respectively, connect GND to Pin 4, Pin 13 to Pin 7, Pin 12 to Pin 6, Pin 11 to Pin 5, and finally Pin 10 to Pin 1.
Programming the ATtiny13
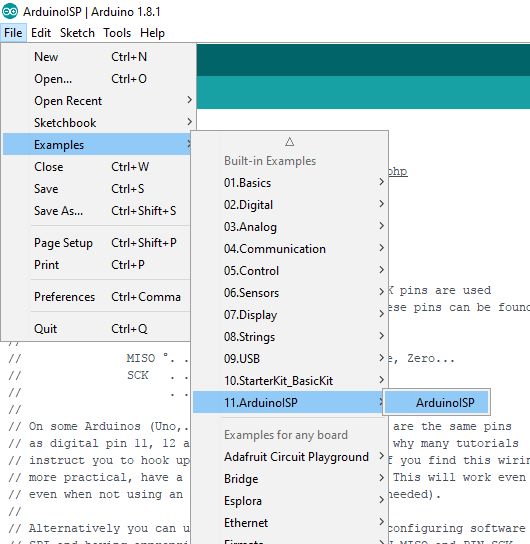
To program ATtiny13 we should set our Arduino as a programmer. This could happen by uploading ArduinoISP sketch to Arduino following this path (Files -> Examples -> ArduinoISP) in the IDE.
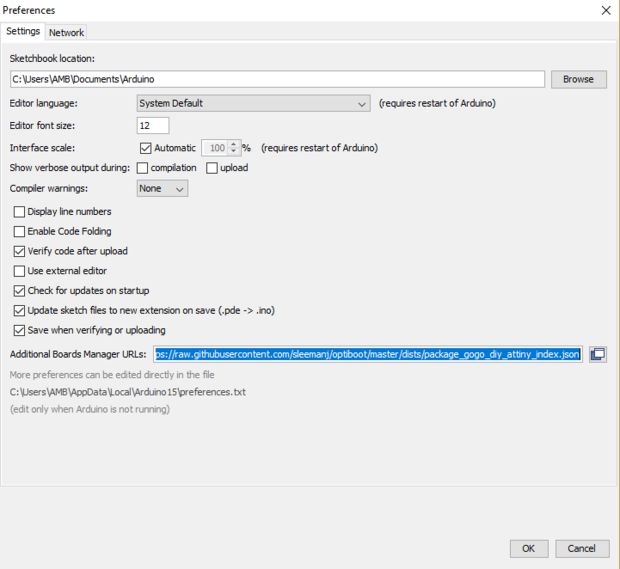
Now our Arduino is ready to program ATtiny 13, but still we have to set up the ATtiny by installing its core files. In this tutorial, files by sleepmanj are preferred.
Now, navigate to tools-board and click on Boards Manager…. Now scroll down until you see DIY ATtiny and click the install button.
Burning the Bootloader to the Attiny
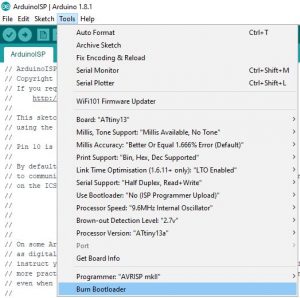
In fact, the bootloader is a piece of firmware in your microcontroller that allows installing new firmware via serial communication. In order to start programming ATtiny 13, we must burn Bootloader to it. There are two steps to achieve this: first, go to Tools-Board and select ATtiny13, and second, click the Burn Bootloader button at the bottom of the tools drop-down menu.
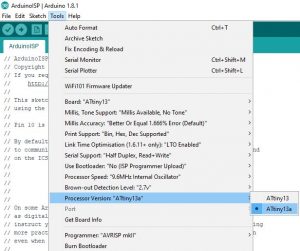
You should pay attention to your ATtiny version, navigate to Tools-Processor Version and select either ATtiny13 or ATtiny13a depending on your chip.
After burning the Bootloader, our ATtiny is now ready to be programmed. You can try now Arduino IDE examples like the Blink sketch.
To make sure that Blink will work correctly, you should first check the diagram below.
Right here, Pin 3 is defined in hardware as PB4, now let’s take a look at the edited code:
//We will replace "LED_BUILTIN" with "4" since ATtiny does not have a built-in led!
void setup() {
  // initialize digital Pin 3 of ATtiny 13(defined in hardware as 4) as an output.
  pinMode(4, OUTPUT);
}

// the loop function runs over and over again forever
void loop() {
  digitalWrite(4, HIGH);   // turn the LED on (HIGH is the voltage level)
  delay(1000);                       // wait for a second
  digitalWrite(4, LOW);    // turn the LED off by making the voltage LOW
  delay(1000);                       // wait for a second
}
Next, modify your circuit by adding an LED between Pin 3 and GND with a suitable resistor as shown in the picture.
Troubleshooting
If you faced any issues while building this project, you can check this list to troubleshoot your project:
• Double check all of your connections and your orientation of the ATtiny and LED.
• Re-upload the ArduinoISP sketch to your Arduino.
• Connect a 10uf electrolytic capacitor between ground and reset on your Arduino. Make sure to plug in the capacitor in the correct orientation, negative goes to ground.
• Connect any large capacitor between the 5v and ground on the breadboard, this will help smooth out any voltage spikes.
• Make sure enough power is getting to the Arduino that is programming the ATtiny, a 9 volt battery might not work.
• Switch out your Arduino with a different Arduino
• Make sure you’re using an up to date IDE and up to date core files
• Click on tools and make sure the drop down menu looks the same as the menu shown in the Burn the Bootloader” step. If something is different, change it and re-burn the bootloader.
You also may need these components while trying to figure out what’s wrong: 10uf electrolytic capacitor a large electrolytic capacitor (>100uF)
You are now all set, it is time to test new ideas and applications with ATtiny programmed using Arduino IDE!
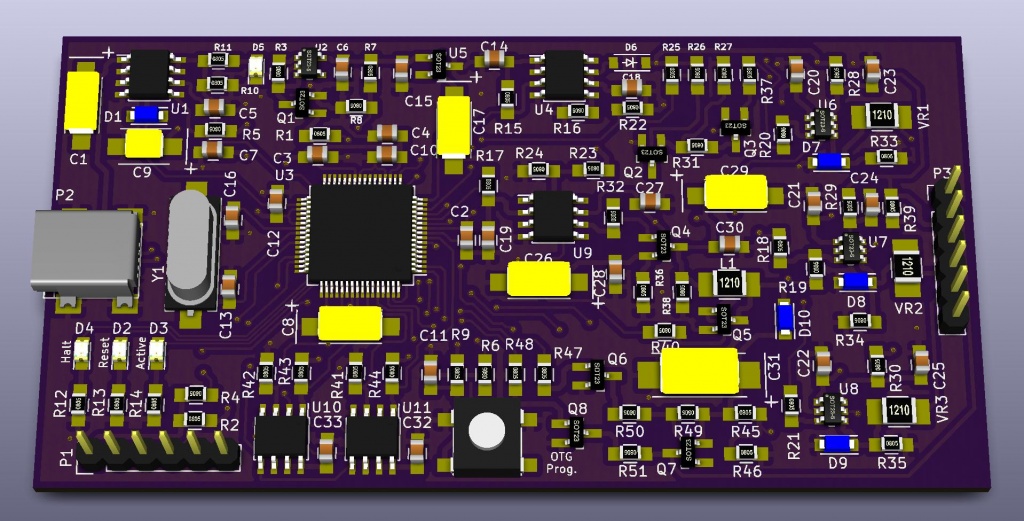
Make Your Own Pic Programmer and Debugger. by reviahh @ reviahh.wordpress.com
After using the Microchip tools to program and debug the projects I work on, I wondered about creating my own programming/debugging module that I could put on my own boards – just like Microchip does with their starter kits and such. As I became more interested in that idea, I began to search the web to see if anyone else had already done something similar. Initially, I found lots of posts regarding the 2nd version of the Pickit – the Pickit 2, but not as much regarding the latest version – the Pickit 3 – which is what I need to program the 32 bit pic processors that I am using.
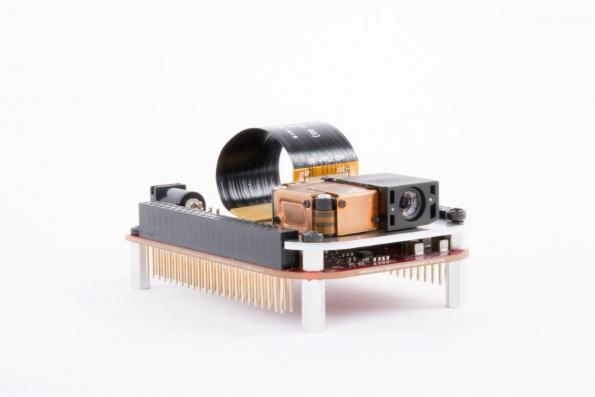
With a $99 evaluation kit/module, Texas Instruments aims to widen design-ins of its projection-based, ultra-compact display technology. By Graham Prophet @ eedesignnewseurope.com
Developers can, TI says, implement DLP (‘digital light processing’) display technology with almost any low-cost processor. The 0.2-inch DLP2000 chipset and $99 DLP LightCrafter Display 2000 evaluation module (EVM) now make it more affordable to make use of DLP technology and design on-demand, free-form display applications such as mobile smart TVs; pico projectors; digital signage; projection displays for smart homes, smartphones and tablets; and control panels and Internet of Things (IoT) display solutions.
TI packages DLP Pico projector display tech for “any low-cost processor” – [Link]
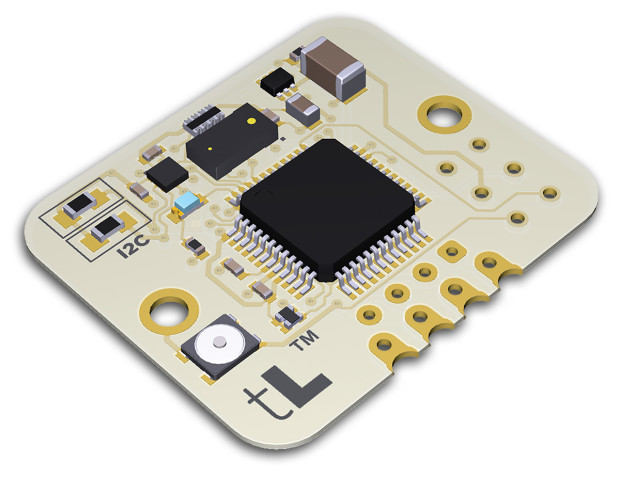
tinyLiDAR provides Arduino users simplified access to cutting-edge smartphone-technology. Don’t pull your hair out! Now you can use ST’s latest Time-of-Flight sensor easily with tinyLiDAR. Its the low cost “easy button” of distance sensors. We’ve put all the smarts inside our onboard 32-bit micro so you won’t have to dedicate your Arduino to the task. Ultra-fast, fully-featured, accurate, low power and low cost – what more could you ask for?
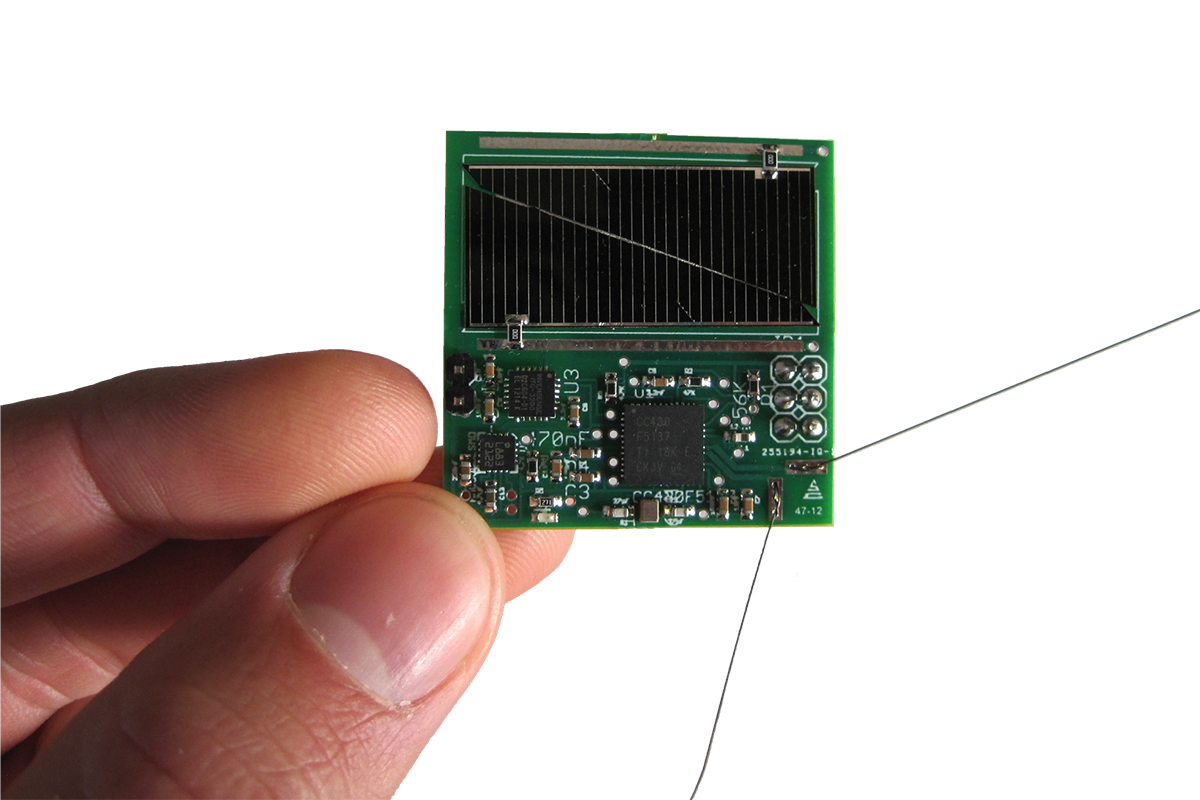
Breakthrough Starshot is a research and engineering project by Breakthrough Initiatives to develop a proof-of-concept fleet of light sail spacecraft, named StarChip, capable of making the journey to the Alpha Centauri star system, 4.37 light-years away, at speeds between 15% and 20% of the speed of light, taking between 30 and 20 years to get there, respectively, and about 4 years to notify Earth of a successful arrival.
The project was announced on 12 April 2016 in an event in New York City by physicist and venture capitalist Yuri Milner and cosmologist Stephen Hawking who is serving as board member of the initiatives. Other board members include Facebook CEO Mark Zuckerberg. The project has an initial funding of US$100 million to start research. Milner places the final mission cost at $5–10 billion, and estimates the first craft could launch around 2036.
It is now in orbit!
On June 23, the initiative sent the tiniest-ever satellites into orbit. Thanks to an Indian rocket, 6 of these satellites, as named as Sprites, went to space. Some of them were attached to larger satellites: : the Latvian Venta satellite and the Italian Max Valier satellite which will release the other four Sprites to orbit once communications are achieved.
In fact, each Sprite contains a computer processor, solar panels, a magnetometer, a gyroscope, and a radio for communicating with researchers on Earth and all in a size of 3.5×3.5 cm circuit board.
Until now, only one signal came from on of the 2 Sprites. Since the Max Valier hasn’t established a connection yet, the remaining Sprites didn’t detach. Usually the satellite should receive a command to release its cargo, and this is not possible without a functioning antenna.
Despite the humble results, the team is feeling victorious. Having these small and cheap satellites hovering over the space and doing part of the job is an achievement.
These tiny satellites can go along on a planetary exploration mission and start deployment once they get there. By using these satellites, the risk of sending large spacecrafts will diminish.
To find more details about the Breakthrough Starshot, check out this official website.
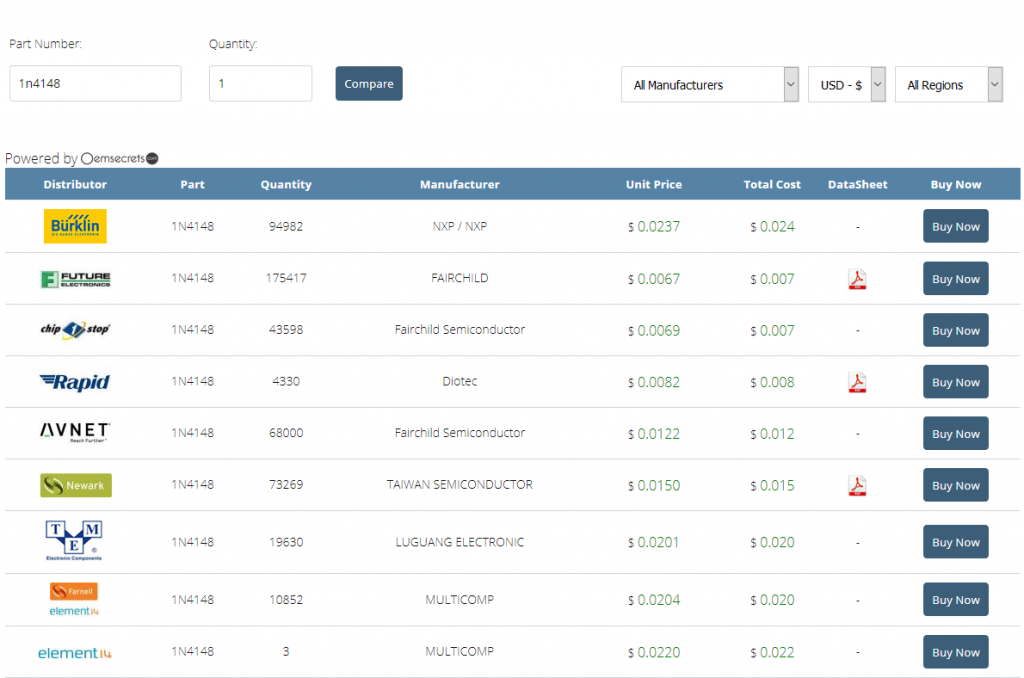
In November 2016, we launched our “Buy Parts” section in partnership with OEMSecrets. It is a search engine for electronic parts with many useful capabilities. This is a time saving tool which will help makers find the best offers for their needs by entering the MPN.
By providing a price comparison feature, it becomes one of the leading search engines in the electronics market. In addition, the database is very large and contains most parts and components from leading distributors and manufacturers. Digikey, Farnell, element14, Avnet, RS, TTI are in the list with many other electronics suppliers.
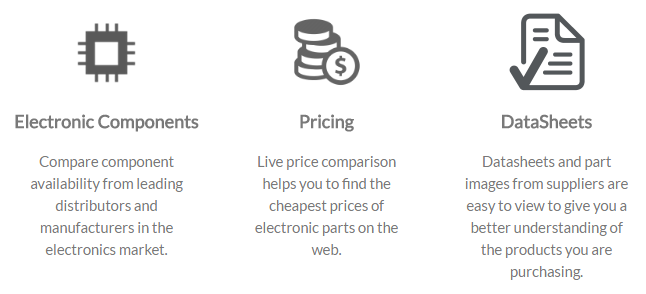
Main features of the engine:
Price comparison to help you find the best price.
Quantity filter to find you the total cost of the part.
Quick datasheet downloads to confirm part specifications.
Order with ease with our add to basket ‘buy now‘ buttons.
Line by line comparison results dedicated to saving you time.
Part images available for visual verification before ordering.
Quick-find supplier navigation to find favorites.
Currency conversions, your zone your currency.
With over 24 million line items of electronic parts from hundreds of electronics distributors and manufacturers, ordering is easy and simple. Buyers are sent directly into the distributors or manufacturers shopping basket to be ready for a quick purchase.
Try the engine now, and share your experience with us!
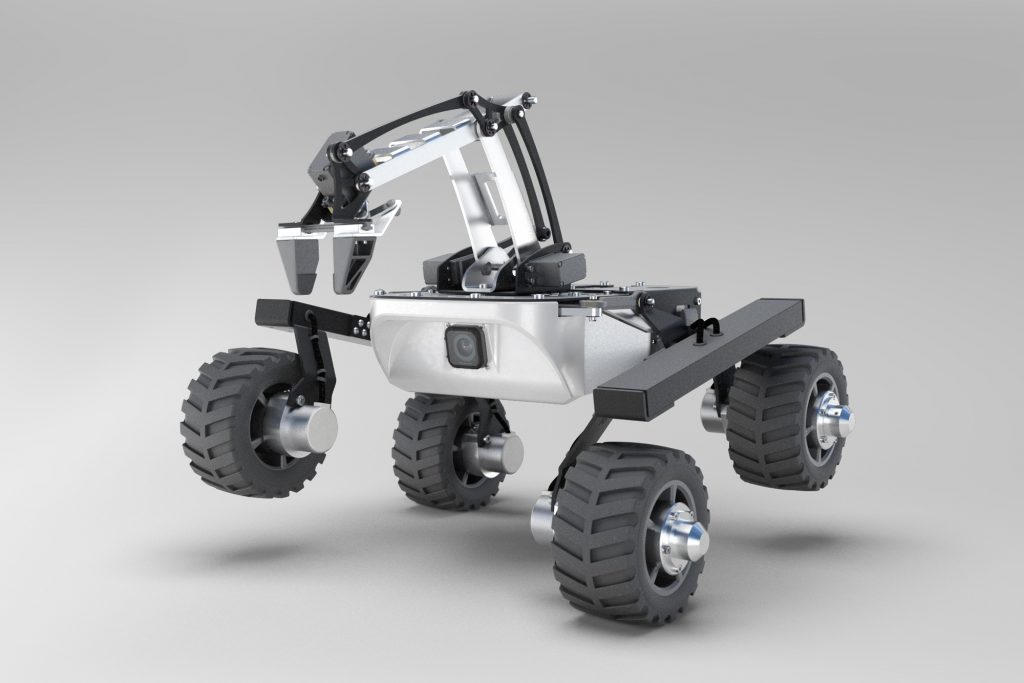
A travel companion and a rover that can explore the entire planet with you
Society has a growing interest in space-related projects. The space industry is quickly beginning to grow and private companies are also entering the market, however it is still very difficult to send their own technology into space.
That said, we use electronic devices everyday; needless to say, they have become an integral part of our lives. Experts agree that we educate too few programmers. We also spend less and less time outdoors.We want to explore other celestial bodies while we still do not know our own planet.
Turtle is a four-wheeled mobile robot that will quickly become your best companion in discovering our planet. With a robotic arm, a waterproof case, the capability to take pictures and stream live video, along with the option to add your own software and hardware – all make Turtle a universal tool for both everyday walks and long hikes.
In August 2017 they plan to release Turtle for sale using the international crowdfunding platform – kickstarter.com. Their primary goal to start a production starts at 100,000 USD. During the campaign they plan to sell seventy up to three hundred rovers.