Carrageenan, a seaweed derivative, can stabilize lithium-sulfur batteries surprisingly

Lithium-sulfur batteries are suitable for both vehicle and grid applications as they are ultra-cheap, high-energy devices. Sulfur is a very low-cost material and the energy capacity is much higher than that of lithium-ion. So, lithium-sulfur is one chemistry that can possibly meet the demand for energy storage at a cheap price. However, the serious problem is, lithium-sulfur batteries suffer from significant capacity fading that makes them almost practically unusable. But, Lawrence Berkeley National Laboratory researchers’ recent surprising discovery could fix this problem.
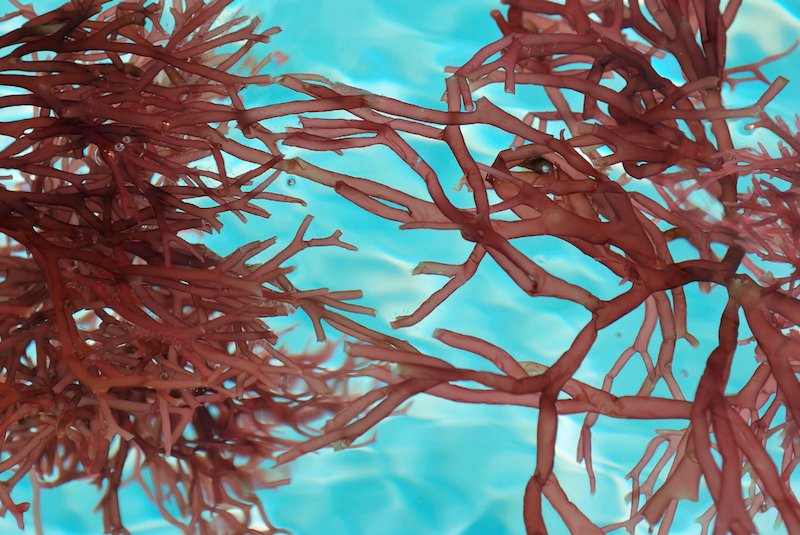
Carrageenan is extracted from this red seaweeds

The research team at Berkley Laboratory surprisingly found that carrageenan, a substance extracted from red seaweeds, acts as a good stabilizer in lithium-sulfur batteries. Better stability in a battery means more charge-discharge cycle and an extended lifetime. Gao Liu, the leader of the research team, said,

It (Carrageenan) actually worked just as well as the synthetic polymer—it worked as a glue and it immobilized the polysulfide, making a really stable electrode.

Lithium-sulfur batteries are already been used commercially in limited applications but the “critical killer” in the chemistry is that the sulfur starts to dissolve and creates polysulfide shuttling effect. Polysulfide shuttling is the primary cause of failure in lithium-sulfur (Li-S) battery cycling. To solve the problem, the research team was experimenting with a synthetic binder that holds all the active materials in a battery cell together.

A binder is like a glue and battery makers want this glue to be inert. The synthetic polymer Liu experimented with, worked remarkably well. The reason is, by chemically reacting with the sulfur, the binder formed a covalent bonding structure and was able to stop it from dissolving. This finding motivated the researchers to find a natural material that would do the same thing. Finally, they discovered that carrageenan has similar chemical properties as the synthetic polymer they used in their initial experiments.
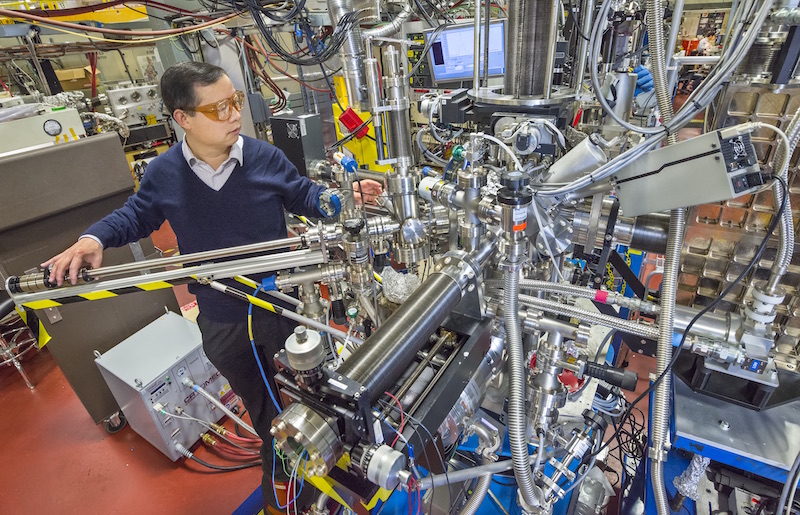
Bekley Lab's researcher is working with advanced light source
Berkley Lab’s researcher is working with advanced light source

With this discovery to stabilize lithium-sulfur batteries­ Liu now wants to improve the lifetime of lithium-sulfur batteries even further. The target of the researchers is to get thousands of cycles from lithium-sulfur chemistry. They are striving to find answers to questions like after this polymer binds with sulfur, what happens next? How does it react with sulfur, and is it reversible? Liu said,

Understanding that will allow us to be able to develop better ways to further improve the life of lithium-sulfur batteries.

As lithium-sulfur batteries are much more lightweight, cheaper, and have higher energy density compared to lithium-ion batteries, they are ideal for airplanes and drones. Hence, Berkeley Lab researchers’ surprising discovery may be a game changer in the world of batteries.

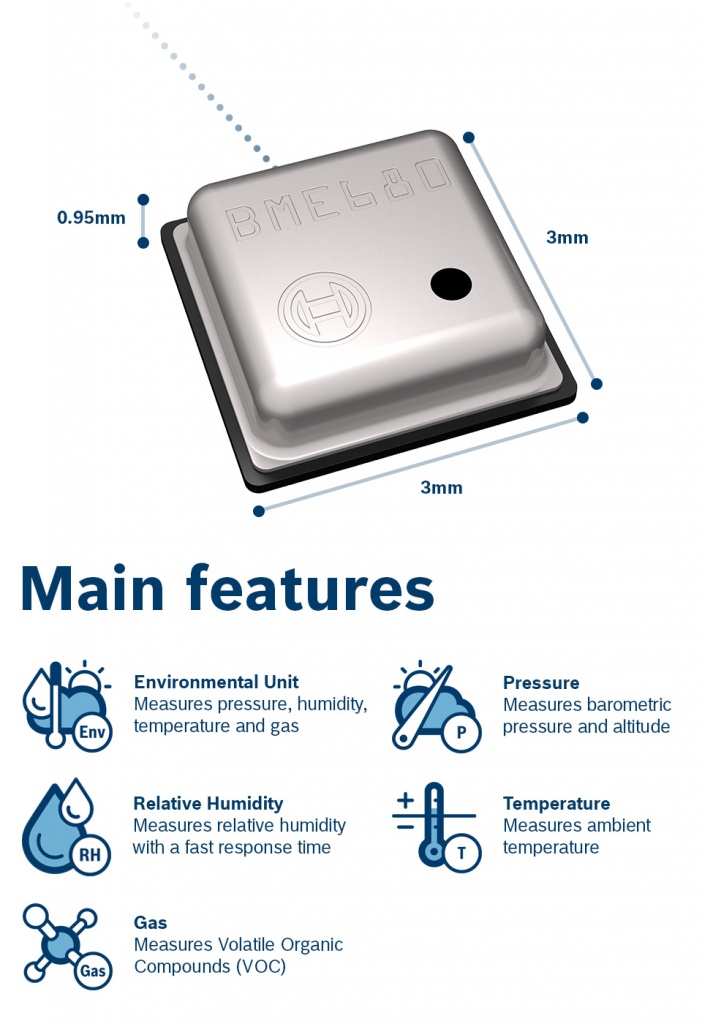
BME680 measures pressure, humidity, temperature and indoor air quality

The BME680 measures pressure, humidity, temperature and indoor air quality. by Bosch Sensortec:

BME680 is an integrated environmental sensor developed specifically for mobile applications and wearables where size and low power consumption are key requirements. Expanding Bosch Sensortec’s existing family of environmental sensors, the BME680 integrates for the first time individual high linearity and high accuracy sensors for gas, pressure, humidity and temperature. It consists of an 8-pin metal-lid 3.0 x 3.0 x 0.95 mm³ LGA package which is designed for optimized consumption depending on the specific operating mode, long term stability and high EMC robustness.

BME680 measures pressure, humidity, temperature and indoor air quality – [Link]

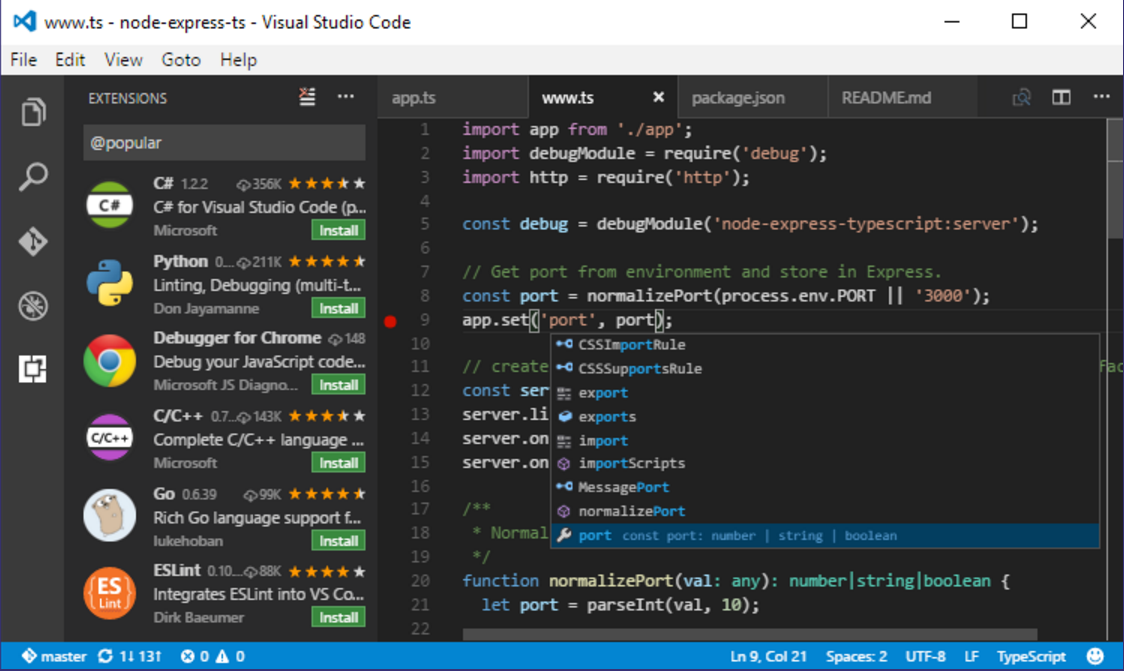
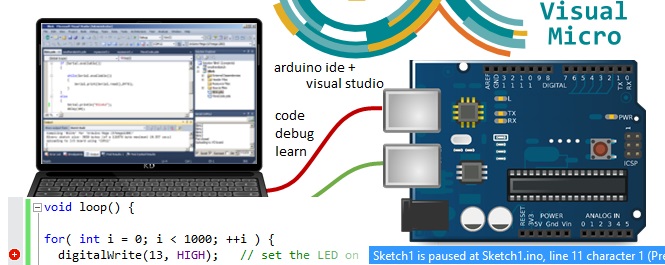
Visual Studio Code Extension for Arduino is now open sourced!

Visual Studio Code is the cross-platform, open sourced advanced code editor by Microsoft.

Recently, after being interested in IoT and hardware, Microsoft is now searching for tools to make building IoT devices easier. It added an Arduino extension to its Visual Studio Code to enable a better eco-system for IoT developers using Arduino. By making some research about some challenges usually developers face, Microsoft found out that giving more access to new features and capabilities will be a pain killer for IoT enthusiasts. Later on, Microsoft had opened the source of the Arduino extension and placed it on GitHub.


Our Arduino extension fully embraces the Arduino developer community and is almost fully compatible and consistent with the official Arduino IDE. On top of it, we added the most sought-after features, such as IntelliSense, Auto code completion, and on-device debugging for supported boards.

Core functionalities of Arduino extension

  • IntelliSense and syntax highlighting for Arduino sketches
  • Built-in board and library manager
  • Verify and upload your sketches in Visual Studio Code
  • Built-in example list
  • Snippets for sketches
  • Built-in serial monitor
  • Automatic Arduino project scaffolding
  • Command Palette (F1) integration of frequently used commands (e.g. Verify, Upload…)
  • Integrated Arduino Debugging (New)

Of course, you can download this extension from Visual Studio Code Marketplace at: https://aka.ms/arduino.

Fortunately, Microsoft had open sourced this project on GitHub under MIT License. Thus, if you are developer, you are more than welcome to participate in developing this extension and here how you can help:

  • File a bug, submit a feature request, you can find the current bug/issue list and feature requests at GitHub’s issue tracker.
  • Join developers and users’ discussions at chat on gitter.
  • Fork the repository, fix bugs and send pull requests
  • Fork the repository, add your new cool features and send pull requests.

Finally, more detailed instructions are available at the Visual Studio Code Repo at GitHub.

Control Your IR Devices With Your Smartphone Bluetooth

Managing some of house devices with its IR remotes may be annoying if you are out of its line of sight. You will have to interrupt the work you are doing, move to another room, turn down the volume of your Hi-Fi for example, then go back and resume your work. Assume you can use bluetooth instead of this process, it will be a time saver and it will maintain your focus.

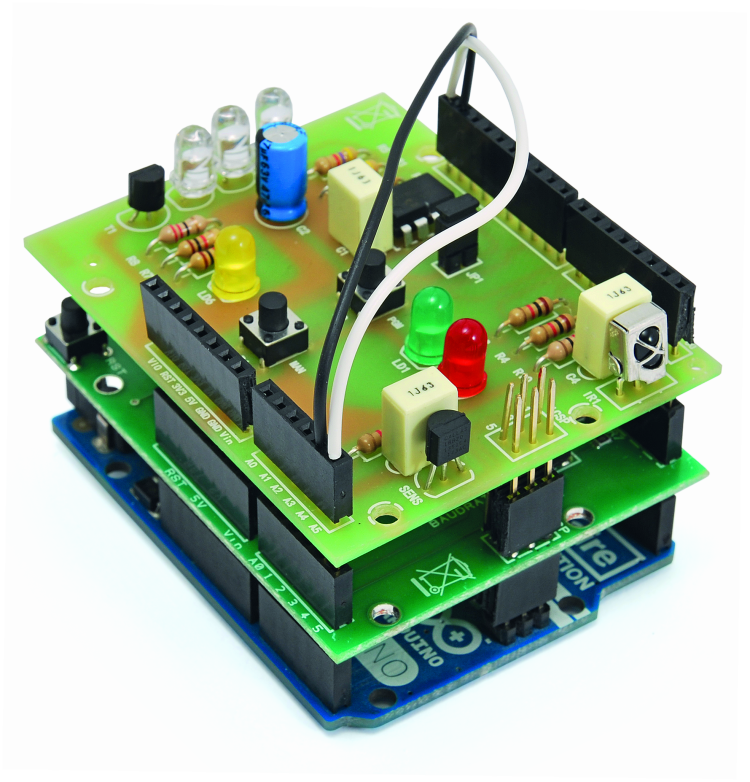
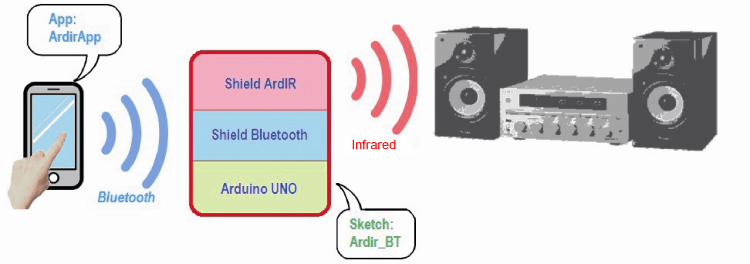
Using an Arduino UNO with IR and Bluetooth shields, you can create your own bluetooth-controlled general purpose remote control. Bluetooth is a good choice because it doesn’t need any active network to connect with a mobile device. Connection between them is direct (point-to-point) and is suitable for small areas. However, by using a wireless shield you will be able to control the devices through the internet.

A project by Open Electronics demonstrates how to build and program such a device. Its hardware side consists of an Arduino with two shields, and the software side is an Android application. The tutorial shows in details how each shield will work, and also how to setup and prepare the mobile application.

Parts needed for the project:

  • An Arduino Uno board or equivalent (e.g. Fishino Uno);
  • An ArdIR shield:An Arduino shield that allows creating a programmable infrared universal remote manageable from the Internet. It simulates the remote control of TVs, home appliances and air conditioners, by transmitting the same data to the desired.
  • A Bluetooth shield:
    A shield for Arduino based on the RN-42 module. It also has a dip switch that allows you to set up the modes of operation of the module RN-42.
  • A smartphone or tablet with Android OS (version 4.1 or higher), of course complete with a Bluetooth interface.

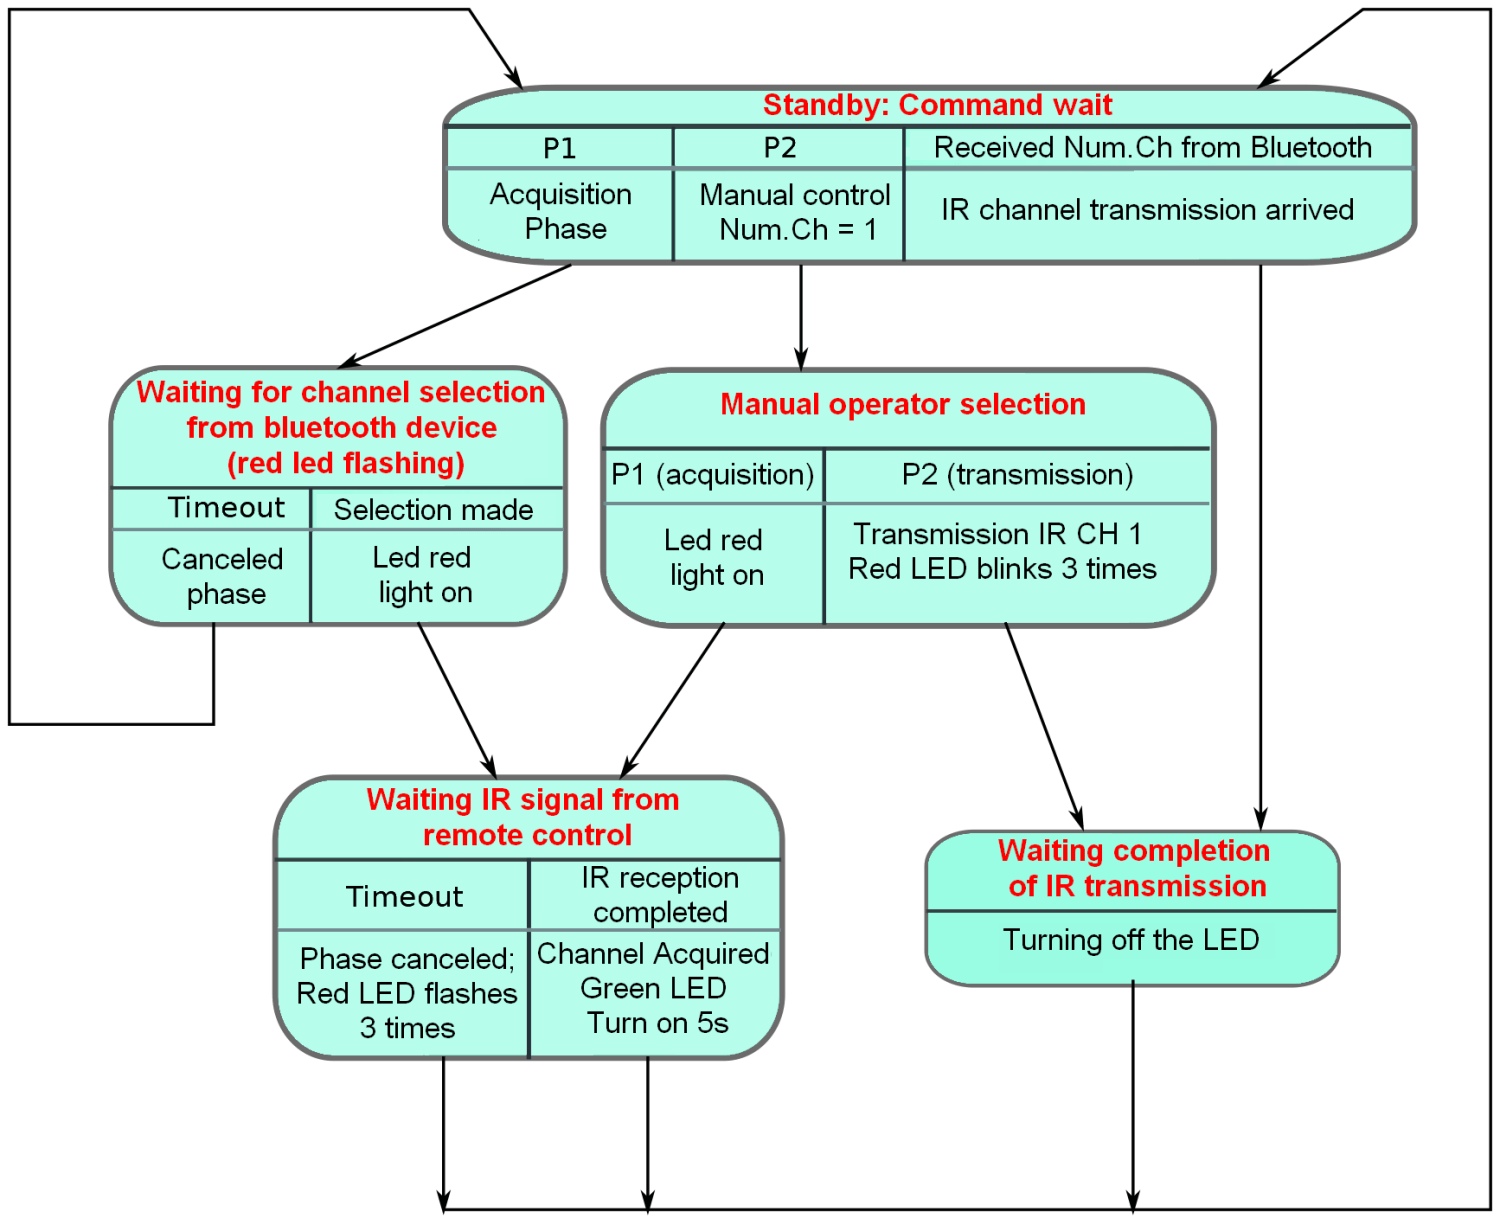
The mobile application is compatible with Android OS devices of version 4.1 (jellybean) and higher. It needs two phases to be handled:

  1. Research and connection to the target Bluetooth device.
  2. Selection and activating one of the channels, for transmitting the code to the shield.

Once the connection with the Bluetooth shield is established and the channel is selected, the program will be ready to handle a subsequent command by the user and will be listening to possible result messages returned by the remote Bluetooth device.

There is no need for additional hardware parts and work, you only have  to assemble both shields on the Arduino board. But before that, you have to upload a sketch to Arduino for handling the ArdIR shield and managing the communication with the Bluetooth shield.

For more information about how the project works, the structure of the application and source files, you can read the original guide.

Temperature Controlled Stair lights With Raspberry Pi

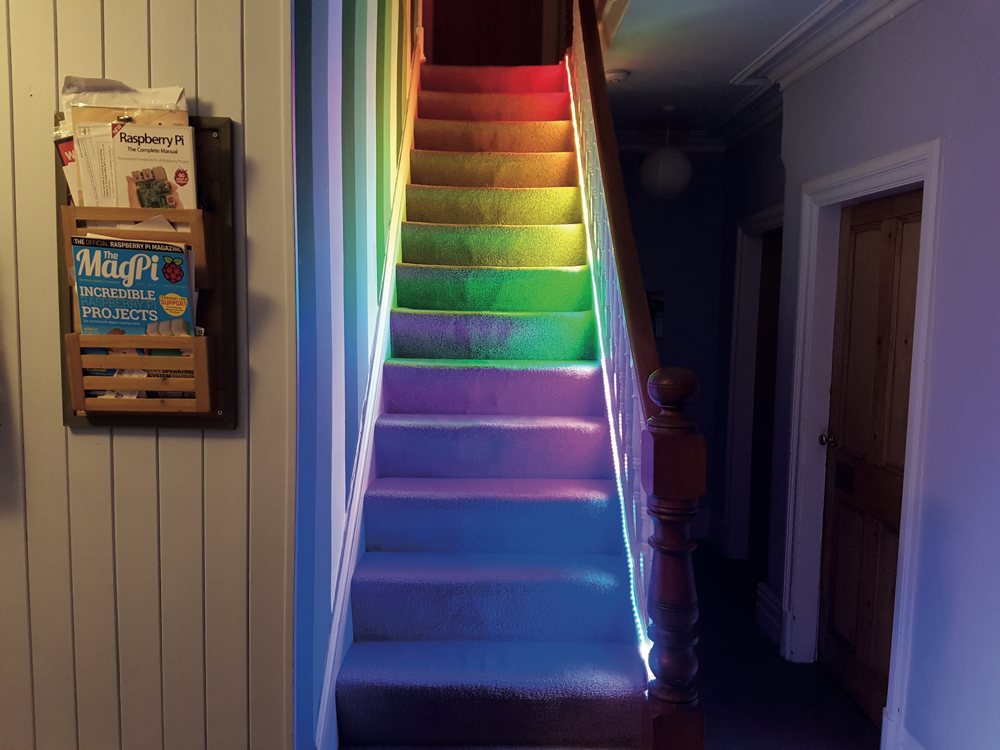
Ever wished to know the temperature on your way to breakfast after waking up in the morning? Now you can find it out in a fascinating way as Lorraine Underwood at The MagPi magazine designed a temperature controlled colorful stair lights system with raspberry pi. In this tutorial, we’re going to discuss that project.

Temperature Controlled Stair Lights

Required Parts

  • Strip of 50 neopixels
  • A 5V power source for the lights
  • 2 x terminal blocks
  • 2 x male to female jumper cables
  • A raspberry pi zero with SD card with Raspian installed
  • Power supply for the Pi zero (temporary)


Make sure that the raspberry pi power supply gives exactly 5 volts and is capable of outputting 2.5A current.

Make The Circuit

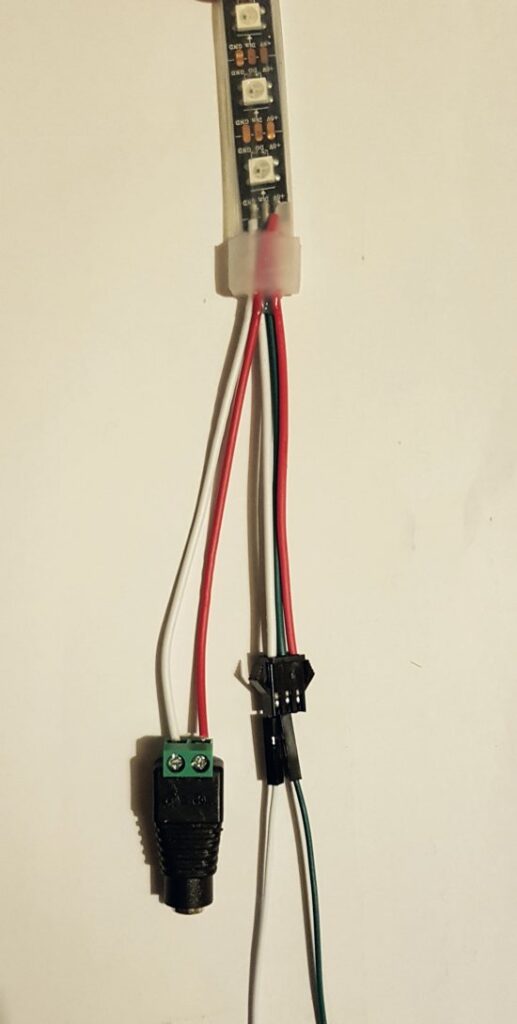
At first, examine your LED strip and find out which pin is what. Connect two wires to GND, one wire to Din, and one wire to +5V pin. Now, connect the 5V pin to the “+” terminal of the female jack and GND pin to the “-” terminal. Tighten the screws of the terminal block to ensure that the wires are connected properly.

Connect the Din and GND pin of the LEDstrip to the GPIO 18 and GND of the Raspberry Pi respectively, using the male-to-female jumper wires. Please note that Broadcom numbering (BCM) is used in this tutorial, not the physical numbering. It will look like below after making the connections:

Connecting Wires To The LED Strip

Set Up The Weather API

You need to set up a weather API in order to get the outside temperature in your area. In this tutorial, forecast.io is used as they allow you to make 1000 queries per day free of cost. Go to forecast.io and select Developer option. Then, click sign up to create a developer account and provide your email address. A secret key will be sent to that address. Store it securely as you’ll need in the next step.

Prepare The Raspberry Pi

At first, you need to install the Adafruit NeoPixel library rpi_ws281x. Go here and follow the instructions to install the required files on your raspberry pi. Once installed, navigate to the examples folder, run any script you wish, and check if the LED strip is functioning properly.

Now, save the below script as stair_lights.py in the Raspberry Pi:

#!/usr/bin/python3
from urllib.request import urlopen
import json
import time
from neopixel import *

apikey="get_your_own_key" # get a key from https://developer.forecast.io/register
# Latitude & longitude - current values are Lancaster University
lati="54.005546"
longi="-2.784876"

LED_COUNT = 50 # Number of LED pixels.
LED_PIN = 18 # GPIO pin connected to the pixels (must support PWM!).
LED_FREQ_HZ = 800000 # LED signal frequency in hertz (usually 800khz)
LED_DMA = 5 # DMA channel to use for generating signal (try 5)
LED_BRIGHTNESS = 8 # Set to 0 for darkest and 255 for brightest
LED_INVERT = False # True to invert the signal (when using NPN transistor level shift)

def color(strip, color, start, end): 
 for i in range(start, end+1):
 strip.setPixelColor(i, color)
 strip.show() 
 
strip = Adafruit_NeoPixel(LED_COUNT, LED_PIN, LED_FREQ_HZ, LED_DMA, LED_INVERT, LED_BRIGHTNESS)
strip.begin()

count = 0
try:
 while True: 
 #get the data from the api website
 url="https://api.forecast.io/forecast/"+apikey+"/"+lati+","+longi+"?units=si"
 meteo=urlopen(url).read()
 meteo = meteo.decode('utf-8')
 weather = json.loads(meteo)

currentTemp = weather['currently']['temperature']

#negative number will always be on 
 color(strip, Color(0, 0, 255), 0,7) # Blue
 
 #what's the temp?
 if currentTemp > 0:
 color(strip, Color(75, 75, 255), 8, 15) # light Blue
 if currentTemp > 5:
 color(strip, Color(0, 255, 0), 16, 23) # dark Green
 if currentTemp > 10:
 color(strip, Color(75, 255, 75), 24, 31) # light Green
 if currentTemp > 15:
 color(strip, Color(255, 100, 0), 32, 39) # yellow 
 elif currentTemp > 20:
 color(strip, Color(255, 50, 0), 40, 47) #orange 
 elif currentTemp > 25:
 color(strip, Color(255, 0, 0), 48, 50) # Red 
 #check every 5 minutes (change to crontab)
 time.sleep(300)
 
except KeyboardInterrupt:
 print("Exit")
 color(strip, Color(0,0,0), 0, 49)

Enter your own secret key in the apikey field on the 7th line. Also, replace the longitude and latitude values on line 9 and 10 with the coordinates of your area. Now save the file and you are almost done.

To start the script automatically after each reboot and check the outside temperature every five minutes, set up a cron task by entering the following command:

sudoE crontab -e

A file will be opened and add the following lines at the end of the file:

*/5 * * * * /usr/bin/python3 /home/pi/stair_lights.py
@reboot /usr/bin/python3 /home/pi/stair_lights.py

Save the file and exit.

The Color Scheme

The following table shows which color represents which temperature range. You can modify the script to change the current color scheme.

Temperature (°C) Lights (Nos) Color
 0 – 4  9 – 16 Light Blue
 5 – 9 17 – 24 Dark Green
 10 – 14 25 – 32 Light Green
 15 – 19 33 – 40 Yellow
 19 – 24  41 – 48 Orange
 25+  48 – 50 Red


16X2 LCD Shield with LMD18201 Motor Driver


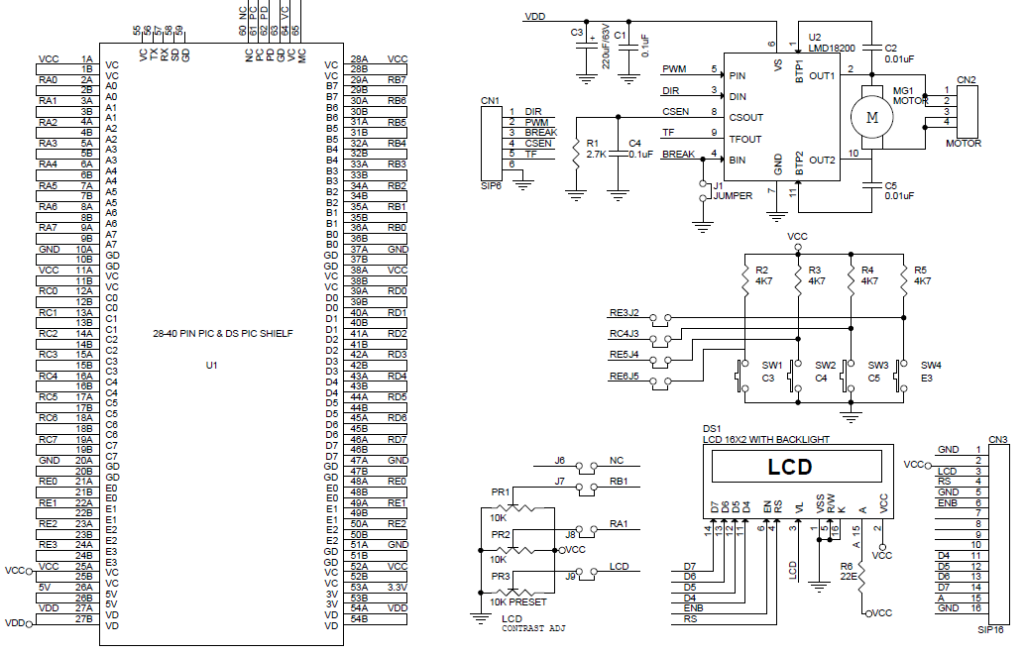
LCD is very important part of many DIY and industrial projects. The 16X2 LCD shield has been designed to develop LCD related projects using 28-40 Pin Pic development board or DSpic development board, along with LCD this shield includes LMD18201 DC Motor driver , 2 Trimmer potentiometer and 4 tact switches with jumpers. Jumpers can be used to connect switches to pre decided port pins or remove jumpers and connect switches to any port pin using female to female wire harness, LCD pins and H-Bridge signal inputs are open ended male header connector and can be hooked to any port pin with the help of female to female wire harness. This is a very useful shield to develop timer, measurements, dc motor driver with display, DC motor pump controller, automatic irrigation system and many more projects.

16X2 LCD Shield with LMD18201 Motor Driver – [Link]

16X2 LCD Shield with LMD18201 Motor Driver

LCD is very important part of many DIY and industrial projects. The 16X2 LCD shield has been designed to develop LCD related projects using 28-40 Pin Pic development board or DSpic development board, along with LCD this shield includes LMD18201 DC Motor driver , 2 Trimmer potentiometer and 4 tact switches with jumpers. Jumpers can be used to connect switches to pre decided port pins or remove jumpers and connect switches to any port pin using female to female wire harness, LCD pins and H-Bridge signal inputs are open ended male header connector and can be hooked to any port pin with the help of female to female wire harness. This is a very useful shield to develop timer, measurements, dc motor driver with display, DC motor pump controller, automatic irrigation system and many more projects.

Features

  • Supply 5V DC
  • Motor Supply 12V to 36V DC
  • Motor Load Up to 3A ( 6 Amp Peak)
  • 4 Tact Switch Open End or Jumpers Interface
  • On Board Trimmer Pot for LCD Brightness Adjust
  • 2 Spare Trimmer Pots

Schematic


Parts List

Photos

New Arduino Book Teaches Electronics Skills One Project at a Time

San Francisco, CA (July 7, 2017)—School’s out for summer, but learning doesn’t have to stop at the classroom door. For parents and educators looking to keep their students exploring, tinkering, and creating, No Starch Press offers the latest addition to its lineup of STEM books.

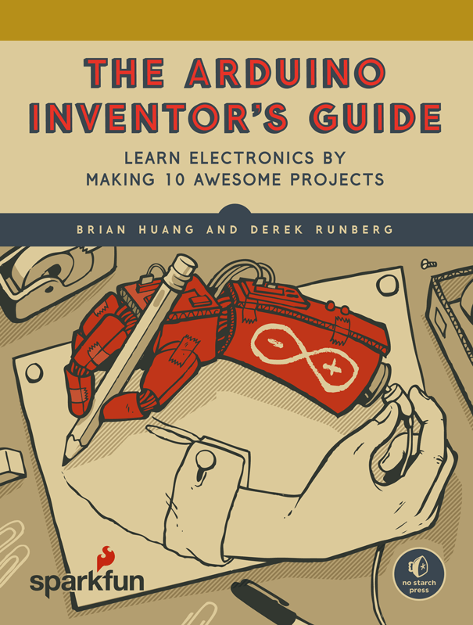
The Arduino Inventor’s Guide (No Starch Press, $29.95, 336 pp., June 2017) is a project-packed introduction to building and coding with the Arduino microcontroller. With each hands-on project, total beginners learn useful electronics and coding skills while building an interactive gadget.

This is No Starch Press’s second installment in its introductory-level educational series for aspiring makers. The series is a collaboration with SparkFun Electronics, the popular electronics parts retailer dedicated to making the world of electronics more accessible to the average person. Authors Brian Huang and Derek Runberg of SparkFun’s Department of Education use their teaching experience to make learning about electronics an adventure.

“We wanted to share the magic that happens when you build something interactive with electronics,” says Huang. “The goal is to teach real, valuable hardware skills, one project at a time,” adds Runberg.

New Arduino Book Teaches Electronics Skills One Project at a Time – [Link]

Inside Intel’s first product: the 3101 RAM chip held just 64 bits

Ken Shirriff takes a look inside the 3110 RAM chip from Intel. He writes:

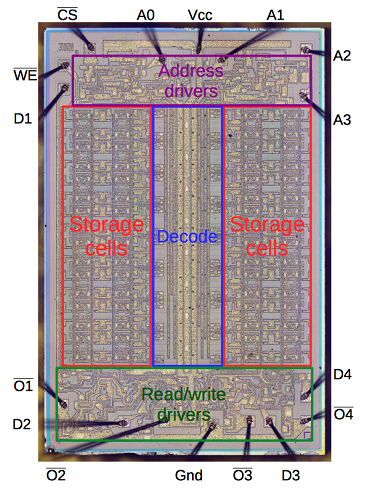
Intel’s first product was not a processor, but a memory chip: the 31011 RAM chip, released in April 1969. This chip held just 64 bits of data (equivalent to 8 letters or 16 digits) and had the steep price tag of $99.50. The chip’s capacity was way too small to replace core memory, the dominant storage technology at the time, which stored bits in tiny magnetized ferrite cores. However, the 3101 performed at high speed due to its special Schottky transistors, making it useful in minicomputers where CPU registers required fast storage. The overthrow of core memory would require a different technology—MOS DRAM chips—and the 3101 remained in use in the 1980s.3

Inside Intel’s first product: the 3101 RAM chip held just 64 bits – [Link]

Bulgarian National Innovator Creative Spaces

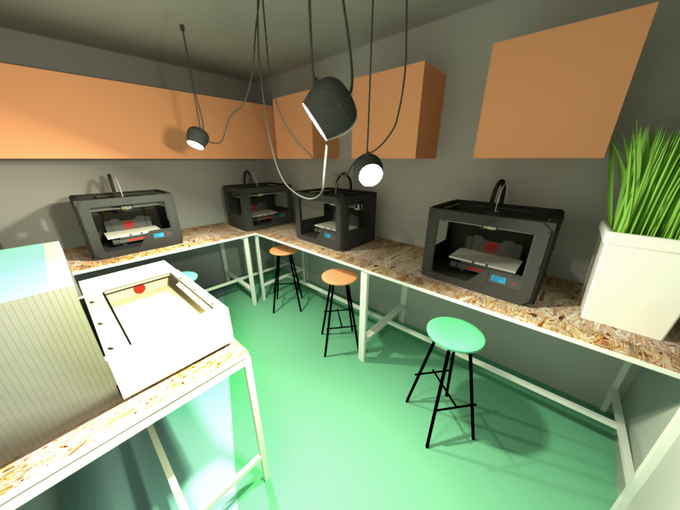
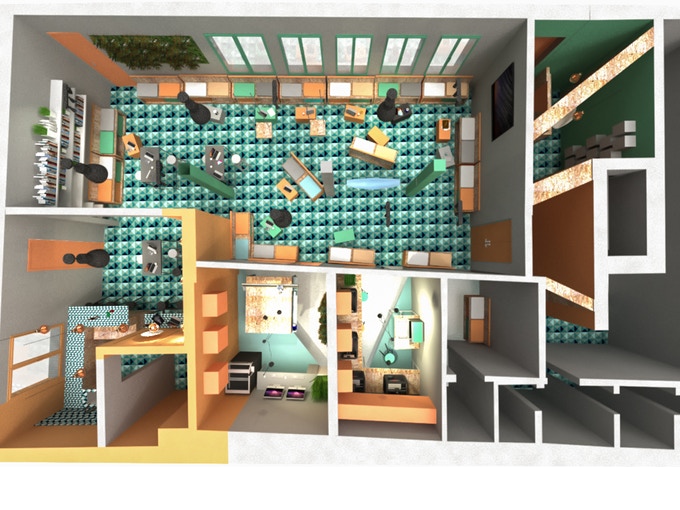
Few days ago, a group of 10 young and experienced people launched a Kickstarter campaign for their new socially significant project “Innovator Creative Spaces“. It is a national network of co-working spaces that cover the whole country of Bulgaria.

The goal of this project is to build creative centers that provide hi-tech workshops for software development and hardware prototypes. It will also have modern tools for prototyping and production laboratories, focused on digital technology, electronics and production technologies.

The creative spaces are targeting enthusiasts, young entrepreneurs and researchers, providing them with required tools and environment to design, make, hack, invent and learn. Their long term goal is to turn Bulgaria into the Silicon Valley of Eastern Europe.

This list of tools is planned to be held in the labs:

  • 3D printers and 3D scanners
  • Laser cutter
  • CNC router
  • CNC lathe
  • Water cutting (water jet cutter)
  • Advanced circuits Lab LPKF Protolaser S
  • CNC PCB Plotter
  • Internet of Things
  • Virtual Reality lab
  • Open Hardware lab
  • Arduino kits
  • Sewing Machines
  • Sergers
  • Embrodiery machines
  • Knitting machines, Soldering irons, Grinders, Vises, Electrocautery
  • Woodworking Facilities
  • Assembly test
  • Other electronic equipment, woodworking tools, measurement gadgets such as micrometer, calipers, etc. And other tools (needed for hacking, creating or fixing just about any project)

Besides the main advantages, the teams see that the co-working spaces will also help building a friendly, encouraging, collaborative and supportive community. The community would enable specialists to enjoy a higher standard of living, achieved by qualification training and mentorship.

At the first phase of the project, only 500 of 1300 square meters will be used. The space includes workshops for different types of machines, separated mini-offices, bar and kitchen, library, conference room, exhibition area, and assembly area.

In addition to membership subscription, the project will provide makers with other services such as prototyping, 3D printing, laser cutting, mentoring and business development, design and branding, events consultations , and more.

We are confident that our project not only helps to deal with youth unemployment, but also improves the re-qualification opportunities and entrepreneurship by discovering new possibilities for personal development in Bulgaria. We believe that the future of our country is in the capable hands of young and pro-active people and gives the fact that a lot of successful start-ups around the world.

If you are interested in supporting this project, you can do that by backing it on Kickstarter and by sharing it with you friends.

TOP PCB Companies