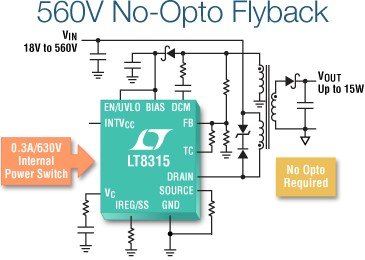
The LT8315 is a high voltage monolithic flyback regulator that simplifies the design of an isolated DC/DC converter. By sampling the reflected isolated output voltage across the third winding on the power transformer, the part requires no opto-isolator or LT1431 for regulation. The LT8315 operates over an 18V to 560V input voltage range, has a 0.30A/630V integrated power switch and delivers up to 15 watts of output power, ideal for electric vehicles and battery stacks, as well as off line, automotive, industrial and medical applications.
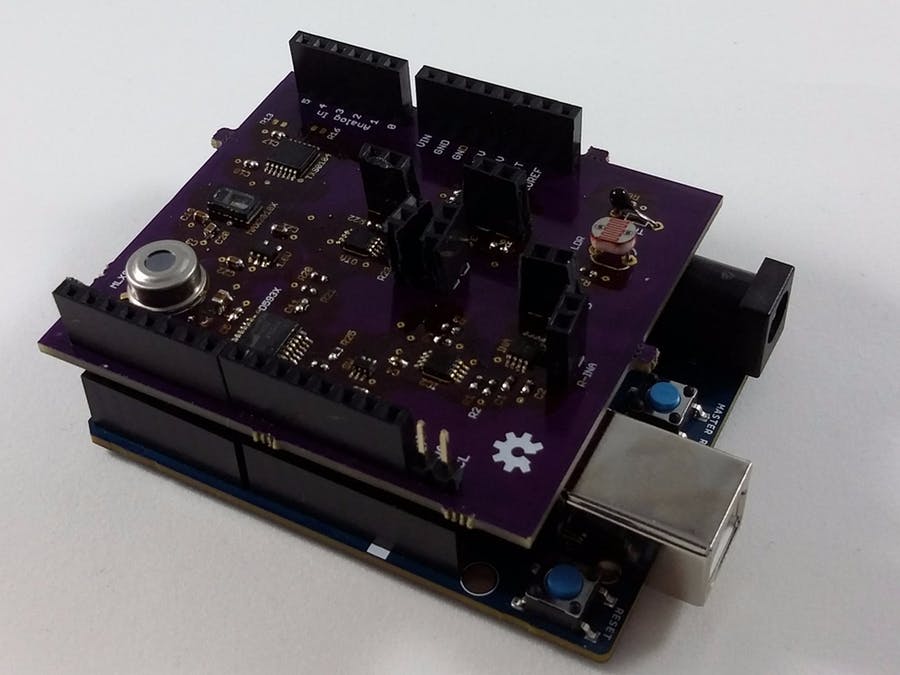
Orlando Hoilett has built his new biomedical Arduino 101 shield: Biomed Shield, in order to allow students, educators, and hobbyists to learn about bio-medicine by monitoring heart rate, temperature, and other physiological metrics.
To build this shield he used the following components:
AD5933
MLX90614
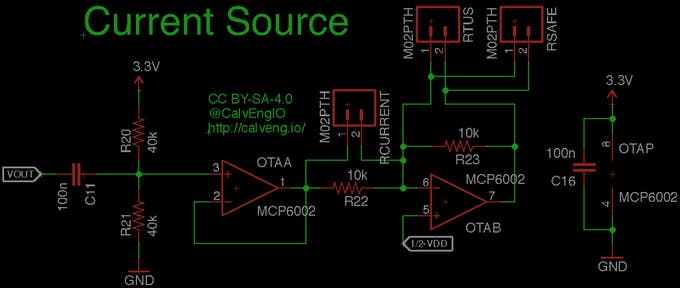
Microchip Rail-to-Rail Input/Output Dual Op-Amp
MAX30101: a specialized integrated circuit that is able to perform reflectance photoplethysmography
Photocell
Thermistor
AD8227
Orlando measured heart beats using transmission photoplethysmography using MAZ30101, where a light shines through an extremity such as a finger and a detector measures the amount of light that passes through. When the heart pumps blood through the body, a momentary increase in blood volume in the fingers happens. As a result, the amount of light that passes through the finger changes with this changing blood volume and is detected by the photodetector.
Bioimpedance Measurement
Bioimpedance is can be another class of bioelectrical measurements where we measure the impedance of the body instead of measuring the electrical signals produced by the body with the help of AD5934 impedance analyser chip. He is also measuring body temperature with the MLX90614 and measuring the amount of light using a CdS Photocell.
Orlando built this shield for education purposes not as a medical device, and his work on this shield is still in progress. Follow his project on hackster.io to know more details and updates. You can check source files at Github.
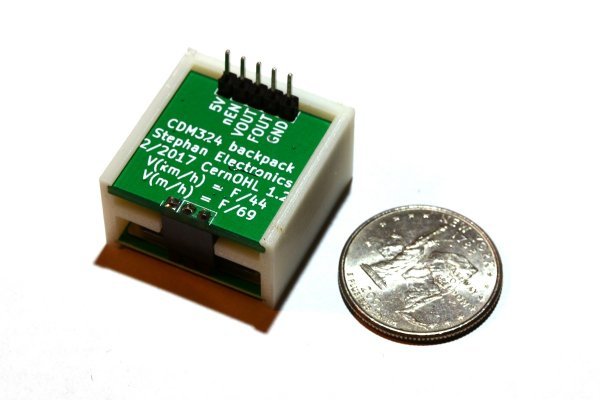
limpkin @ limpkin.fr tries out the CDM324 / IPM165 Doppler effect sensor and proposes an amplification circuit to get the readings out of the sensor. He writes:
You may recall the article I wrote a couple of years ago about a nearly identical Doppler sensor, the HB100.
While the HB100 is using a 10.525GHz frequency, this new module uses 24.125GHz! This has the main advantage of being compatible with European regulations (ETSI #300 400) and having good penetration in dry materials. Moreover, as the main frequency is higher the patch antennas are smaller, hence the tiny 25x25x6mm module.
Making the Electronics for CDM324 – 24GHz Doppler Motion Sensor – [Link]
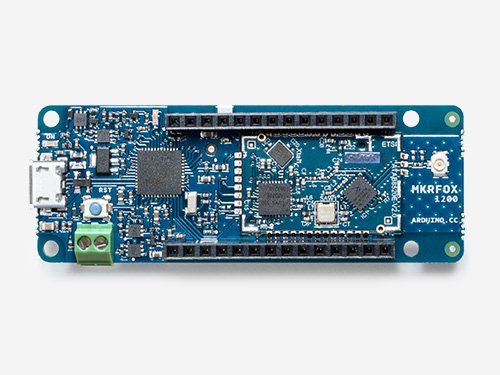
MKRFOX1200 is a powerful board that combines the functionality of the Zero and SigFox connectivity. It is the ideal solution for makers wanting to design IoT projects with minimal previous experience in networking having a low power device.
Arduino MKRFOX1200 has been designed to offer a practical and cost effective solution for makers seeking to add SigFox connectivity to their projects with minimal previous experience in networking.
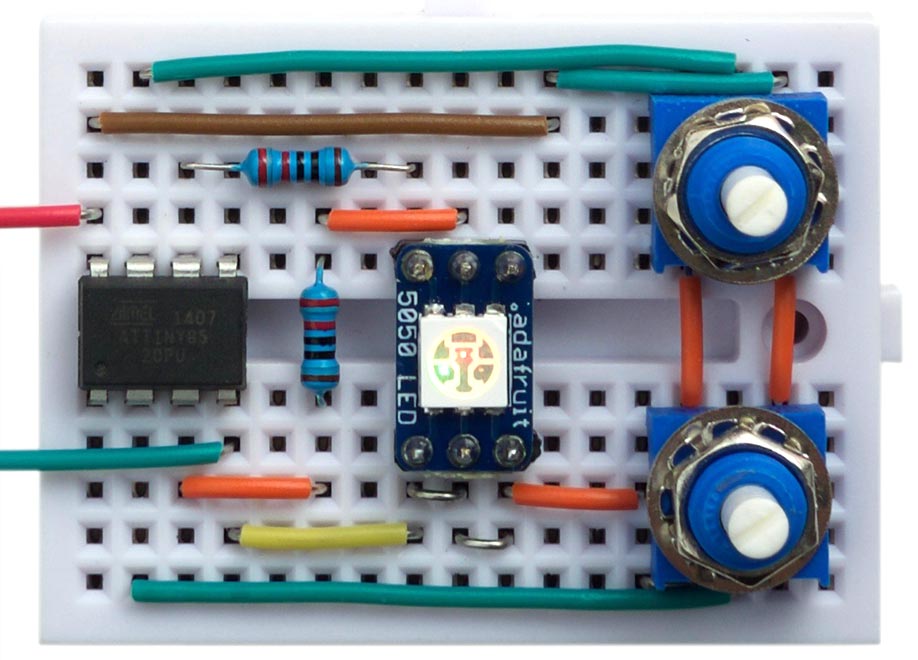
This article describes how to get up to two 10 or 12-bit digital-to-analogue outputs from an 8-bit Timer/Counter, such as in the ATtiny85. To test the routine I built a circuit which allows you to vary the brightness of two LEDs with two potentiometers:
With so many projects being made with the Arduino, we’ve seen a fair share of thermometer projects that try to do something different. This version, by educ8s.tv, does so by adopting an older look.
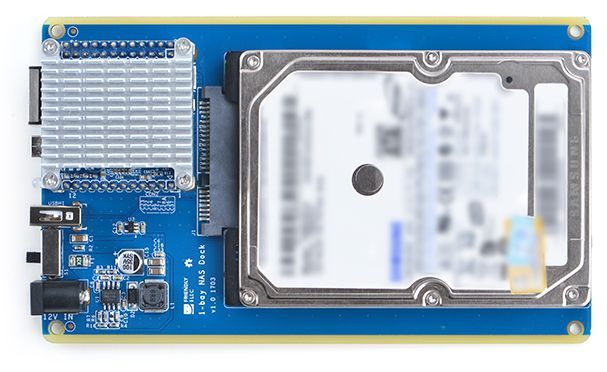
The NanoPi Neo is a tiny computer with a quad-core ARM Cortex-A7 processor, Ethernet and USB ports, and support for a number of accessories.
Measuring just 1.6″ x 1.6″ it’s smaller than most Raspberry Pi computers, and with a starting price of $7 it’s also an awfully affordable computer capable of running Ubuntu Linux.
NanoPi NEO kit lets you build your own network-attached storage system for about $30 – [Link]
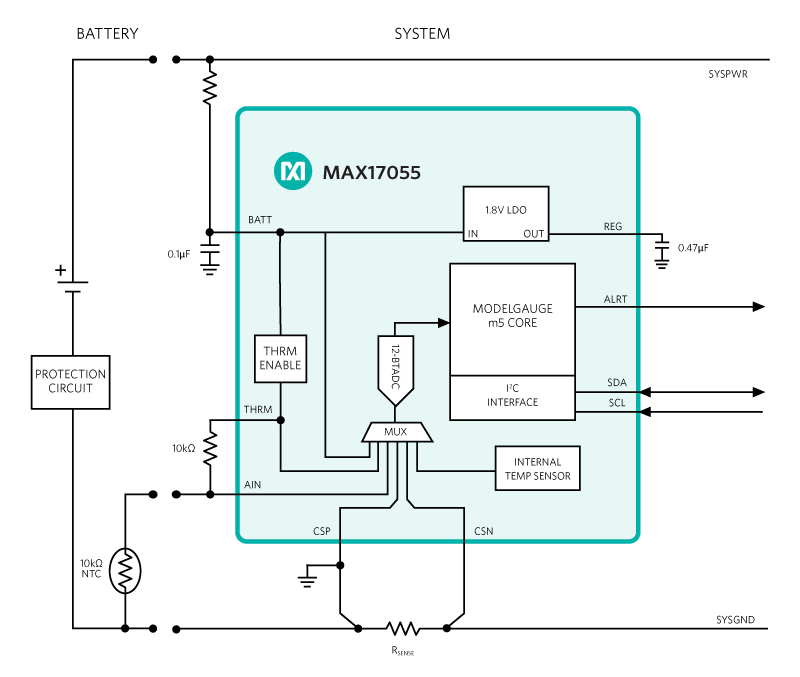
Maxim Integrated has posted details of a battery charge monitor IC for which it claims the lowest quiescent current available, at 7µA. The 1-cell Fuel Gauge with Maxim’s ModelGauge m5 EZ algorithm can eliminate battery characterization issues.
MAX17055 – a 7μA operating current fuel gauge – [Link]
ExaGear is a virtual machine that implements virtual x86 Linux container on ARM and allows you to run Intel x86 applications directly on ARM. With this software by Eltechs you can run Intel x86 application on your ARM-based Mini PC simultaneously with common native applications. It is like QEMU but 5 times faster! You can even run Windows applications on your ARM Mini PC if you install Wine.
ExaGear is user friendly software with transparent operation so you don’t notice a difference between running x86 applications on x86-based or ARM-based platform. Use your favorite applications on ARM-based devices and overcome platform compatibility.
In 2014 ExaGear Desktop was launched to allow running PC games on ARM-based devices (Raspberry Pi, Odroid etc.). ExaGear Desktop is an emulator too but dramatically differs from other emulators with its performance. ExaGear Desktop provides very low slowdown – 1.3 times instead of 50-100 times for other kind of emulators! Run games of the level beyond Retropie such as Arcanum, Disciples II, Fallout , Might And Magic VI,Pharaoh and Cleopatra, Stronghold Crusader, Sid Meier’s Alpha Centauri, Caesar 3 and many others on Raspberry Pi! You can learn how to set up these games from this article
However, there was one important issue. ExaGear Desktop didn’t support hardware graphics acceleration. That mean that games which actively use 3D were terrible laggy.
But amazing things happened! A new version of ExaGear Desktop – ExaGear Desktop 2.0 is fully supporting 3D graphics acceleration on Raspberry Pi 2 and Raspberry Pi 3!
Check this video that run Counter Strike and Diablo II on Raspberry Pi:
More games are going to be added gradually and you can also suggest on the team your favorites. The team solved this problem after the OpenGL library was adapted into Raspberry Pi architecture, so they could develop some OpenGL calls to the hardware in order to solve the problem of 3D graphics.
This option is only available at Raspberry Pi since it is the only development board that uses OpenGL. You can learn more about this new era of gaming from this article and get ExaGear from here.
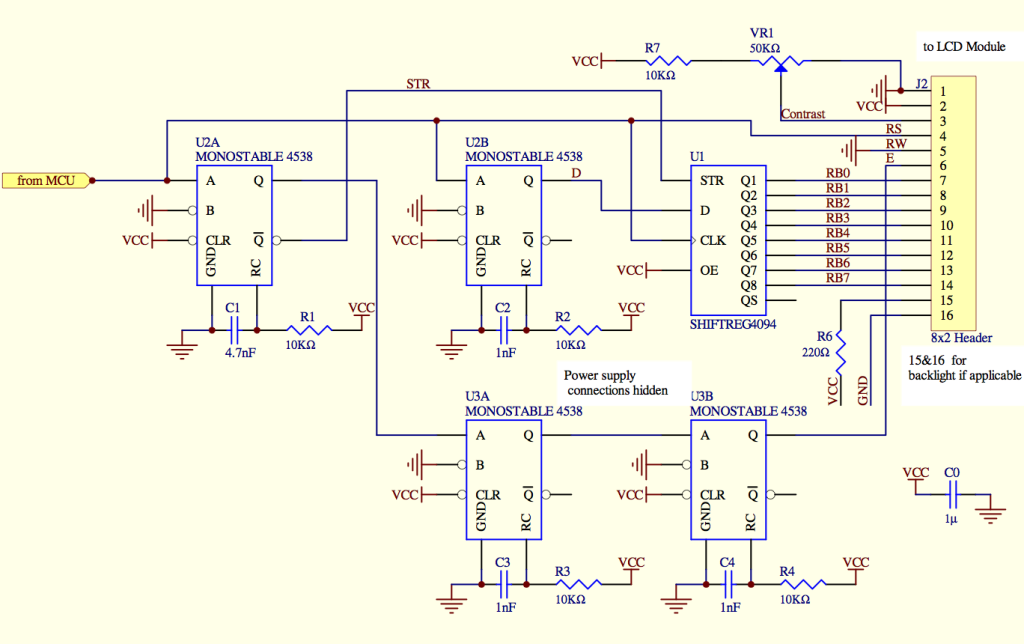
Rex Niven @ edn.com has a design idea on how to drive a character LCD using only one wire.
This hardware interface Design Idea reduces the connection to just one wire, allowing a basic microcontroller with limited I/O to drive a large display, either directly, through a standard interface, or even an opto-isolator.