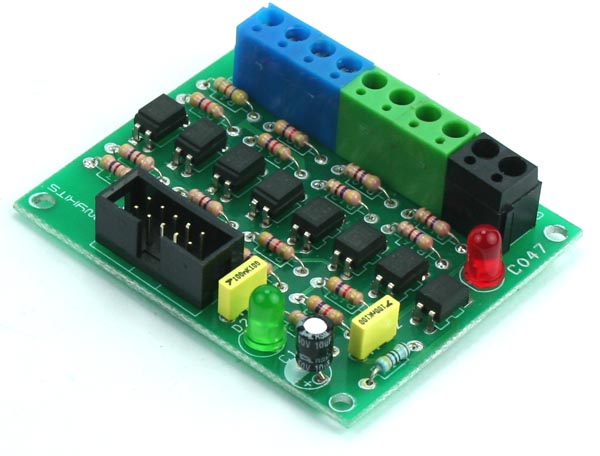
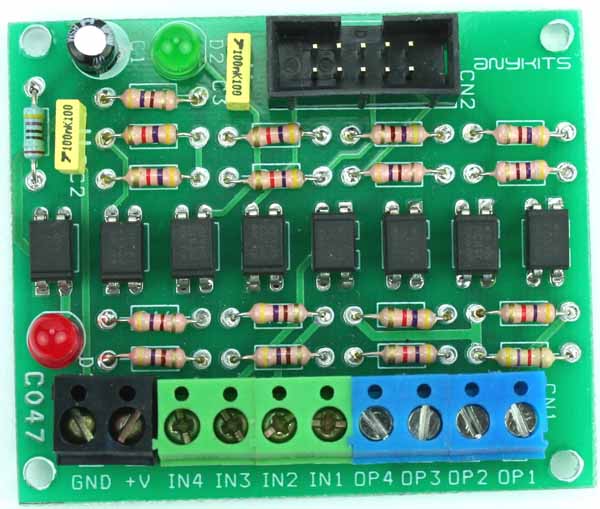
Opto-Isolated I/O Board offers a compact & convenient way to interface industrial type inputs/outputs to your microcontroller boards, Signal transmission between circuits of different potentials and impedances etc.
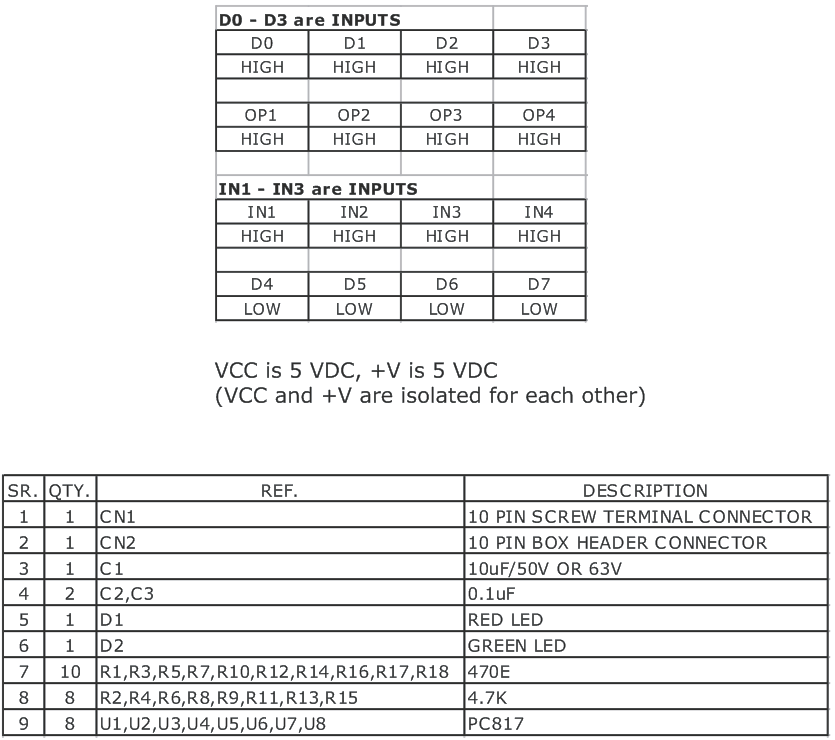
Specifications
- 4 opto-isolated inputs & 4 opto-isolated outputs
- Std TTL input signals for opto-couplers
- Interfacing is via 10-pin Box Header and Screw terminal type connector
- Power source LED indicator
- Four mounting holes 3.2 mm each
- PCB dimensions 54 mm x 64 mm
Schematic

Parts list
Photos

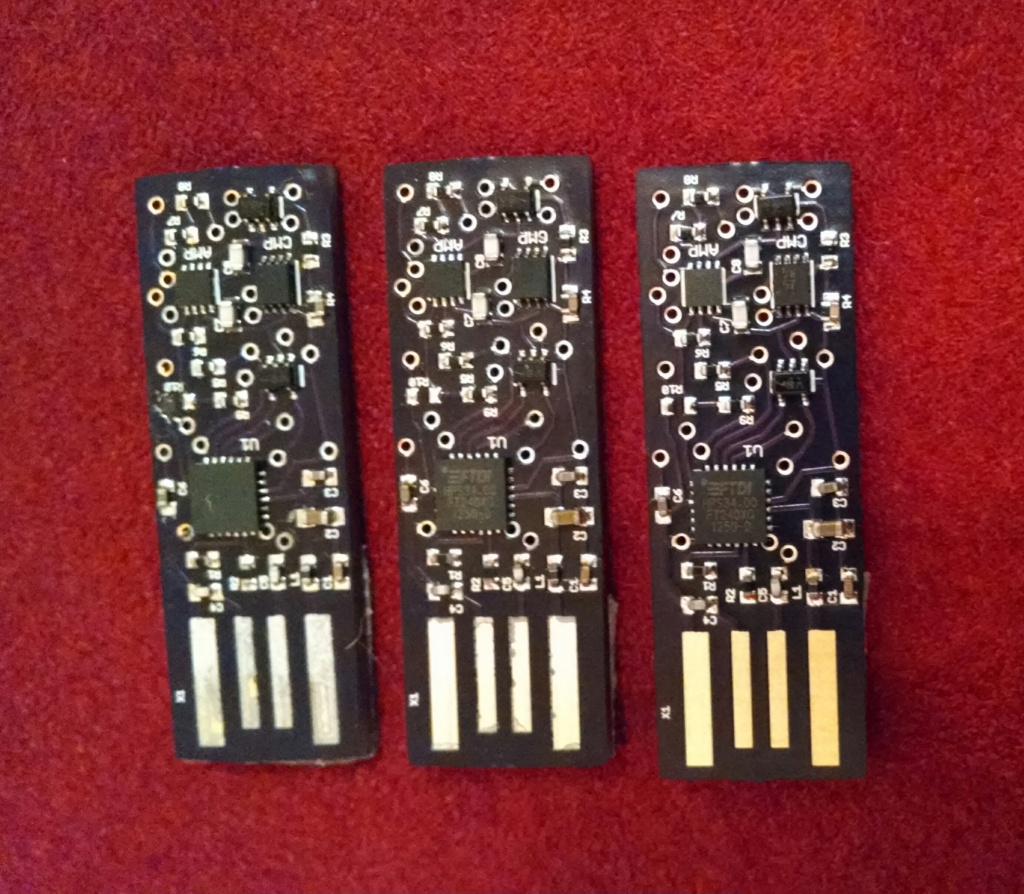
waywardgeek @ github.com shares his USB TRNG:
The Infinite Noise TRNG is a USB key hardware true random number generator. It uses what I call a “Modular Entropy Multiplier” architecture (previously Infinite Noise Multiplier or FireBug). Besides being simple, low-cost, and fast, it is much easier to get right than other TRNGs. It naturally defends against influence from outside signals, such as radio interference and power supply noise, making it simple to build securely, without requiring an expert in analog design.
Infinite Noise True Random Number Generator – [Link]

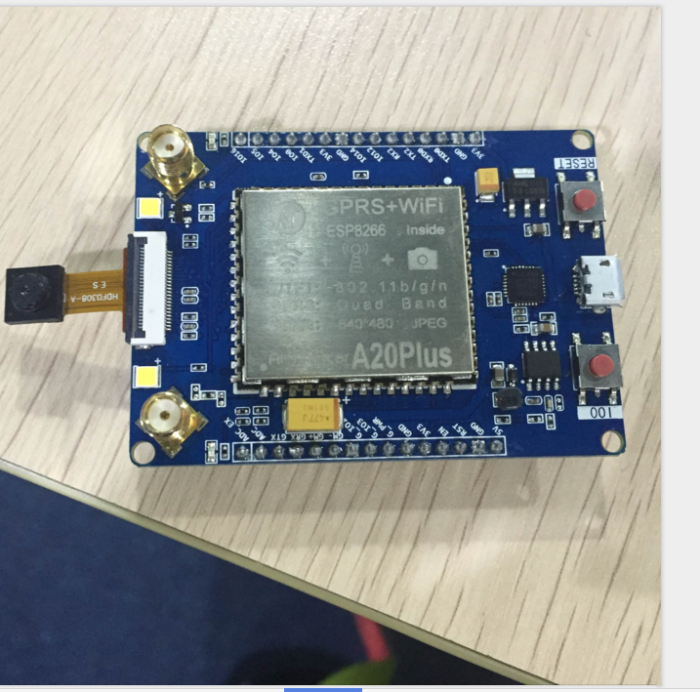
Raymond Tunning shares the information he found about the new A20 modules bought from taobao.
A20 Plus – WIFI/GPRS/GSM/CAMERA module – [Link]

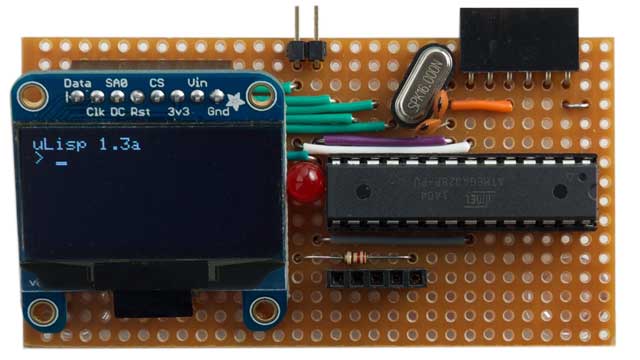
The Tiny Lisp Computer is a self-contained computer programmed in Lisp. Some programming examples are included in the author’s website.
This article describes a self-contained computer with its own display and keyboard, based on an ATmega328, that you can program in Lisp. You can use it to run programs that interface to components such as LEDs and push-buttons via the I/O pins, read the analogue inputs, and operate external devices via the I2C and SPI interfaces. It has a small monochrome OLED display that gives 8 lines of 21 characters per line, and a miniature PS/2 keyboard
Tiny Lisp Computer using ATmega328 – [Link]

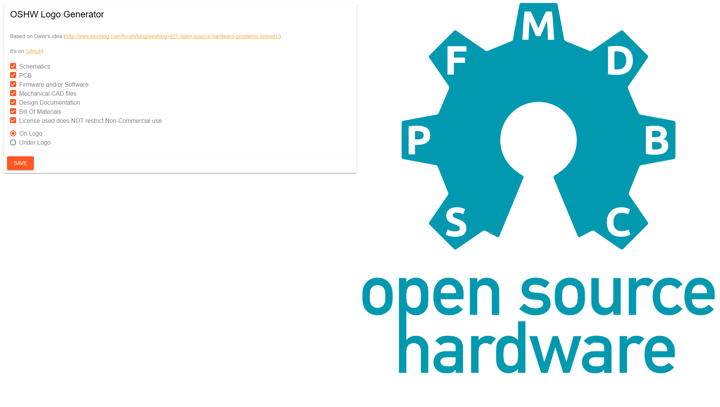
Here is a proposal for a new OSHW logo which uses release symbols to know exactly what the license covers. The KEYS used are:
S = Schematic
P = PCB
F = Firmware and/or software
M = Mechanical CAD files
D = Design Documentation
B = Bill Of Materials
C = License used allows for commercial use
The new logo generator is on github and it is able to save the logo in .svg format. Please note this is a proposal for a new kind of open source logo and not yet used in designs.
OSHW Logo Generator – [Link]

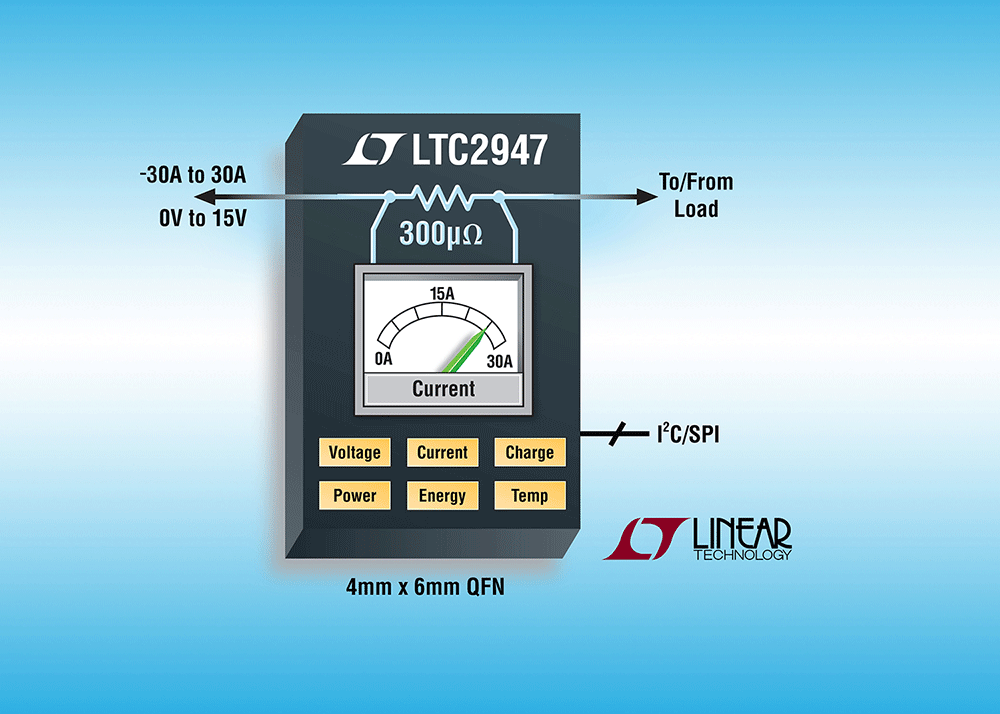
Designed to simplify board-level energy measurements, the LTC2947 power and energy monitor for 0V to 15V DC supply rails eliminates the need for an external sense resistor to measure current. by Graham Prophet @ edn-europe.com
Choosing a sense resistor, Linear says, is not an easy task, especially when dealing with high currents, where available sense resistors can dissipate too much power, occupy a lot of board space or have a large impact on measurement accuracy. The LTC2947 integrates a 300 µΩ temperature-compensated sense resistor to alleviate these concerns, providing users with a simple 24 mm² solution that provides up to 1.2% accurate energy readings at up to ±30A.
30A, PCB-level supply monitor has integrated 300 µΩ sense resistor – [Link]
Single Digit Big Display module using 74HC595 IC project will display large size 7 segment single digit number. 3.5inch height, which can be visible over large distance. More digit can be connected serially to each other easily connector.
This circuit is a single digit seven segment big display using a set of 5 LEDs per segment and a shift register for easy control by micro-controller input. Each of the LEDs used in this project are 5mm high glow type.
Specifications
- A ULN2003 IC helps sink higher current flowing through the LEDs to ground.
- Resistor R1 to R8 are current limiting Resistors for the LEDs connected in series.
- CN1 Connector is Data In connector
- CN2 Connector is optional Data Out Connector if you need to stack more than 1 single display board in series
- +V CN1 & CN2 should be connected to higher voltage to drive the LEDs
- VCC Should be connected to 5V DC. This supply can be source from host controller
- Each Segment made up of 5LEDs
7 Segment LED Based SPI Display using 74HC595 – [Link]

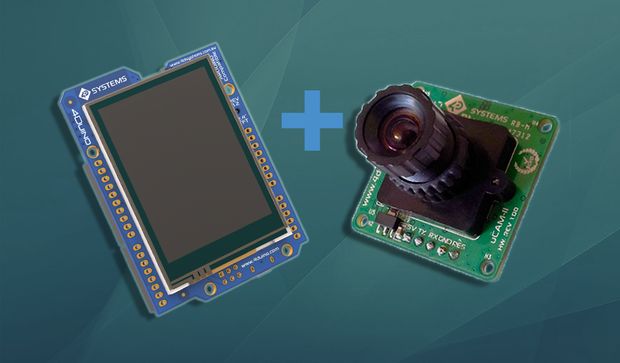
by 4D Systems @ instructables.com:
The main objective of this project is to show how to interface a uCAM-II serial camera to 4Duino. uCAM-II is a highly integrated micro serial camera which could be controlled by any host that requires a video camera or a JPEG compressed still camera for embedded imaging applications. uCAM-II processes various features making it trivial to interface to a microcontroller. Following are the list of few features to help you understand the module better.
4Duino UCAM-II Demo – [Link]