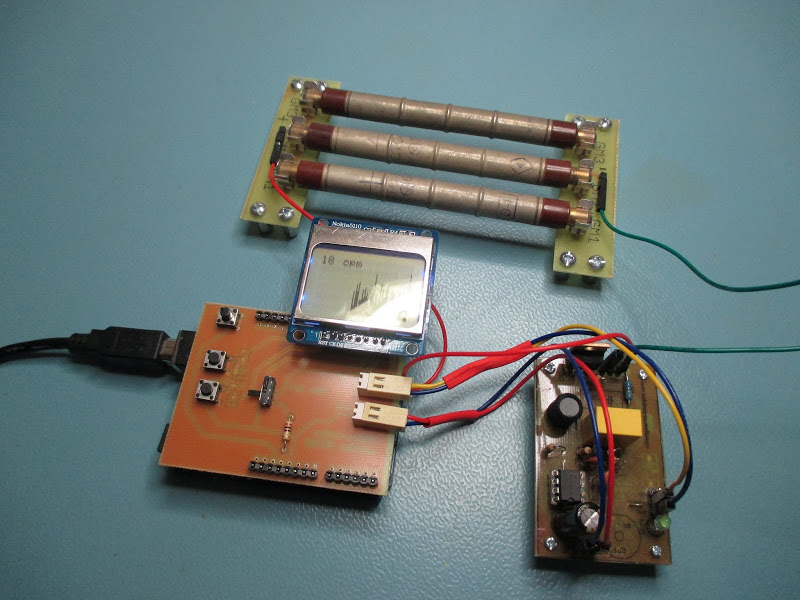
Bob tipped us with his latest project. It’s a custom Arduino shield able to communicate with a Geiger-Muller counter and display data on a LCD display. The data are displayed in two layouts: bar graph of the pulses in one minute interval and histogram of the gathered data.
In the previous posts I’ve described a simple Geiger–Müller counter and various experiments with this device. Today I would like to present Arduino project to communicate with a Geiger-Muller counter, gather data and present it to the user. The device is based on Arduino Uno, Nokia 5110 LCD and homemade shield.
Arduino Geiger–Müller counter with LCD display – [Link]
KA7OEI designed a circuit that disconnects the battery when it over-discharges. He writes:
The avoidance of overcharging is usually pretty easy to avoid: Just use the appropriate charging system – but overdischarge is a bit more difficult, particularly if the battery packs in question don’t have a “protection board” with them.
Lead acid batteries (almost) never come with any sort of over-discharge protection – one must usually rely on the ability of the device being powered to turn itself off at too-low a voltage and hope that that threshold is sensible for the longevity of a 12 volt battery system.
Disconnect circuit for 12 volt lead acid and lithium batteries – [Link]
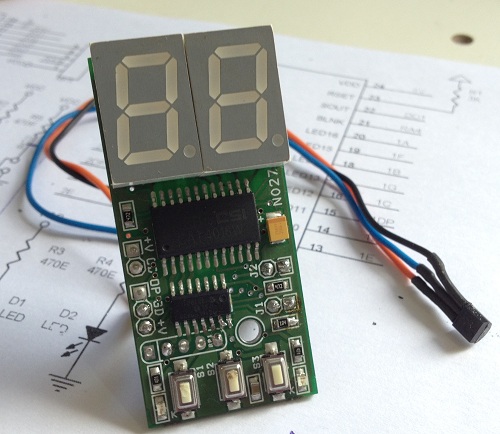
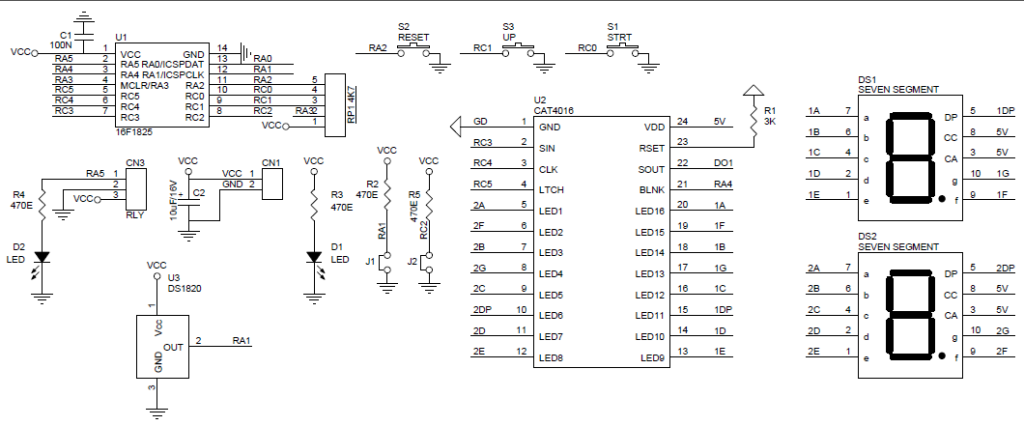
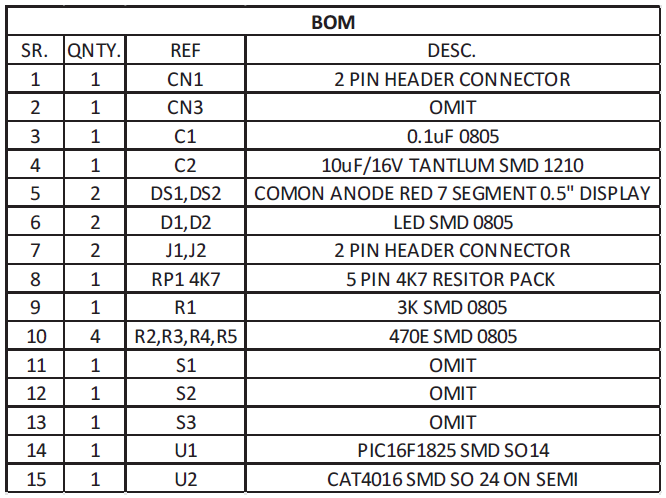
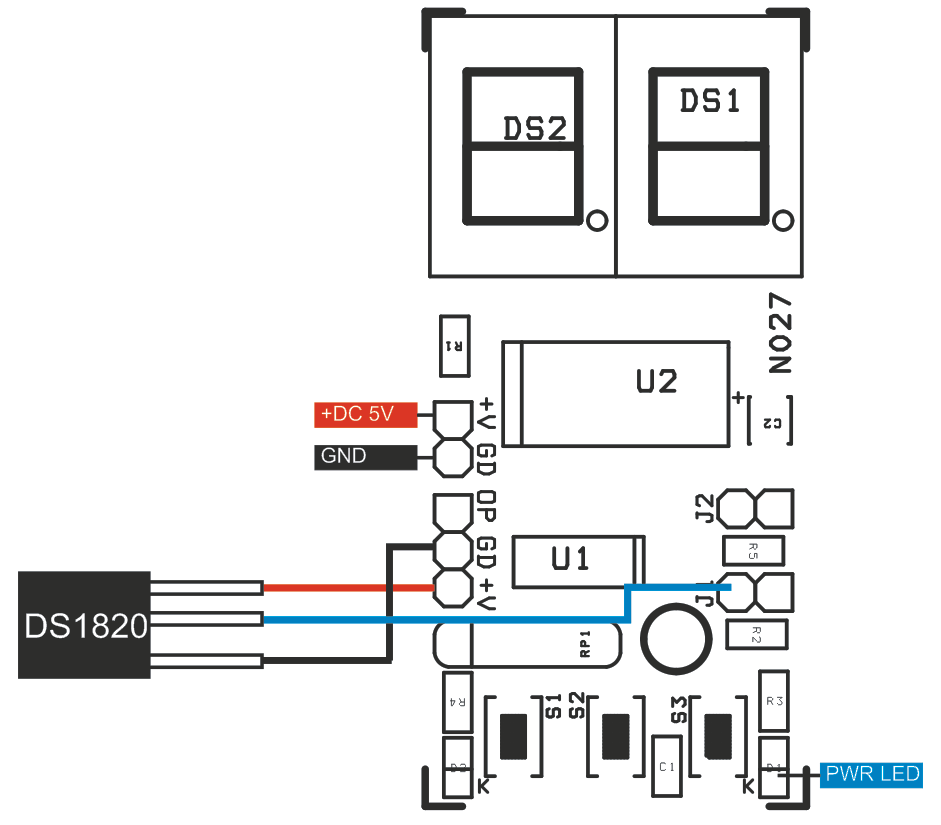
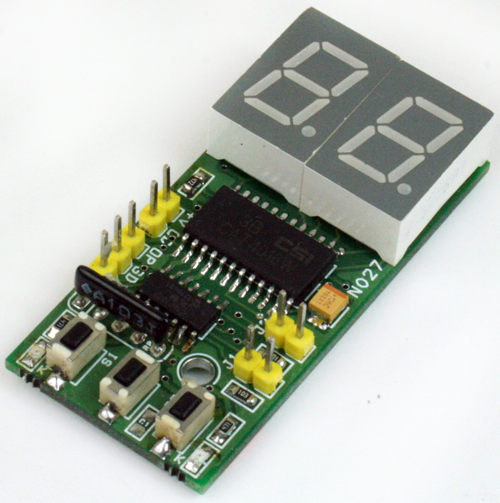
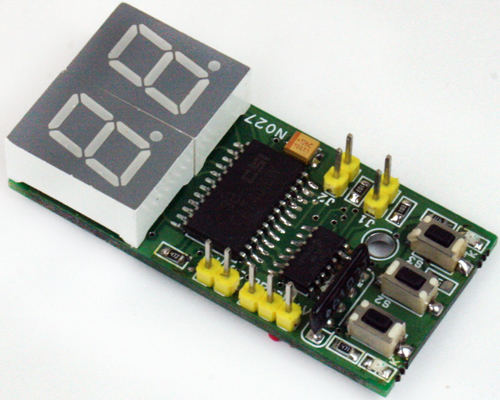
This digital temperature meter provides real-time temperature values from 00 to 99 degrees Celsius. The Temperature Monitor project built using PIC16F1825 Microcontroller from Microchip, CAT4016 serial to display driver IC from ON-Semiconductor, DS18200 Temperature sensor and two 7 Segment common anode 0.5 Inch display. This little handy project consumes low current and can be work with 4.5 V batteries, intensity of the display can be change by replacing value of R1, read Cat4016 data sheet for more information about current setting. Display range 00 to 99 degree Centigrade.
This digital temperature meter provides real-time temperature values from 00 to 99 degrees Celsius. The Temperature Monitor project built using PIC16F1825 Microcontroller from Microchip, CAT4016 serial to display driver IC from ON-Semiconductor, DS18200 Temperature sensor and two 7 Segment common anode 0.5 Inch display. This little handy project consumes low current and can be work with 4.5 V batteries, intensity of the display can be change by replacing value of R1, read Cat4016 data sheet for more information about current setting. Display range 00 to 99 degree Centigrade.
Dot uses precise location tracking to make your smartphone’s notifications highly intelligent and contextual.
dot uses your location to make your smartphone more aware of your surroundings.
Launching Soon. Sign up for updates and get 10% off our Kickstarter!
Dot want to teach your smartphone how to recognize your daily patterns and behaviors in the places that make up your life (bedroom, car, kitchen, garage, desk at work, etc).
Jone Teel over Makezine walked through how to use BLE (Bluetooth Low Energy ), aka Bluetooth smart, in an electronic product.
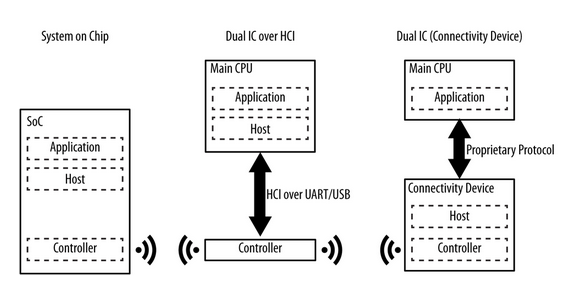
BLE, unlike classic Bluetooth, it’s not designed for big data transmission or streaming audio or video. BLE comes in SoC (System on Chip) ICs which combine a RF transceiver and a microcontroller running the Bluetooth stack (firmware) all in a single chip but you can still have the transceiver alone and run the software stack firmware on your processor.
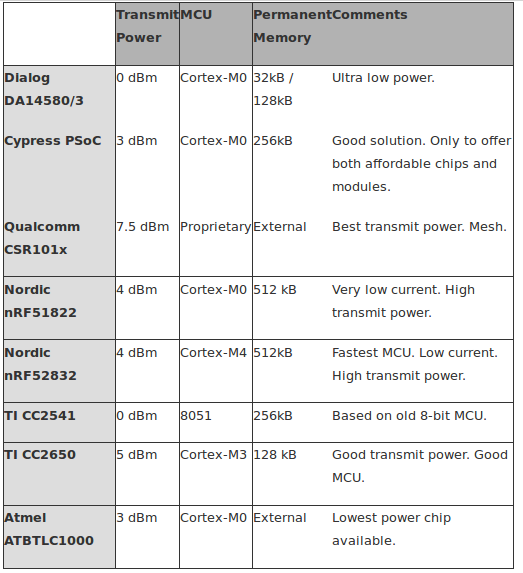
According to Jone, the software stack of Bluetooth Classic must be purchased separately and costs at least $10,000 USD plus a per unit licensing fee for every unit sold. Now, BLE SoC makers provide the software stack free in most cases. For example, Nordic Semiconductors provides the software stack S110, S120 and S130 SoftDevice for free.
most popular BLE chip solutions – Makezine
Jone advises to use ready made BLE modules rather than chips and this will reduce the costs required for FCC certification and eliminate the need for antenna tuning.
Jone ends his article talking about the Antenna design solutions using a ceramic antenna or a trace antenna on PCB.
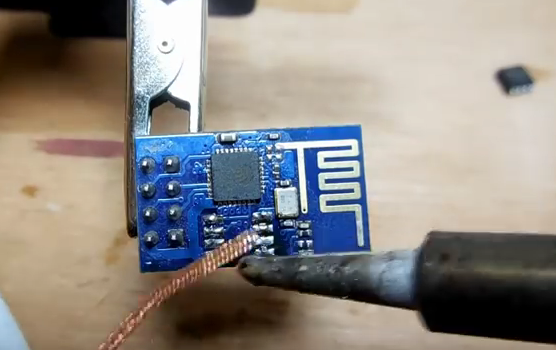
ESP8266, the well known WiFi module contains an ESP8266EX SoC IC and an external SPI flash. This external SPI flash is used together with ESP8266EX to store user programs.
The supported size of flash by ESP8266EX is up to 16MB but some of ESP8266 modules contain flash chips with low storage capacity like 512KB. In some cases you need more space. For example, if the upgrade Over The Air “OTA is enabled: the minimum flash memory that can be supported is 1 Mbyte” according to ESP8266EX datasheet.
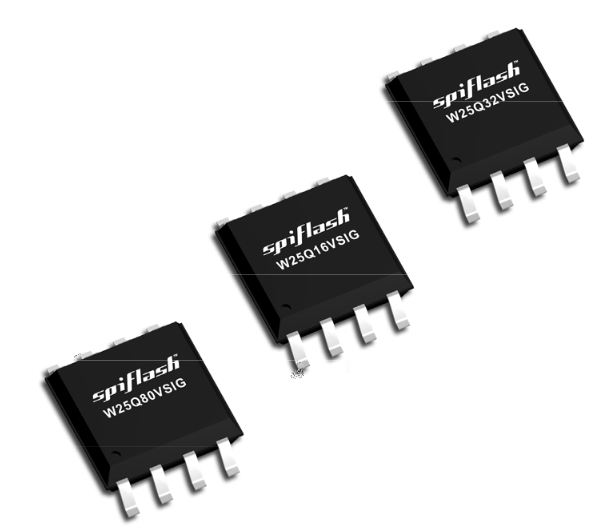
The SPI flash used in ESP8266 modules is W25qxx from Winbond, and in order to upgrade your flash memory you need to remove the old chip soldered to your module PCB and then solder the new one W25Q32 (32M-bit / 4M-byte), which can be ordered from Aliexpress.
[Code and Solder] channel over Youtube shared with us how to do the upgrade process.
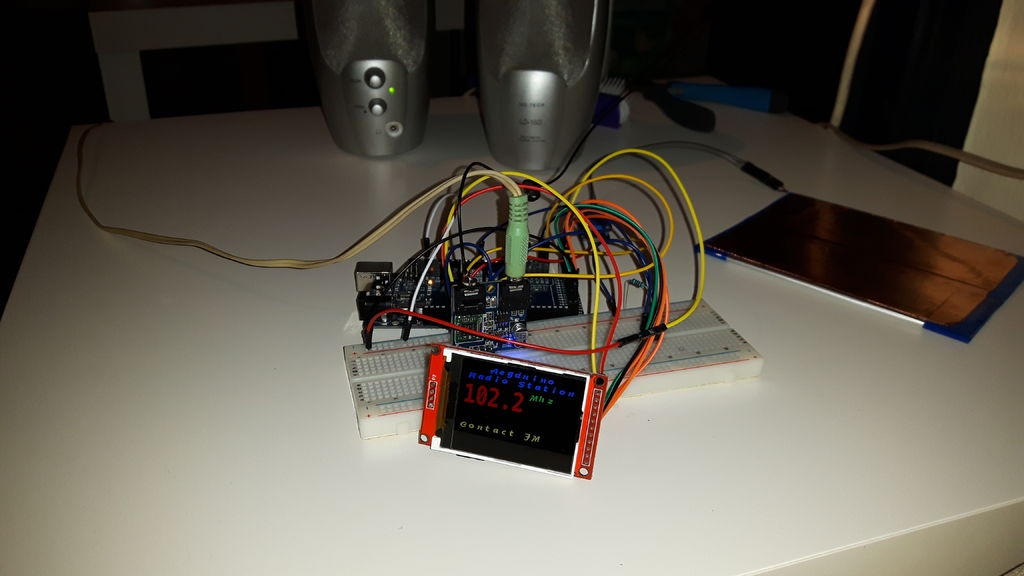
AxelP6 @ instructables.com has uploaded a new tutorial on how to make a simple arduino radio based on 2.2″ TFT ILI9225 controller, TEA5767 breakout board and Arduino MEGA2560. The radio can play a list of predefined stations and can’t scan through them.
So, I was searching for a tutorial to create a simple Radio with Arduino… And all what I found was very complex sketches for a very simple result, and I didn’t find any tutorials to use it with a TFT and UTFT library.
I decide to create a tutorial for noobs like me which are searching for it