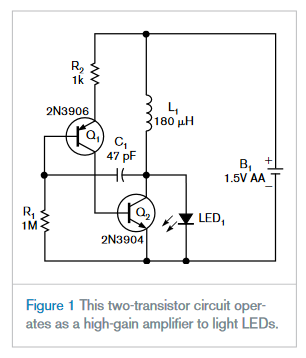
Barry Tigner @ edn.com has a design idea on how to power a LED from a 1.5V battery using two easily available transistors.
A previous Design Idea describes a circuit that uses an astable multivibrator to drive an LED (Reference 1). The circuit in Figure 1 uses a simpler alternative approach. The circuit uses a 2N3904 NPN transistor and a 2N3906 PNP transistor, which operate as a high-gain amplifier.
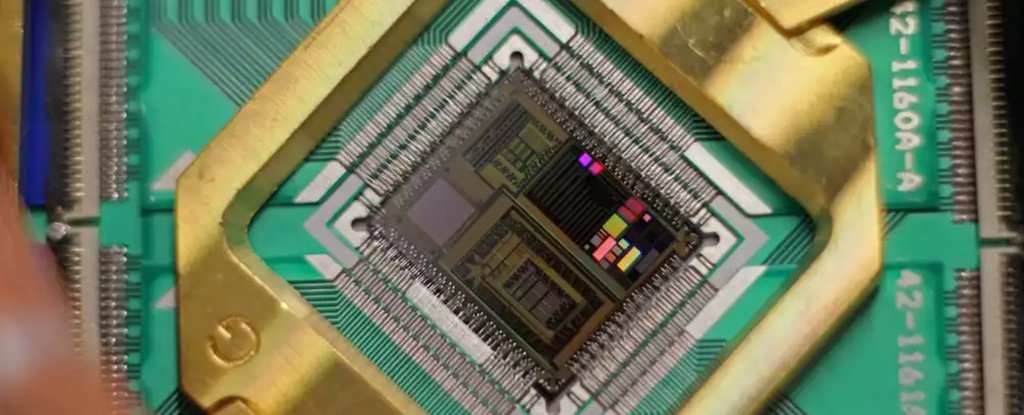
Google’s engineers just achieved a milestone in quantum computing: they’ve produced the first completely scalable quantum simulation of a hydrogen molecule. by DAVID NIELD @ sciencealert.com
Researchers working with the Google team were able to accurately simulate the energy of hydrogen H2 molecules, and if we can repeat the trick for other molecules, we could see the benefits in everything from solar cells to medicines.
These types of predictions are often impossible for ‘classical’ computers or take an extremely long time – working out the energy of something like a propane (C3H8) molecule would take a supercomputer in the region of 10 days.
Google’s quantum computer just accurately simulated a molecule for the first time – [Link]
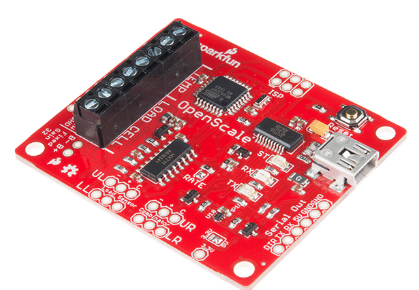
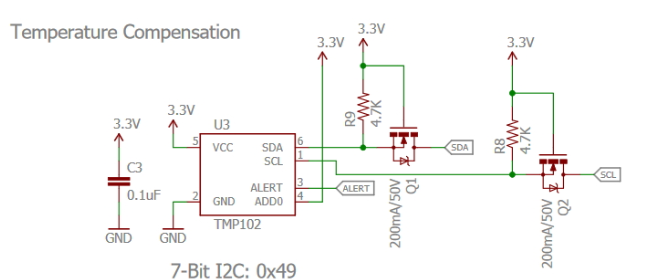
Sparkfun has a simple-to-use and open source solution for measuring weight and temperature. All you need is a load cell hooked up with OpenScale. You may find a variety of high quality weight sensors to be used in this project on Flintec load cells.
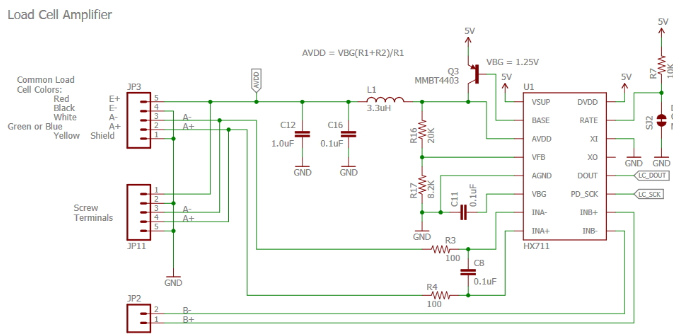
OpenScale uses HX711, a 24-bit analog-to-digital converter (ADC) specifically designed for weighing scales. It’s connected with an Atmega328P through a serial data line to get the reads from HX711. Atmega328P is running Arduino and an extensive pre-loaded configuration firmware to create an off-the-shelf solution for load cell reading.
You can get the output using the on board FT231 through USB terminal or directly get UART signals through the serial out connector. Also, Openscale uses TMP102, as on board temperature sensor. You can also connect an external one.
To get more details, you can refer to the detailed OpenScale guide.
Lucas Reed @ instructables.com has build a proximity alarm using Arduino and an ultrasonic sensor from Parallax. If a nearby object is approaching then the alarm will sound and an RGB LED will light up. He writes:
An ultrasonic rangefinder and Arduino microcontroller will check for nearby objects and if need be, alert you with a piezo-buzzer and RGB LED. Learn about these components using electronics lab simulations and eventually design, code, simulate, and build the proximity alarm itself! This is great if you are looking for a quick project to learn about digital electronics.
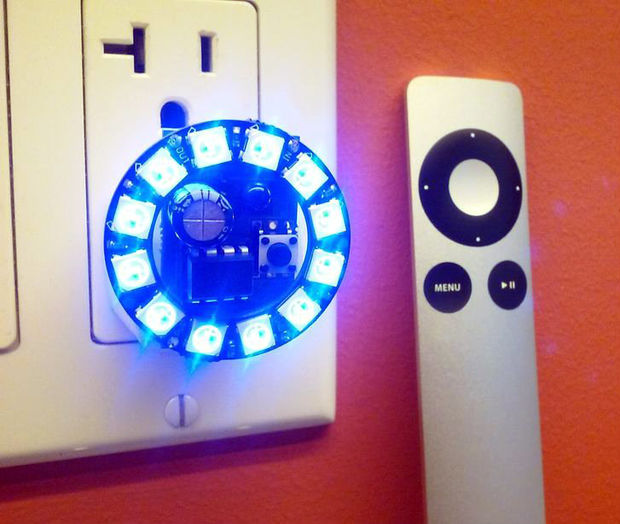
joshua.brooks @ instructables.com describes how he build a night light using an Adafruit NeoPixel, ATtiny85 microcontroller, TSSP4038 IR receiver and some other easy available components.
I’m giving some workshops in electronics in a few weeks, centered around an inexpensive, but useful real-world project. When trying to come up with a thing to make, I wanted it to involve a microcontroller, NeoPixel LEDs (because, they’re awesome), be remotely controllable, and allow for different build options. It also had to be fully simulatable in Autodesk Circuits. This is the project that evolved.
Allegro MicroSystems Europe has added a field programmable precision linear Hall-effect current sensor IC with features including a 240 kHz bandwidth, integrated voltage regulator, reverse battery protection, user-selectable ratiometry, and uni- or bi-directional output options. By Graham Prophet
The user can configure the sensitivity and quiescent (zero field) output voltage through programming on the VCC and output pins, to optimise performance in the end application. The quiescent output voltage is user-adjustable, around 50% (bidirectional configuration) or 10% (unidirectional configuration) of the supply voltage, VCC, and the output sensitivity is adjustable within the range of 0.6 to 6.4 mV/G (Gauss).
A1367 – Field programmable linear Hall-effect sensor IC – [Link]
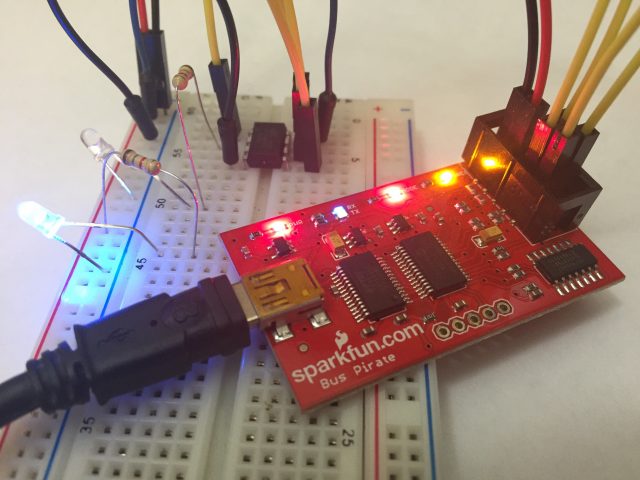
Scott Harden show us how to control the Bus Pirate with python and give us example code.
After using the AVR-ISP mkII for years (actually the cheap eBay knock-offs) to program ATMEL AVR microcontrollers, today I gave the Bus Pirate a shot. Far more than just a microcontroller programmer, this little board is basically a serial interface to basic microcontroller peripherals.
Future Cities, a full-length documentary strand from WIRED Video, takes us inside the bustling Chinese city of Shenzhen
We examine the unique manufacturing ecosystem that has emerged, gaining access to the world’s leading hardware-prototyping culture whilst challenging misconceptions from the west. The film looks at how the evolution of “Shanzhai” – or copycat manufacturing – has transformed traditional models of business, distribution and innovation, and asks what the rest of the world can learn from this so-called “Silicon Valley of hardware”.
Shenzhen: The Silicon Valley of Hardware (Full Documentary) – [Link]
Online learning of embedded system and electronics in general still bounded, and this is mainly related to the nature of hardware it self. Anyway, efforts for embedded systems training/learning continue to appear especially with MOOC platforms like Coursera and edX.
In this blog post, i’m not going to talk about MOOC online courses. I’m going to share with you some of dedicated online training centers and university programs for embedded systems.
Online University Certifications:
1-Embedded Systems Engineering Certificate from UCI:
The course schedule has variety of courses that focus on embedded system programming, logic design using VHDL and FPGA, real time systems, motor control and embedded linux.
The brochure contains informations about the fees as the following:
Course fees (4.5 prerequisite, 9 required and 6 elective units) $4,800, textbooks $1,350 , candidacy fee $125 and the total estimated Cost $6,275.
UCI had also created the “An Introduction to Programming the Internet of Things (IOT)” specialization on Coursera.
DOULUS focuses mainly on ARM (DOULUS is an ARM Approved Training Center), logic design and embedded linux. They also present a free online webinar on a regular basis.
Opersys was founded by Karim J. Yaghmour, the author of Embedded Android and Building Embedded Linux Systems books. The training courses is about embedded Linux and embedded Android.
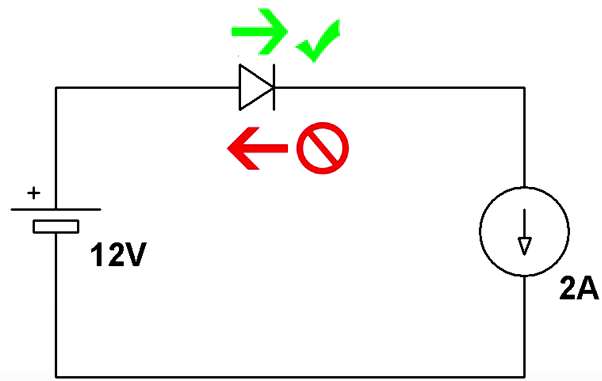
Diode or P-channel MOSFET is what you need to protect your circuit from applying reversed voltage, according to a nice video published on Afrotechmods channel.
Method 1:Diode
The simplest way is to use a diode in series with main power supply. When you connect the power source right, the diode anode is connected to positive side and the cathode will take the ground from the rest of the load which is connected to the ground.
The downside of using this method is the heat generated from the diode.
wasted power=Vf*current
So if we use a normal diode like 1n4007 for 2A:
wasted power=0.85*2=1.7W
If you connect the power source in reverse, then the diode will be off, thus protecting the circuit.
Method 1 (enhanced):Schottky Diode
In this way we can reduce the amount of power dissipated by the diode, as long Schottky Diode have a lower forward voltage compared with a normal diode.
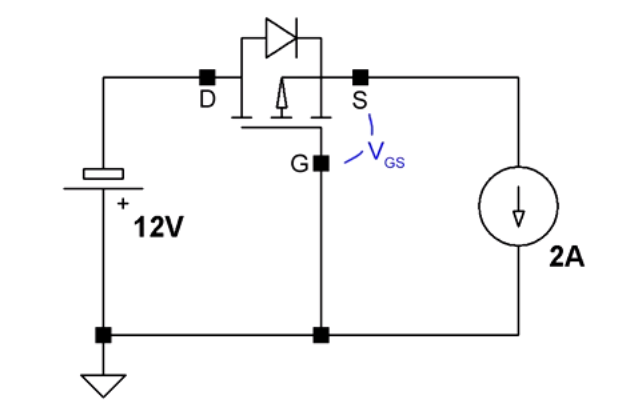
Method 2:P-channel MOSFET
You can use P-channel MOSFET like FQP47P0. In this method, when the power supply is connected properly, the Vgs is negative (you need to be above the threshold). When we power on the device, Vs is connected to Vd through the body diode of MOSFET and the MOSFET is on, the equivalent resistance between drain and source is very near to zero, for example Rds(on)=0.026ohm for FQP47P0.
wasted power=I*I*R=2*2*0.026=0.104W
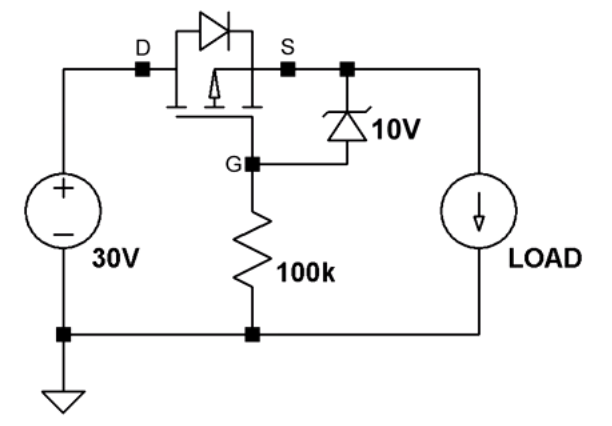
Method 2 (enhanced):P-channel MOSFET with Zener
In this method, we protect the MOSFET from applying Vgs with a limit that exceeds the breakdown voltage.