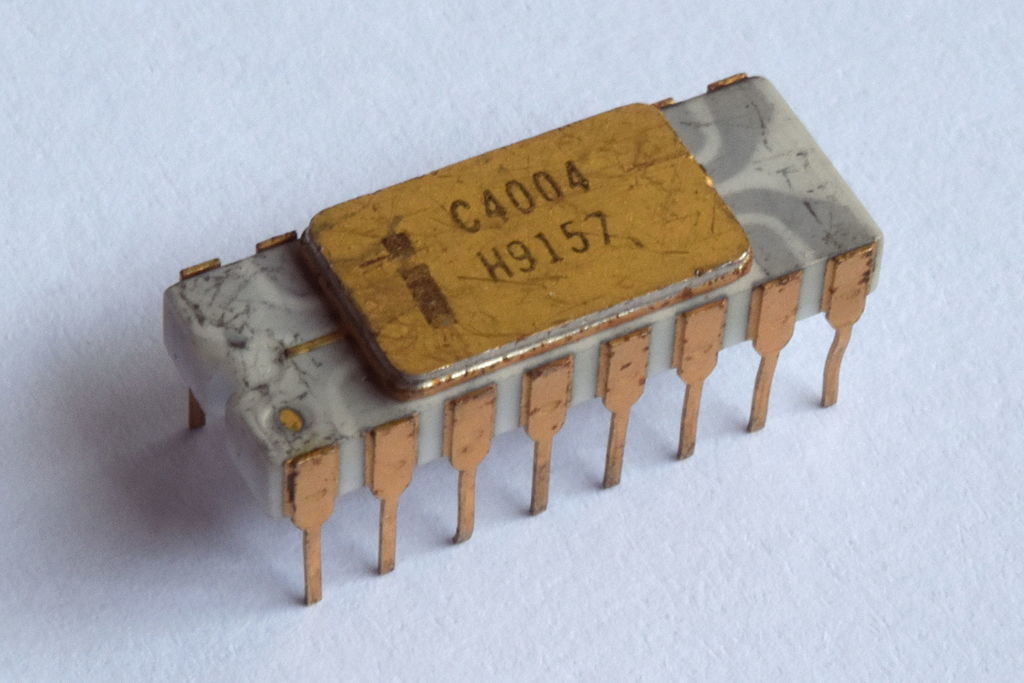
Celebrating its 45th anniversary, adafruit stumbled upon these high-resolution images of Intel’s 1971-released 4004 CPU. Click any of the below images to view them at their maximum scale on the MIT domain:
Schematic, Mask, and Die Shot of Intel’s 4004 CPU from 1971 – [Link]
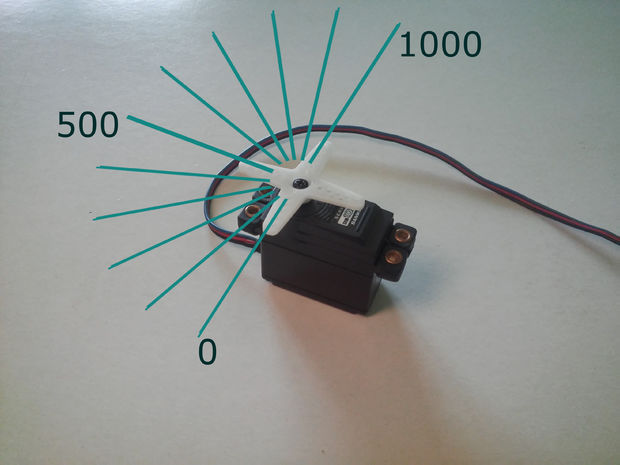
TheSuperSewcio @ instructables.com shows us how to control a servo motor in high precision using Arduino:
In many project like CNC machines people use stepper motors. They are probably always more expensive than servos. They can rotate 360°, 1 step = 1,8° (mostly). Servos can rotate only from 0° to 180°, 1 step = 1°. But why are they working this way, inside them we will find potentiometer which rotates as servo (up to 180°), but have 1024 steps.
Using Wi-Fi is a convenient way to link your newly created IoT device into your existing IT infrastructure – including cloud services – but it also has a drawback. Wi-Fi’s demand for power usually makes battery operation impractical for any real deployment. I have been able to get around this issue for most of my projects (e.g. the train and the smart shelf described on this blog) because they are for demonstration purposes only, requiring the battery to last no longer than a few hours.
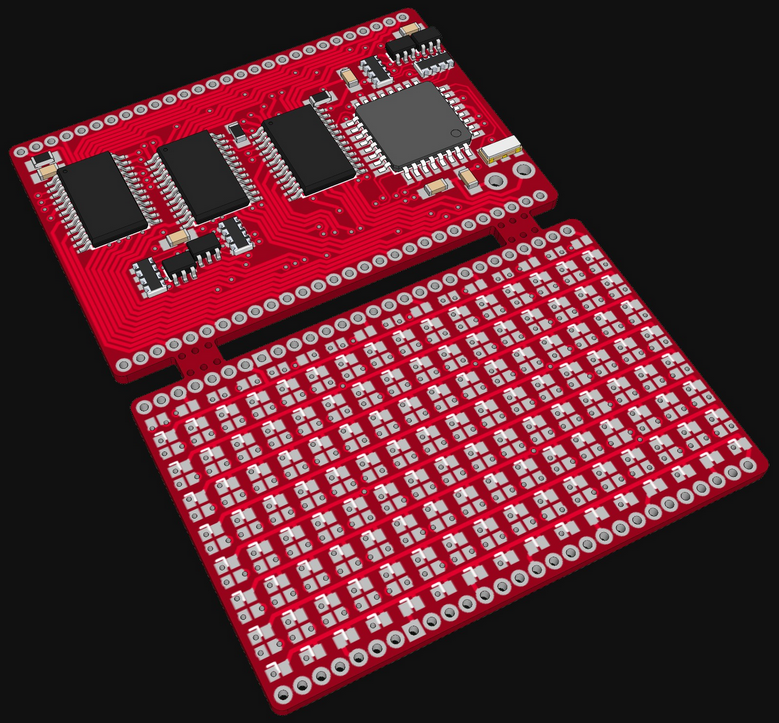
Mini (1.44” x 0.94” or 24mm x 37mm) 8X16 RGB LED Array. 128 RGB LEDs with three LED chip each gives 384.
For this project I designed two PCBs. A control PCB and a LED PCB. My goal was to fit them both in a small panel inside a 5×5 cm square to use cheap Chinese Manufacturing offers. Both PCB to have the same size and will be connected with 50mil / 1.27mm pin headers. The LED PCB will be stacked on top of the control PCB.
This video describes the function of the vertical position and vertical offset controls of a modern digital oscilloscope. It shows how using the offset control can provide valuable visibility of the DC bias and small signal waveform simultaneously, which can be very valuable in many applications.
Oscilloscope Vertical Position and Offset explained – [Link]
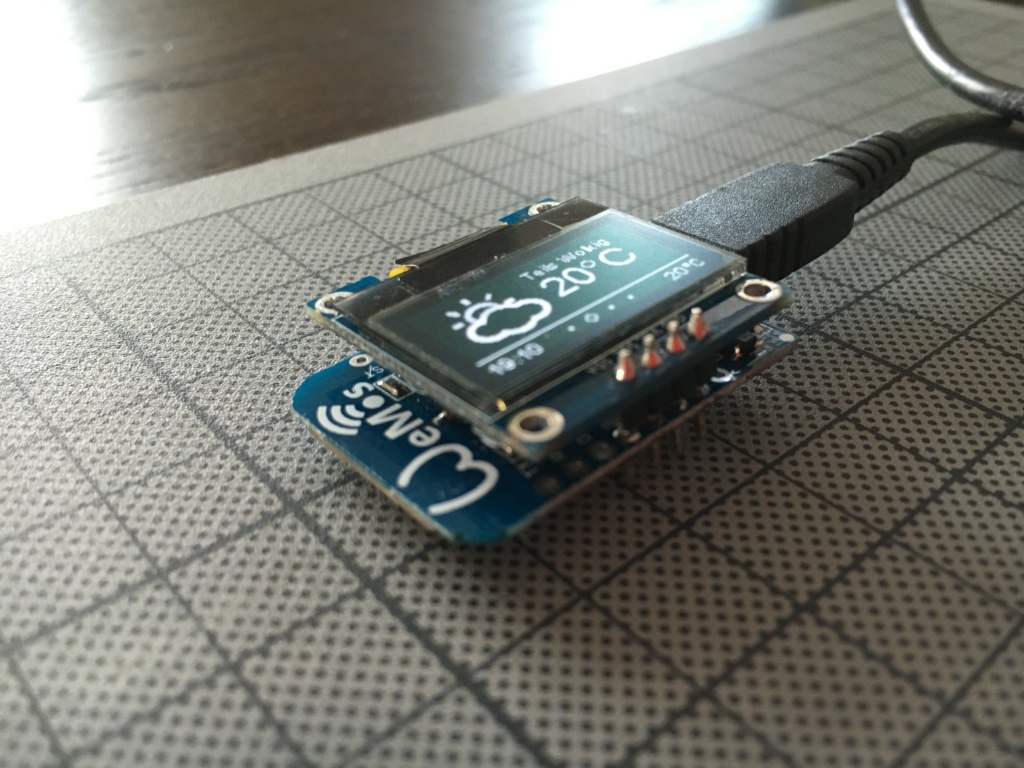
Daniel Eichhorn build a mini OLED display weather widget using WeMos D1 Mini board.
Inspired by Mike Rankin’s (@mikerankin) beautiful crossovers between an ESP8266 ESP-01 and an 0.96 Inch OLED I2C display I decided to try if there wasn’t an easy hack to marry the two components with as little soldering as possible. After turning, connecting and flashing different combinations of the two modules I finally found one that only requires you to solder 4 connections.
Piggybacking OLED display on WeMos D1 Mini – [Link]
educ8s.tv published a new project, a ESP8266 Wifi weather display.
In this video we are going to build a WiFi Weather display with the impressive Wemos D1 board. The board uses the ESP8266 chip in order to connect to the internet and we are going to program it using the Arduino IDE. The project gets weather data from the openweathermap.org website and displays some of the data on the display. As you are going to find out, you can build this project in less then 10 minutes. Let’s start!
A few weeks ago I published a video about the impressive WeMOS D1 board which is an ESP8266 based board which resembles the Arduino Uno. Today we are going to build our first project with it. A weather display, using this old LCD display shield I was using with Arduino Uno a long time ago. As you can see, the display works fine with the WeMOS D1 board! The project, connects to my WiFi network, and then it downloads the weather data for my location from the openweathermap website, and prints some of data in the display! It downloads new data for my location every 10 minutes. It is nice project to start with the ESP8266 chip. Let’s see how to build it.
WiFi Weather display using a Wemos D1 board and operweathermap.org website – [Link]
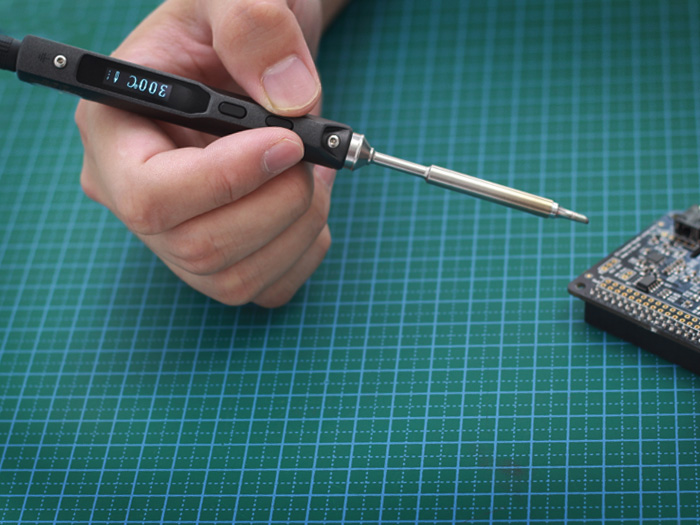
The Chinese company Seeed Studio offers a lot of interesting things for electronics enthusiasts. Along with selling products from various manufacturers, Seeed develops and produces their own products, many of which are very innovative. For instance, a year ago we had a close look at the DSO Nano V3 miniature oscilloscope.
Seeed has also developed their own miniature soldering iron, which is now available in a European version. The unique thing about this soldering iron is that a display and the control circuitry are integrated into the grip. From the photos and Seeed’s description, it looked like a good idea for us to get our hands on one and try it out in the Elektor Labs.
Seeed Studio miniature soldering iron – Review – [Link]