

Smartec has commenced selling a new temperature sensor as the successor to the SMT160: the SMT172. The SMT172 has a superior performance, such as a very low power consumption (60 μA) , a very high accuracy (0.1 °C) and a very high resolution (0.1 mK). [via elektormagazine.com]
For battery applications, the SMT172 can operate on the basis of a low voltage range from 2.7 V and 5.5 V. The sensor has a PWM Out for easy connection to any type of microcontroller.
The new SMT172 is available in TO18, TO92, TO220, SOIC-8, SOT223 as a small hybrid device (HEC) and comes with a cable of 5 m length.
Very low power temperature sensor – [Link]

by Julien Happich @ edn-europe.com
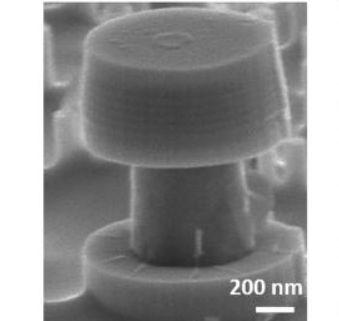
Published in Applied Physics Letters under the title “Sub-wavelength InAs quantum dot micro-disk lasers epitaxially grown on exact Si (001) substrates”, the findings from an international team of researchers opens a new route to CMOS-compatible on-chip laser integration.
The researchers designed subwavelength micro-disk lasers (MDLs) as small as 1μm in diameter on exact (001) silicon, using colloidal lithography (dispersing silica colloidal beads as hard masks before etching the prepared QD material layers). The disk region encapsulates five layers of InAs/InGaAs dot-in-a-well (DWELL) structure. The micro-cavity gain medium was grown on a high crystalline quality GaAs-on-V-grooved-Si template with no absorptive intermediate buffers. Under continuous-wave optical pumping (from an external diode laser operating at 532nm), the micro-disk structure lased in the 1.2μm wavelength range, with low thresholds down to 35μW at 10K (cryogenic temperature).
Quantum dots shrink on-chip lasers to 1μm – [Link]

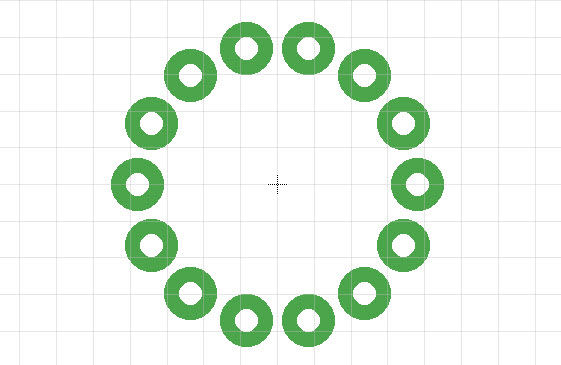
lucadentella.it shows us how to create a Nixie tube footprint by placing the pads in a circular way.
I’m working with Eagle to prepare a PCB for a Nixie clock. I wasn’t able to find a library for the Nixie I chose so I had to create it from scratch.
Eagle – Create Nixie tube footprint – [Link]
Luca Dentella writes:
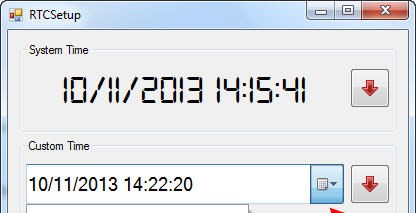
During the development of my electronic projects, I sometimes need to develop a graphical user interface (GUI) that talks using serial communication with the devices I create.
In the past, I usually chose to develop those interfaces in C# and using the .Net Framework; framework which allows a rapid development, offers great ways to customize the interface (for example the ability to use custom fonts as in the GUI for RTCSetup) and makes easy to access all the different graphical elements of the operating system, like the systray (cfr the GUI for Type4Me).
Chrome Apps and serial port communication – [Link]
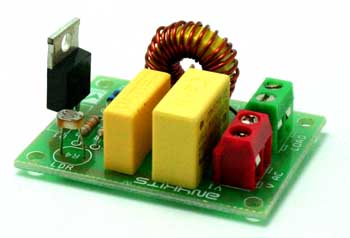
Dark Sensitive Lamp controller project switches a load connected to it when light falling on LDR (Light Dependent Resistor) goes bellow set point. It could be used as an automatic street light application. The project is based on Triac and doesn’t requires additional DC supply, it works directly on 230VAC.
Features
- Mains supply input 230 VAC
- Output load up to 500 W lamp / bulb
- Snubber circuit
- Sensor LDR
- Screw terminal connector for easy input mains supply and load connection
- Small size PCB
- Four mounting holes of 3.2 mm each
- PCB dimensions 37 mm x 49 mm
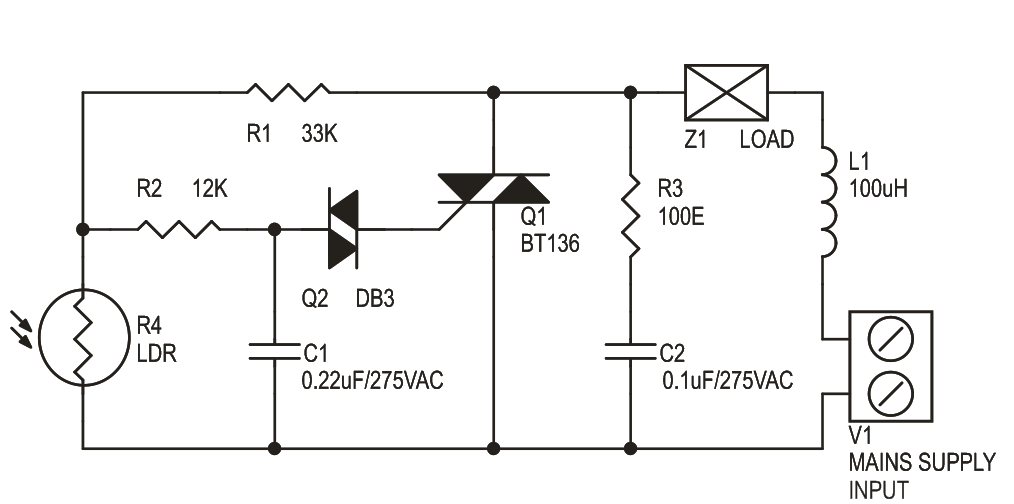
Dark Sensitive Lamp ON/OFF Controller – [Link]
Dark Sensitive Lamp controller project switches a load connected to it when light falling on LDR (Light Dependent Resistor) goes bellow set point. It could be used as an automatic street light application. The project is based on Triac and doesn’t requires additional DC supply, it works directly on 230VAC.
Features
- Mains supply input 230 VAC
- Output load up to 500 W lamp / bulb
- Snubber circuit
- Sensor LDR
- Screw terminal connector for easy input mains supply and load connection
- Small size PCB
- Four mounting holes of 3.2 mm each
- PCB dimensions 37 mm x 49 mm
This project works on 230V AC, dangerous voltages can occur on the board and to equipment linked or connected to it. The operation should be carried out by qualified and authorized personnel only well respecting safety precautions.
Schematic
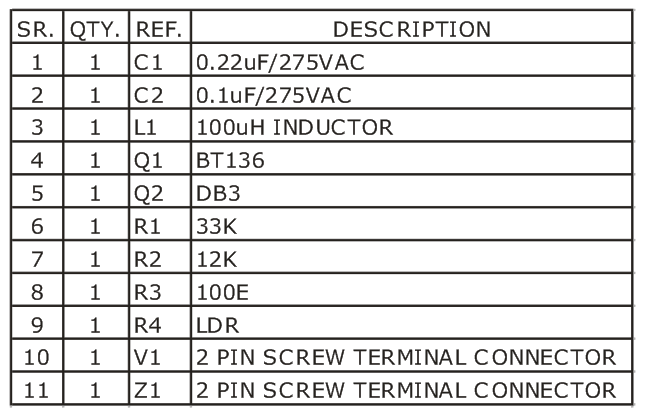
Parts List
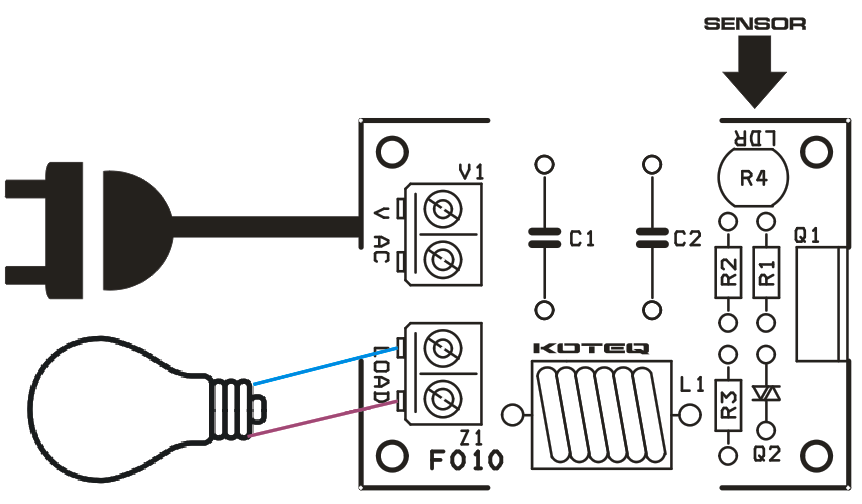
Connections

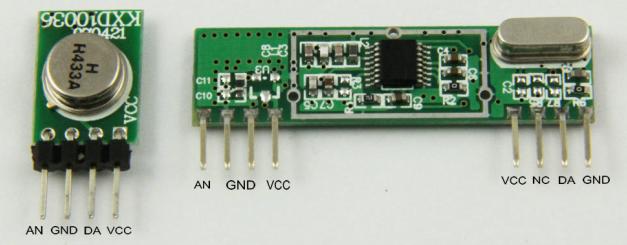
RomanBlack.com explains in details how to use 433/315Mhz modules for serial communication.
These cheap RF modules usually come in a pair, with one transmitter and one receiver. A pair can be bought on ebay for as cheap as $4, and even as cheap as $2 a pair if you buy 10 pairs.
Much of the information on the internet from people’s projects is sketchy and not very comprehensive. I test these modules out, and show how to get good reliable serial comms direct from USART -> USART, and I also show how to greatly speed up the data rate and reliability by using an alternative bit encoding system.
How to do serial comms using the cheap RF 433/315 MHz modules – [Link]
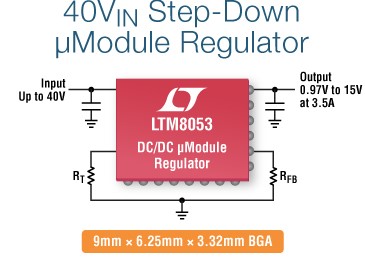
The LTM8053 is a 40VIN, 3.5A (continuous) step-down μModule regulator. Included in the package are the switching controller, power switches, inductor, and all support components. Operating over an input voltage range of 3.4V to 40V, the LTM8053 supports an output voltage range of 0.97V to 15V and a switching frequency range of 200kHz to 3MHz, each set by a single resistor. Only the input and output filter capacitors are needed to finish the design
LTM8053 – 40VIN, 3.5A/6A Step-Down μModule Regulator – [Link]

Michael Dunn discuss about a circuit that smooths ripple and noise but doesn’t regulates the output.
A well known power supply circuit is the capacitance multiplier. It doesn’t regulate, but instead reduces ripple & noise while the output tracks at some fraction of the input vol
LM317 smooths but doesn’t regulate – [Link]

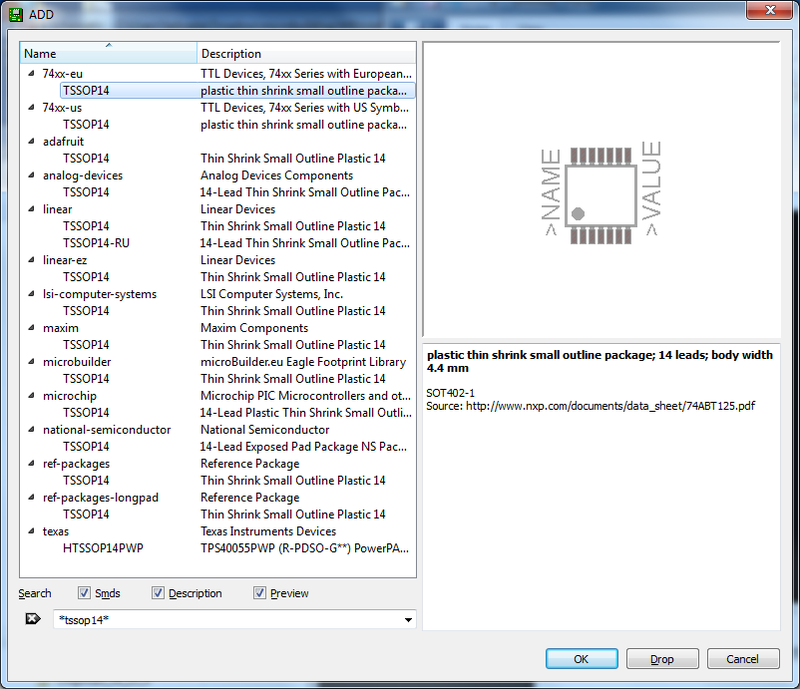
Save time by re-using existing packages and symbols .
There are thousands of devices in the ‘default’ library that comes with EagleCAD but whaddyaknow, the exact package/device you need isn’t always going to be one of those thousands. However, instead of making a brand new device from scratch every time you can often ‘merge’ two existing devices, or at least reuse the SMD package. Not only will you save time, but it can minimize mistakes. (Note I say it can – be sure to always always triple check pinouts, package sizes, dimensions and more!)
Eagle Tutorial – How to add a new package to a component – [Link]
