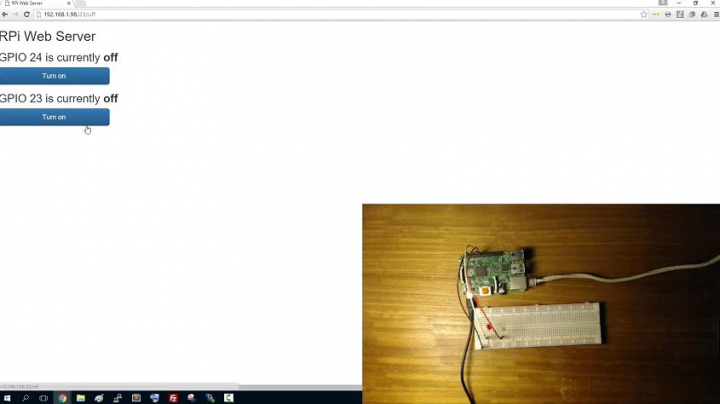
In this article “Rui Santos” shows us how to configure Raspberry Pi as server and use it to toggle two LEDs over the internet.
In this project you’ll create a standalone web server with a Raspberry Pi that can toggle two LEDs. You can replace those LEDs with any output (like a relay or a transistor). In order to create the web server you will be using a Python microframework called Flask.
Raspberry Pi Web Server using Flask to Control GPIOs – [Link]
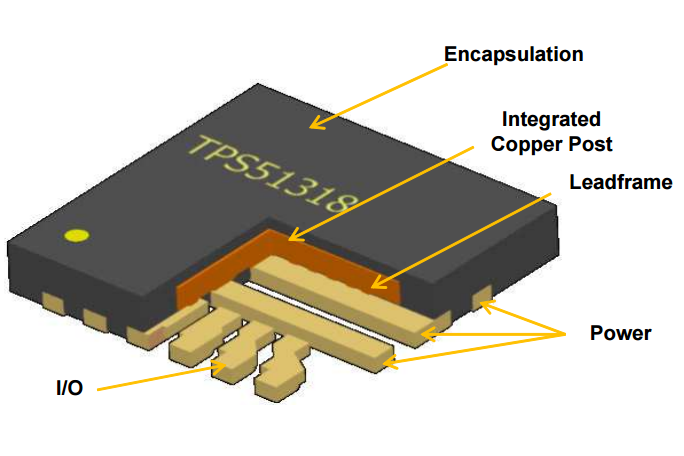
Clemens Valens @ elektormagazine.com shows us a new IC Package that keeps the IC cool.
Texas Instruments’ HotRod QFN is a thermally enhanced plastic package with solder lands on all sides as well as power buses for enhanced current carrying capability. Inside the package the die is mounted on a copper lead frame which eliminates the power wire bonds, improving electrical and thermal performance. This technique also improves application efficiency and minimizes package parasitic radiation.
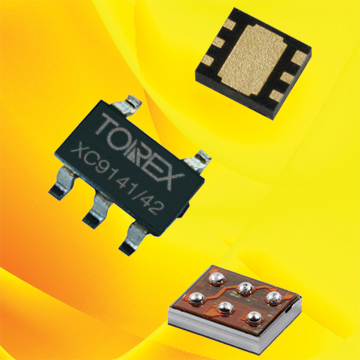
Torex Semiconductor’s XC9141/XC9142 series of 0.8A step-up DC/DC converters come with an input–output disconnection function (load disconnection function) to prevent malfunctioning during standby, and for device functionality that enables power supply to RTC.
When the output voltage is 3.3V, the IC can start from an input voltage of 0.9V with a resistance load of 100Ω, enabling use in devices driven by one alkaline or nickel-hydrogen battery. The input voltage range is 0.65V to 6.0V, and the output voltage range can be set from 1.8V to 5.5V (accuracy ±2.0%) in steps of 0.1V. A switching frequency of 1.2MHz or 3.0MHz can be selected to match the application.
0.8A step-up DC/DC converters in a tiny package – [Link]
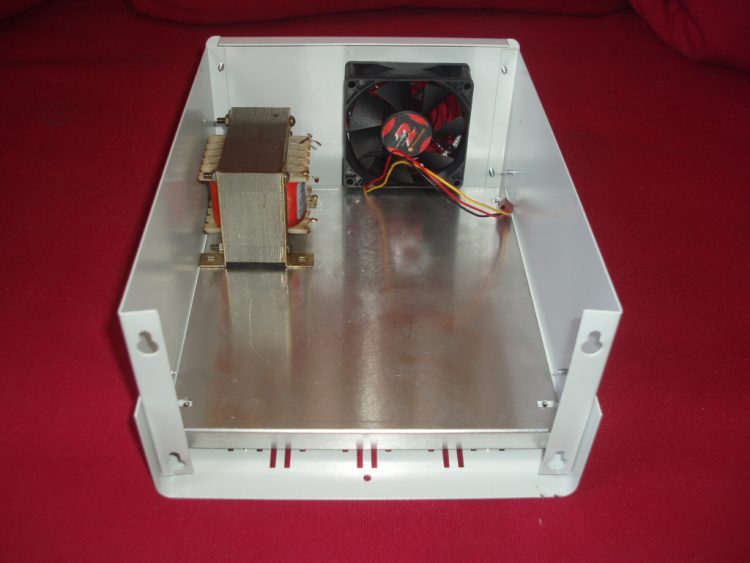
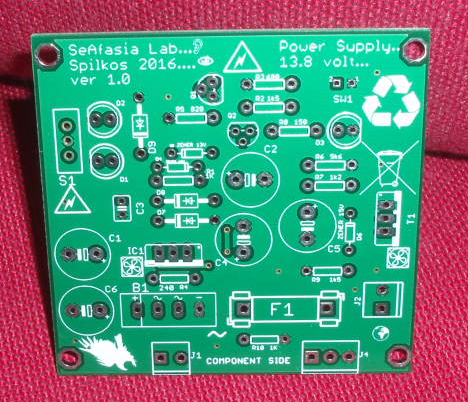
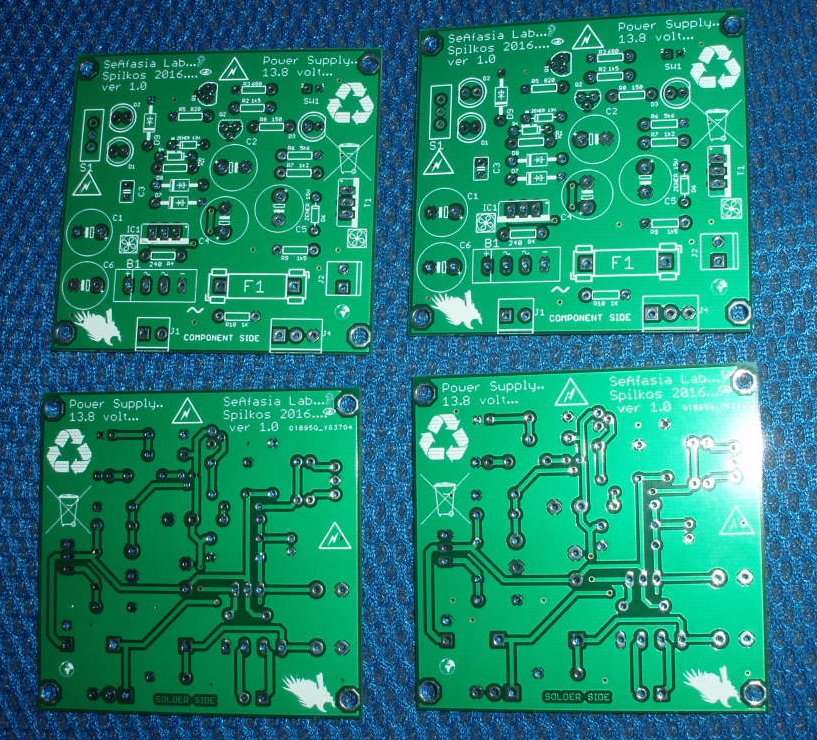
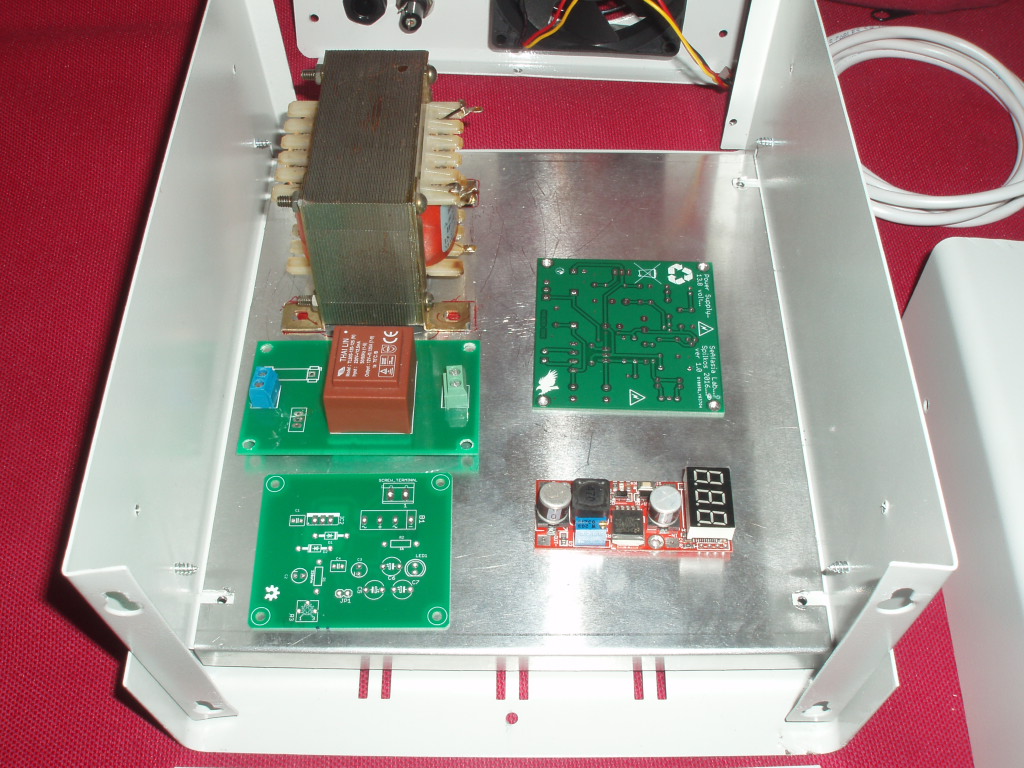
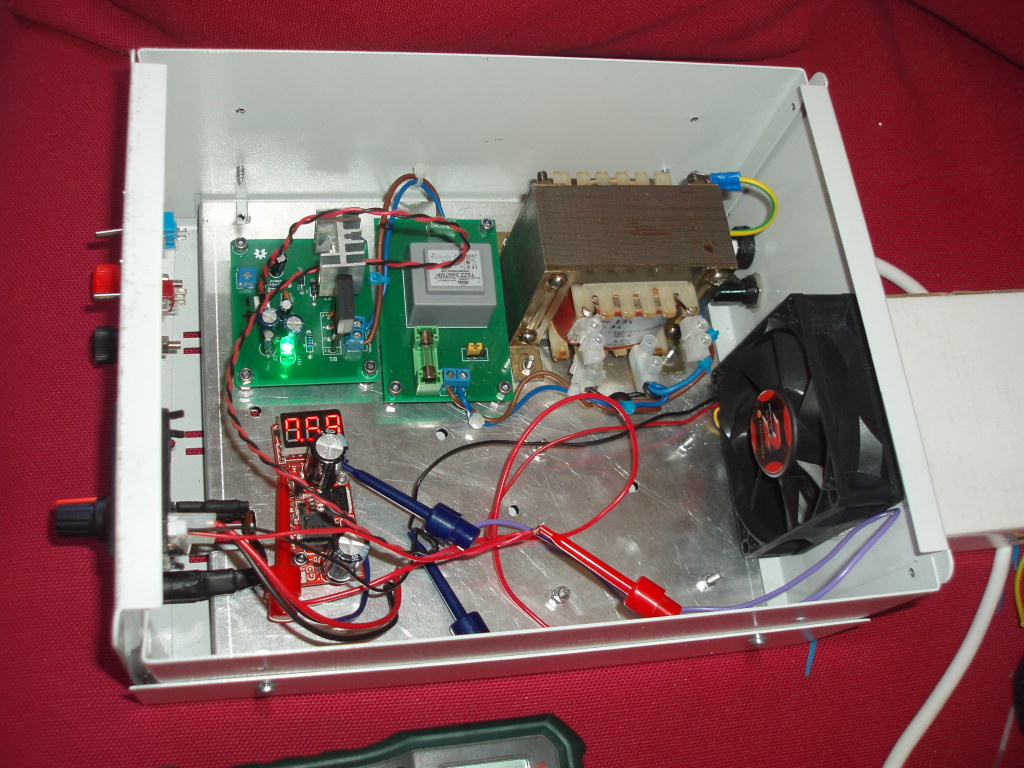
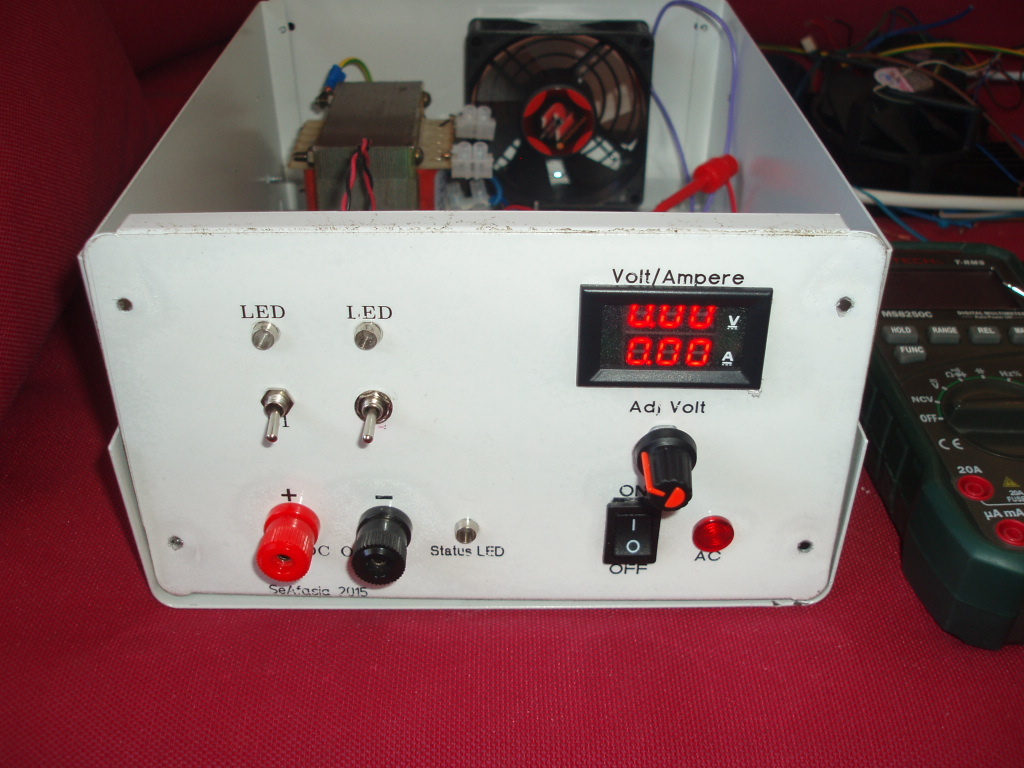
This power supply appeared in the summer issue of Elektor 2000 without a PCB layout. So, I decided to build a PCB using Cadsoft EAGLE Lite edition following the Elektor’s schematic and introducing some changes.
The power supply uses through-hole parts which are easy to find on market. Main part is LM338 Regulator which can be found in TO-220 and TO-3 packages. LM338 must be mounted on a heatsink to avoid overheating.
I have done some small changes on original schematic like adding a fuse F1 after bridge rectifier 2KBP for better protection from overcurrent and I also added an additional SCR connector, to connect an overvoltage protection circuit as separate unit.
The overvoltage protection unit is from ARRL 2015 Handbook and consists of MC3423P1, a BT152 SCR (or equivalent) and a FUSE on LM338 output.
Operation
LM338 can handle up to 5A of DC current but in this project we limit it’s use to 2A. Diode D8 helps C2 to discharge and D9 protects the output from connecting a reverse polarity voltage source. Capacitor C2 smooths the input voltage. The transistor Q2 along with D3 indicate whenever there is no voltage at the output of the fuse is blown. For protecting the load from high output voltages there is a Thyristor and a Zener diode D6 at 15V. If the output voltage exceeds 15V then D6 conducts and T1 fires. In this way the thyristor shortcircuits the output, the fuse is blown and D3 lights up.
If the connection between R2 and R3 is grounded using the S1a switch, then Q1 conducts and the output voltage is 13V (Zener D5 voltage). If the switch is on the other position Q1 is on cutoff region and the output voltage is 8,8V. LEDs D1 and D2 indicate if we have 13V or 8.8V on the output.
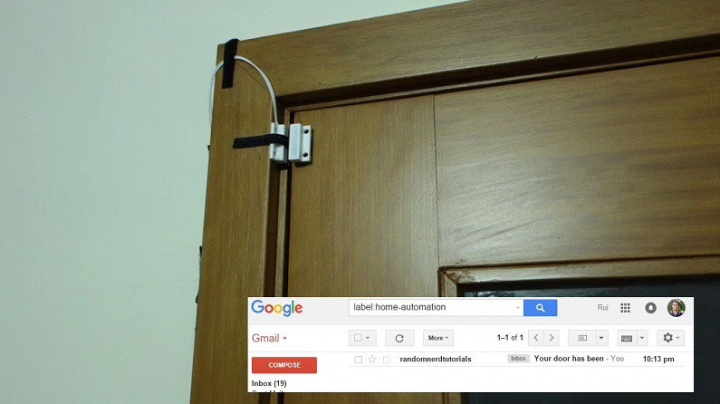
Rui Santos tipped us with this tutorial on how to monitor the status of your door using an ESP8266.
In this project you’re going to monitor the status of a door using an ESP8266. The goal of this project is to show the endless possibilities that this $4 WiFi module offers when integrates with a free platform that I’m about to show you.
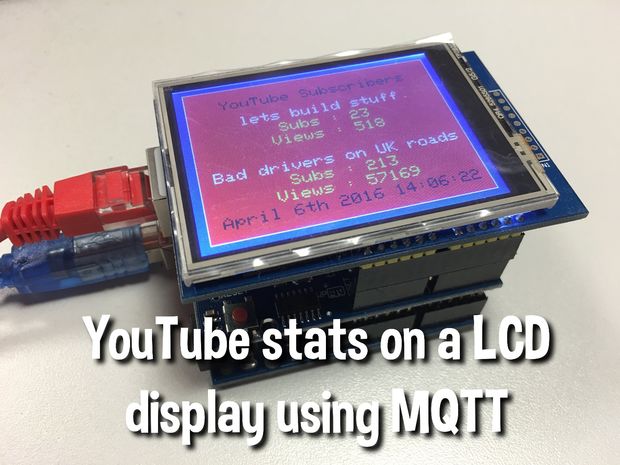
In this guide “padeath” shows us how to use a 320×240 LCD display with Arduino UNO to display youtube statistics. The stats are updated once in a minute using the google API.
This little Instructable will show you how to use a 320×240 pixel LCD screen connected to an Arduino Uno with a network shield too, to show stats for Youtube channels.
I created this as I wanted to see how many subscribers and views I had on my channels without having to check Youtube 🙂 The stats update on the LCD screen every minute using the google api.
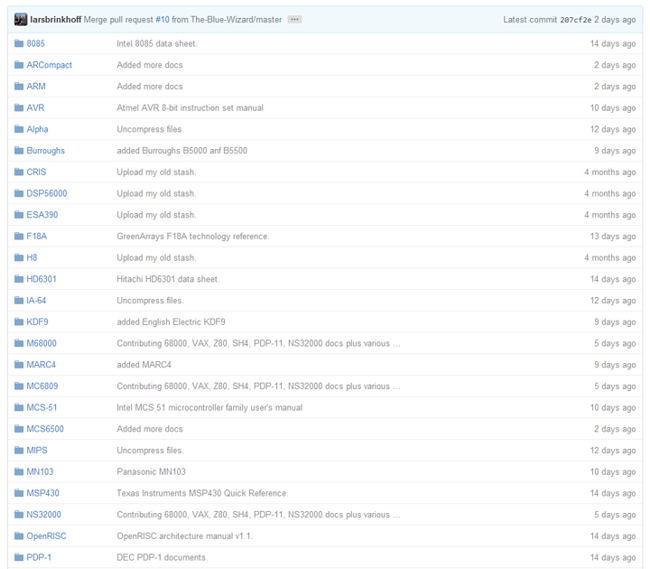
larsbrinkhoff @ github.com has compiled a list of all CPU and MCU documentation. The list contains data sheets, programmer’s manuals, quick reference cards etc.
This repository contains the documentations for various CPUs. It may contain data sheets, programmer’s manuals, quick reference cards, and the like.
All CPU and MCU documentation in one place – [Link]
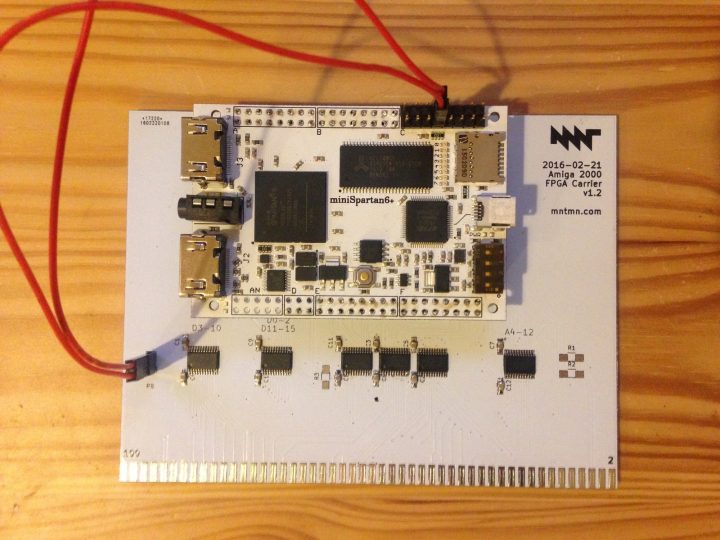
This is an Amiga 2000 Graphics Card (Zorro II), written in Verilog by user “mntmn” @ github.com:
This repository contains my Kicad schematics and Xilinx ISE/Verilog files for my graphics card project. This is a work in progress, started in October 2015. The first 4 prototypes were assembled in Jan/Feb 2016 and had noise problems, so I started a redesign on Feb 13, 2016.
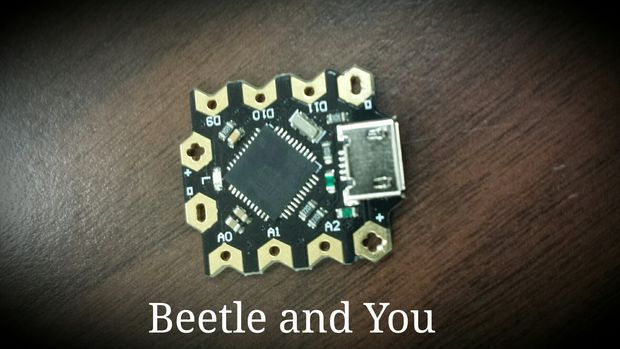
KickolasNage @ instructables.com introduces us to Beetle , a tiny arduino board able to minimize your projects to the size of a quarter.
The DFRobot Beetle is one the latest innovations in minimalistic Arduino technology. About the size of a quarter, and the capabilities of an Arduino Leonardo, this tiny guy can minimize your projects with ease without having to sacrifice functionality.