

Micah Elizabeth Scott @ yoututbe.com does a teardown, repair, and mini-review of the 2007 vintage Protek B8010FD.
Protek B8010FD Function Generator Teardown and repair – [Link]
Micah Elizabeth Scott @ yoututbe.com does a teardown, repair, and mini-review of the 2007 vintage Protek B8010FD.
Protek B8010FD Function Generator Teardown and repair – [Link]
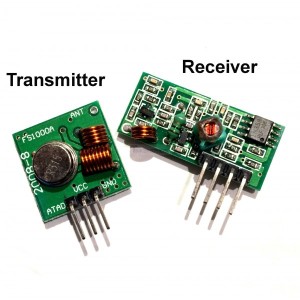
Here is a tutorial on how to use 433MHz RF modules to send data from an Arduino to another. The example code transmits a message to the serial port of receiver.
The most practical and cool way of sharing data from 1 Arduino to another is by far using a radio transmitter and receiver. The simplest form of wireless transmission (I could find) is the 433Mhz ASK modules. They come in pairs, a receiver and a transmitter. They are ridiculously cheap, selling at $1 or less a pair!!
Arduino 433Mhz RF Wireless Data Transfer – [Link]

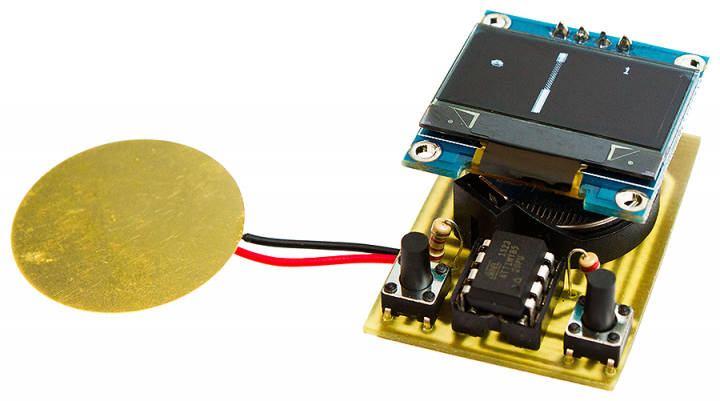
Daniel Grießhaber @ hackaday.io has published his build of a USB power meter. His device is based on ATTiny 85 mcu and 0.96″ OLED Display and is able to measure voltage, current and power output from USB port.
Since USB has become more and more a power delivery standard, it would be nice to have a convenient way to measure the power consumption these devices need. Of course there are already power meters out there, but they are just boring or don’t have all the features I like.
USB Power Meter – [Link]
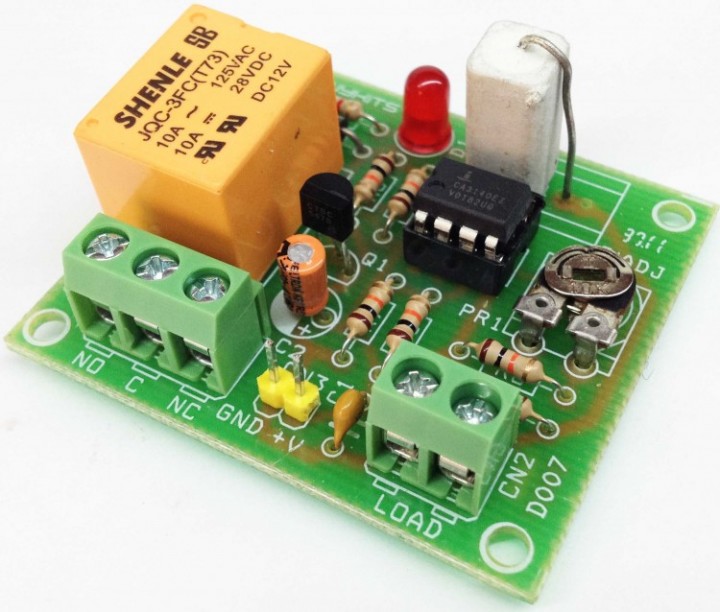
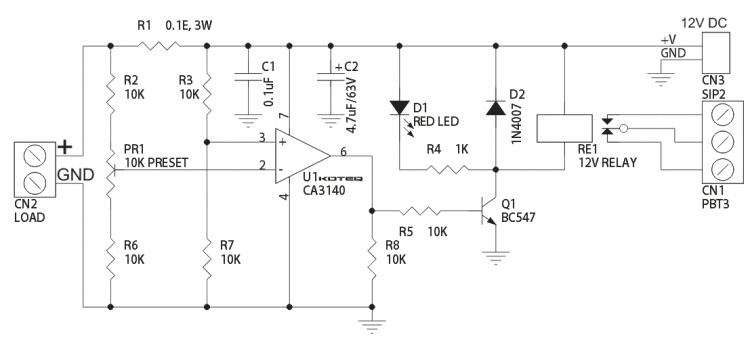
Current Sensing Switch is designed to operate a Relay Contact when there is a DC current through the sense resistor exceeds the set point, Set point adjustable from 1A to 3Amp using on board potentiometer. This circuit can offer over current protection to your project.
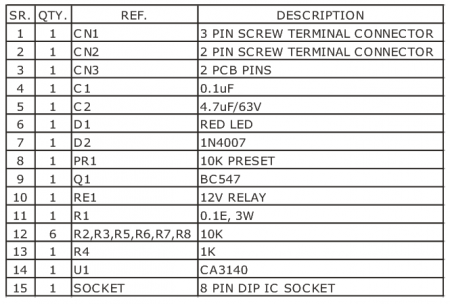
Specifications
Over Current Protection Switch – [Link]

Current Sensing Switch is designed to operate a Relay Contact when there is a DC current through the sense resistor exceeds the set point, Set point adjustable from 1A to 3Amp using on board potentiometer. This circuit can offer over current protection to your project.
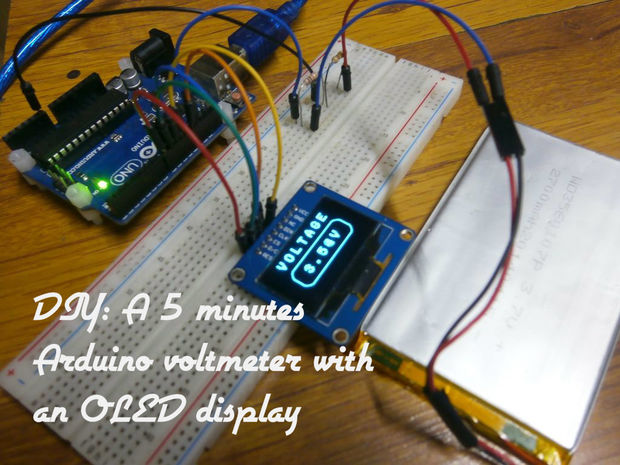
Konstantin Dimitrov has published an Arduino tutorial on how to make an voltmeter using SH1106 OLED display:
I’m going to show you how to make a voltmeter with Arduino UNO, an OLED display, 2 resistors and 9 jumpers for less than 5 minutes. With it you will be able to measure voltage from 0 to 30V (if you exceed it you may damage your arduino !). Lets begin !
Arduino Voltmeter With OLED Display – [Link]
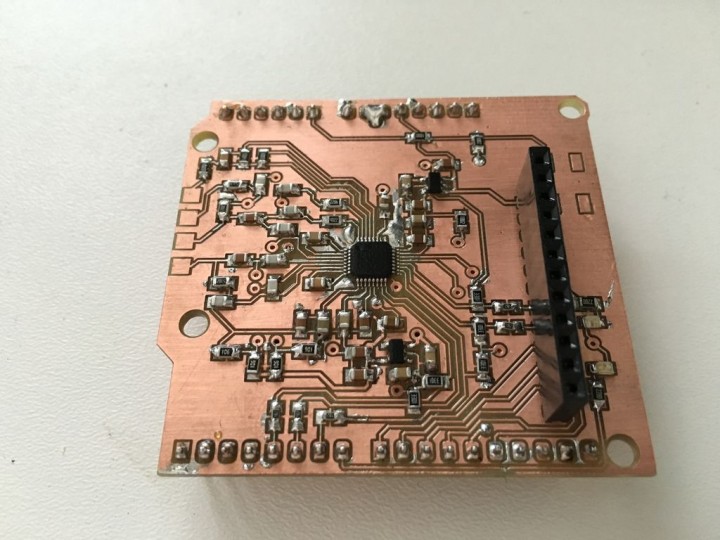
This project is an Arduino shield able to measure ECG and respiration. The shield is equipped with a LCD display to show measured signal in real time. It’s based on ADS1292R ECG Front End from TI.
Recently i made shield for arduino which can measure ECG, respiration, eventually after some changes in PCB and code, EEG and EMG. Big advantage of this shield is possibility to make it easily at home. The shield is equipped by display to show you measured signal real-time.
ECG Arduino Shield – [Link]
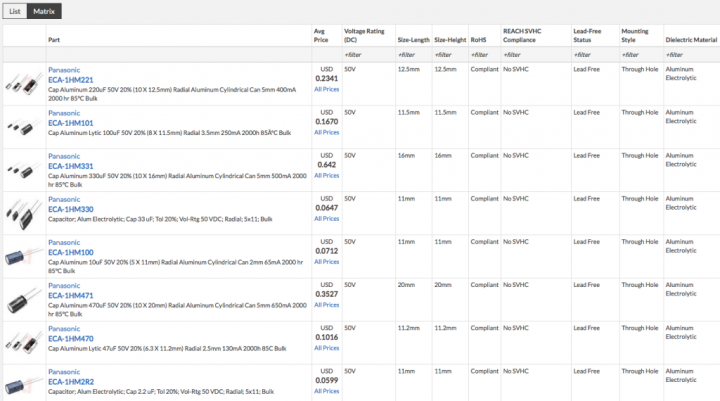
Sanket Gupta @ blog.octopart.com has written a capacitor select guide. The article goes through aluminum electrolytic capacitors, ceramic capacitors, Tantalum Capacitors, mica capacitors, film capacitors and Polymer Capacitors.
In this blog, we will explain all the different types of capacitors, their merits and demerits, and popular applications. We have included some recommendations for commonly used capacitor series with high supply chain availability from Common Parts Library and Seeed Studio’s Open Parts Library
How To Select a Capacitor – [Link]
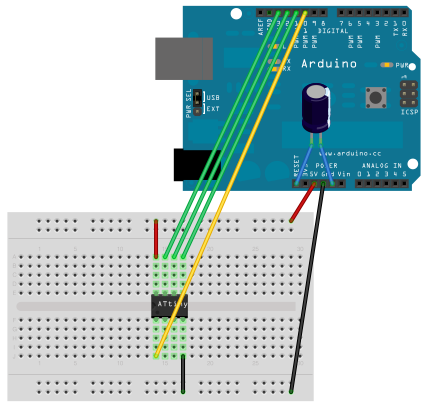
This detailed tutorial shows how to program an ATtiny45, ATtiny85, ATtiny44 or ATtiny84 microcontroller using the Arduino software.
The ATtiny45 or 85 is a great option for running simple Arduino programs: it’s small, cheap and relatively easy to use. It does, however, have some limitations relative to the ATmega328P on an Arduino Uno. There are fewer pins, meaning you can’t connect as many components.
Programming an ATtiny with Arduino board – [Link]
webboggles.com has designed a SSD1306 OLED Screen based game kit using an ATtiny85 microcontroller. They also sell it as a kit to assemble it yourself.
The new snap case has been updated to allow enough height for the screen header as well as a factory made CR2032 battery holder.
The buttons have been concealed to prevent spontaneous button presses inside bags and pockets.
ATtiny85 Game Console – [Link]


