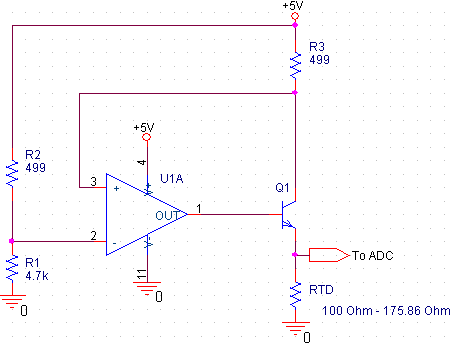
Maurizio @ dev.emcelettronica.com tipped us with his latest article on how to measure Resistance Temperature Detectors over long distances.
There is a multitude of process parameters nowadays that need to be measured in the industrial environment (temperature, pressure, humidity, force etc.). Out of these, undoubtedly the most common one is temperature, as it influences most manufacturing parameters. It is no wonder then that many solutions have been developed over time to measure it. There are a few general categories any industrial temperature sensor will fall into: thermocouples, RTDs (Resistance Temperature Detectors), thermistors and integrated silicon sensors. There is no “best sensor” rather they all have pros and cons which need to be individually evaluated for each application.
Using the camera module with Raspberry Pi is great fun. If you want to add camera capabilities to your Raspberry Pi projects this tutorial is for you!
When I first received my Raspberry Pi, about a month ago, the first thing I wanted to have was this camera module. I have a passion for photography and from the moment I saw this module I came up with many project ideas. It is an impressive little device, it has a resolution of 5Mp for still images and it can record FULL HD video at 30 FPS.
Raspberry Pi Tutorial: Camera Module easy tutorial on a Raspberry Pi A+ – [Link]
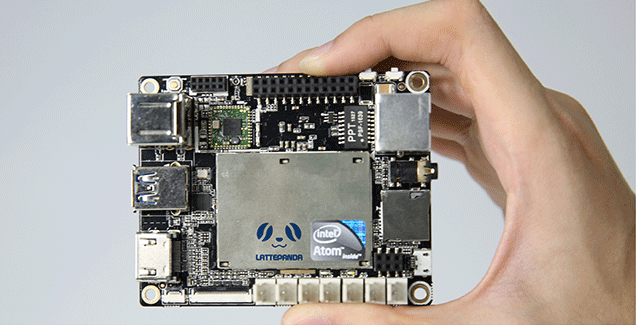
LattePanda is featured with quad-core 1.8Ghz, 2/4G RAM, 32/64 GB eMMC, WIFI, Bluetooth 4.0 and USB 3.0, plus onboard Arduino processor!
It includes everything a regular PC has and can do anything that a regular PC does, all at a low price of 69 USD.
LattePanda runs perfectly on the go. Creating documents with Microsoft Office, playing HD videos and running Windows apps on LattePanda is exactly the same experience as using a regular PC.
LattePanda comes pre-installed with a full edition of Windows 10, including powerful tools such as Visual Studio, NodeJS, Java, Processing, and more!
LattePanda – A £45 Win10 Computer For Everything – [Link]
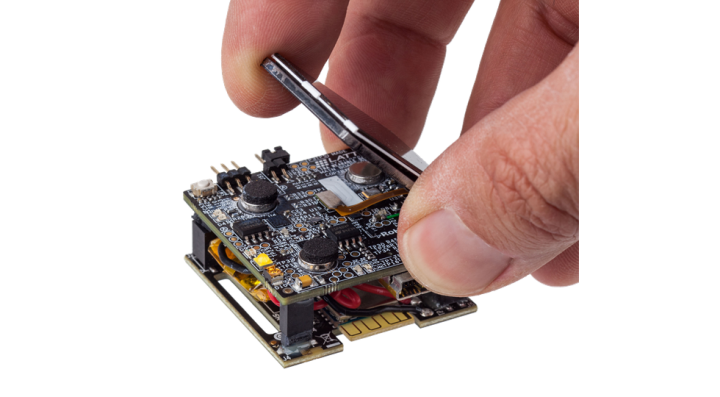
Lattice Semiconductor has introduced their iCE40 Ultra Wearable Development Platform that supports multiple wearable applications.
Portable and easy to use development platform: iCE40 Ultra Wearable Development Platform features iCE40 Ultra FPGA and MachXO2 with sensors and 1.54” LCD display in a compact watch form factor for designers to implement and develop always-on functions for wearable applications. Powered via built-in battery or simple USB mini cable.
Features:
Wearable watch form factor 1.50“ x 1.57“ x 0.87“(WxLxH) with wrist strap*
iCE40 Ultra (iCE5LP-4K-SWG36) in a 36-ball WLCSP package
MachXO2 (LCMXO2-2000ZE-1UWG49) in a 49-ball WLCSP package
LG 1.54” 240×240 Single Lane MIPI DSI Display
Bluetooth Low-Energy Module
Sensors: Heart-rate/SpO2, skin temperature, pressure and accelerometer/Gyroscope
2 user LEDs, RGB LEDs, High-current White LED and High-current IR LED
Stereo MEMs PDM Microphones
32Mb Quad SPI-flash
27MHz Oscillator
Power via built-in 3.7 V, 250mAh Lithium-Polymer Battery or mini-USB cable
FTDI 2232HQ USB device allows programming of FPGA and Flash and UART interface to a PC
iCE40 Ultra Wearable Development Platform – [Link]
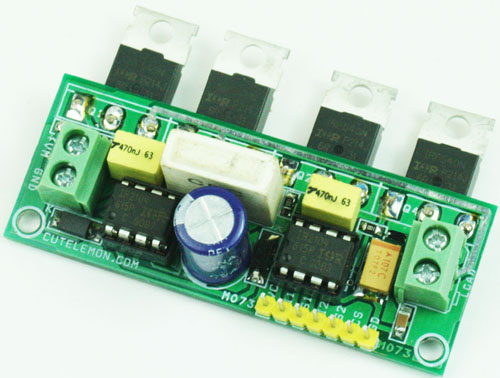
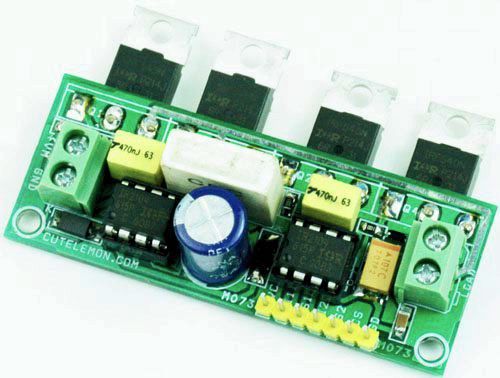
H-Bridge has been designed around IR2104 IC from international Rectifier. The board has been made mainly for DC-Motor application. The driver can handle load up to 8-10Amps. I have tested this board with 36V DC supply . The circuit uses N Channel IR540 MOSFETS from international rectifier. IR540 requires large heat sink for 10Amps load. Board has shunt resistor to provide voltage proportional to current flowing through load. This can be later amplify and connect it to microcontroller.
Features
Motor DC Supply 36V DC (Screw Terminal Connector)
Logic Supply 12V DC
Load 8-10Amps (Screw Terminal Connector)
Header Connector for Inputs (7 Pin Header Connector)
H-Bridge has been designed around IR2104 IC from International Rectifier. The board has been made mainly for DC-Motor applications. The driver can handle a load up to 8-10Amps. I have tested this board with 36V DC supply . The circuit also uses N Channel IR540 MOSFETS from International rectifier. IR540 requires large heat sink for 10Amps load. Board has shunt resistor to provide voltage proportional to current flowing through load. This can be later amplified and read from microcontroller ADC. This H-bridge can be used to control DC Motor speed and direction, DC-DC Converters, HMI lamp driver etc.
Features
Motor DC Supply 36V DC (Screw Terminal Connector)
Logic Supply 12V DC
Load 8-10Amps (Screw Terminal Connector)
Header Connector for Inputs (7 Pin Header Connector)
On Board Shunt Resistor for Current feedback
PWM Frequency 10 to 20 KHz
Duty Cycle 0-99%
Logic Pins support 3.3V, 5V, 12V (Inputs and PWM)
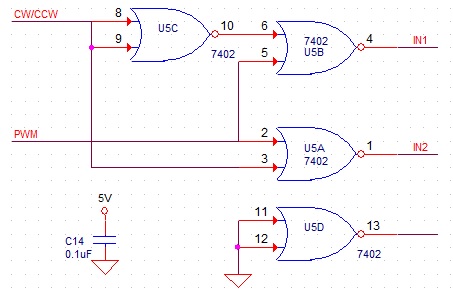
Schematic
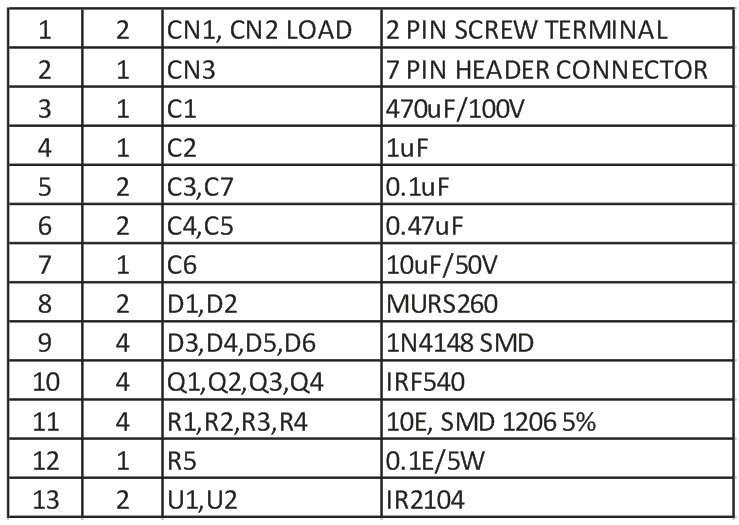
Parts List
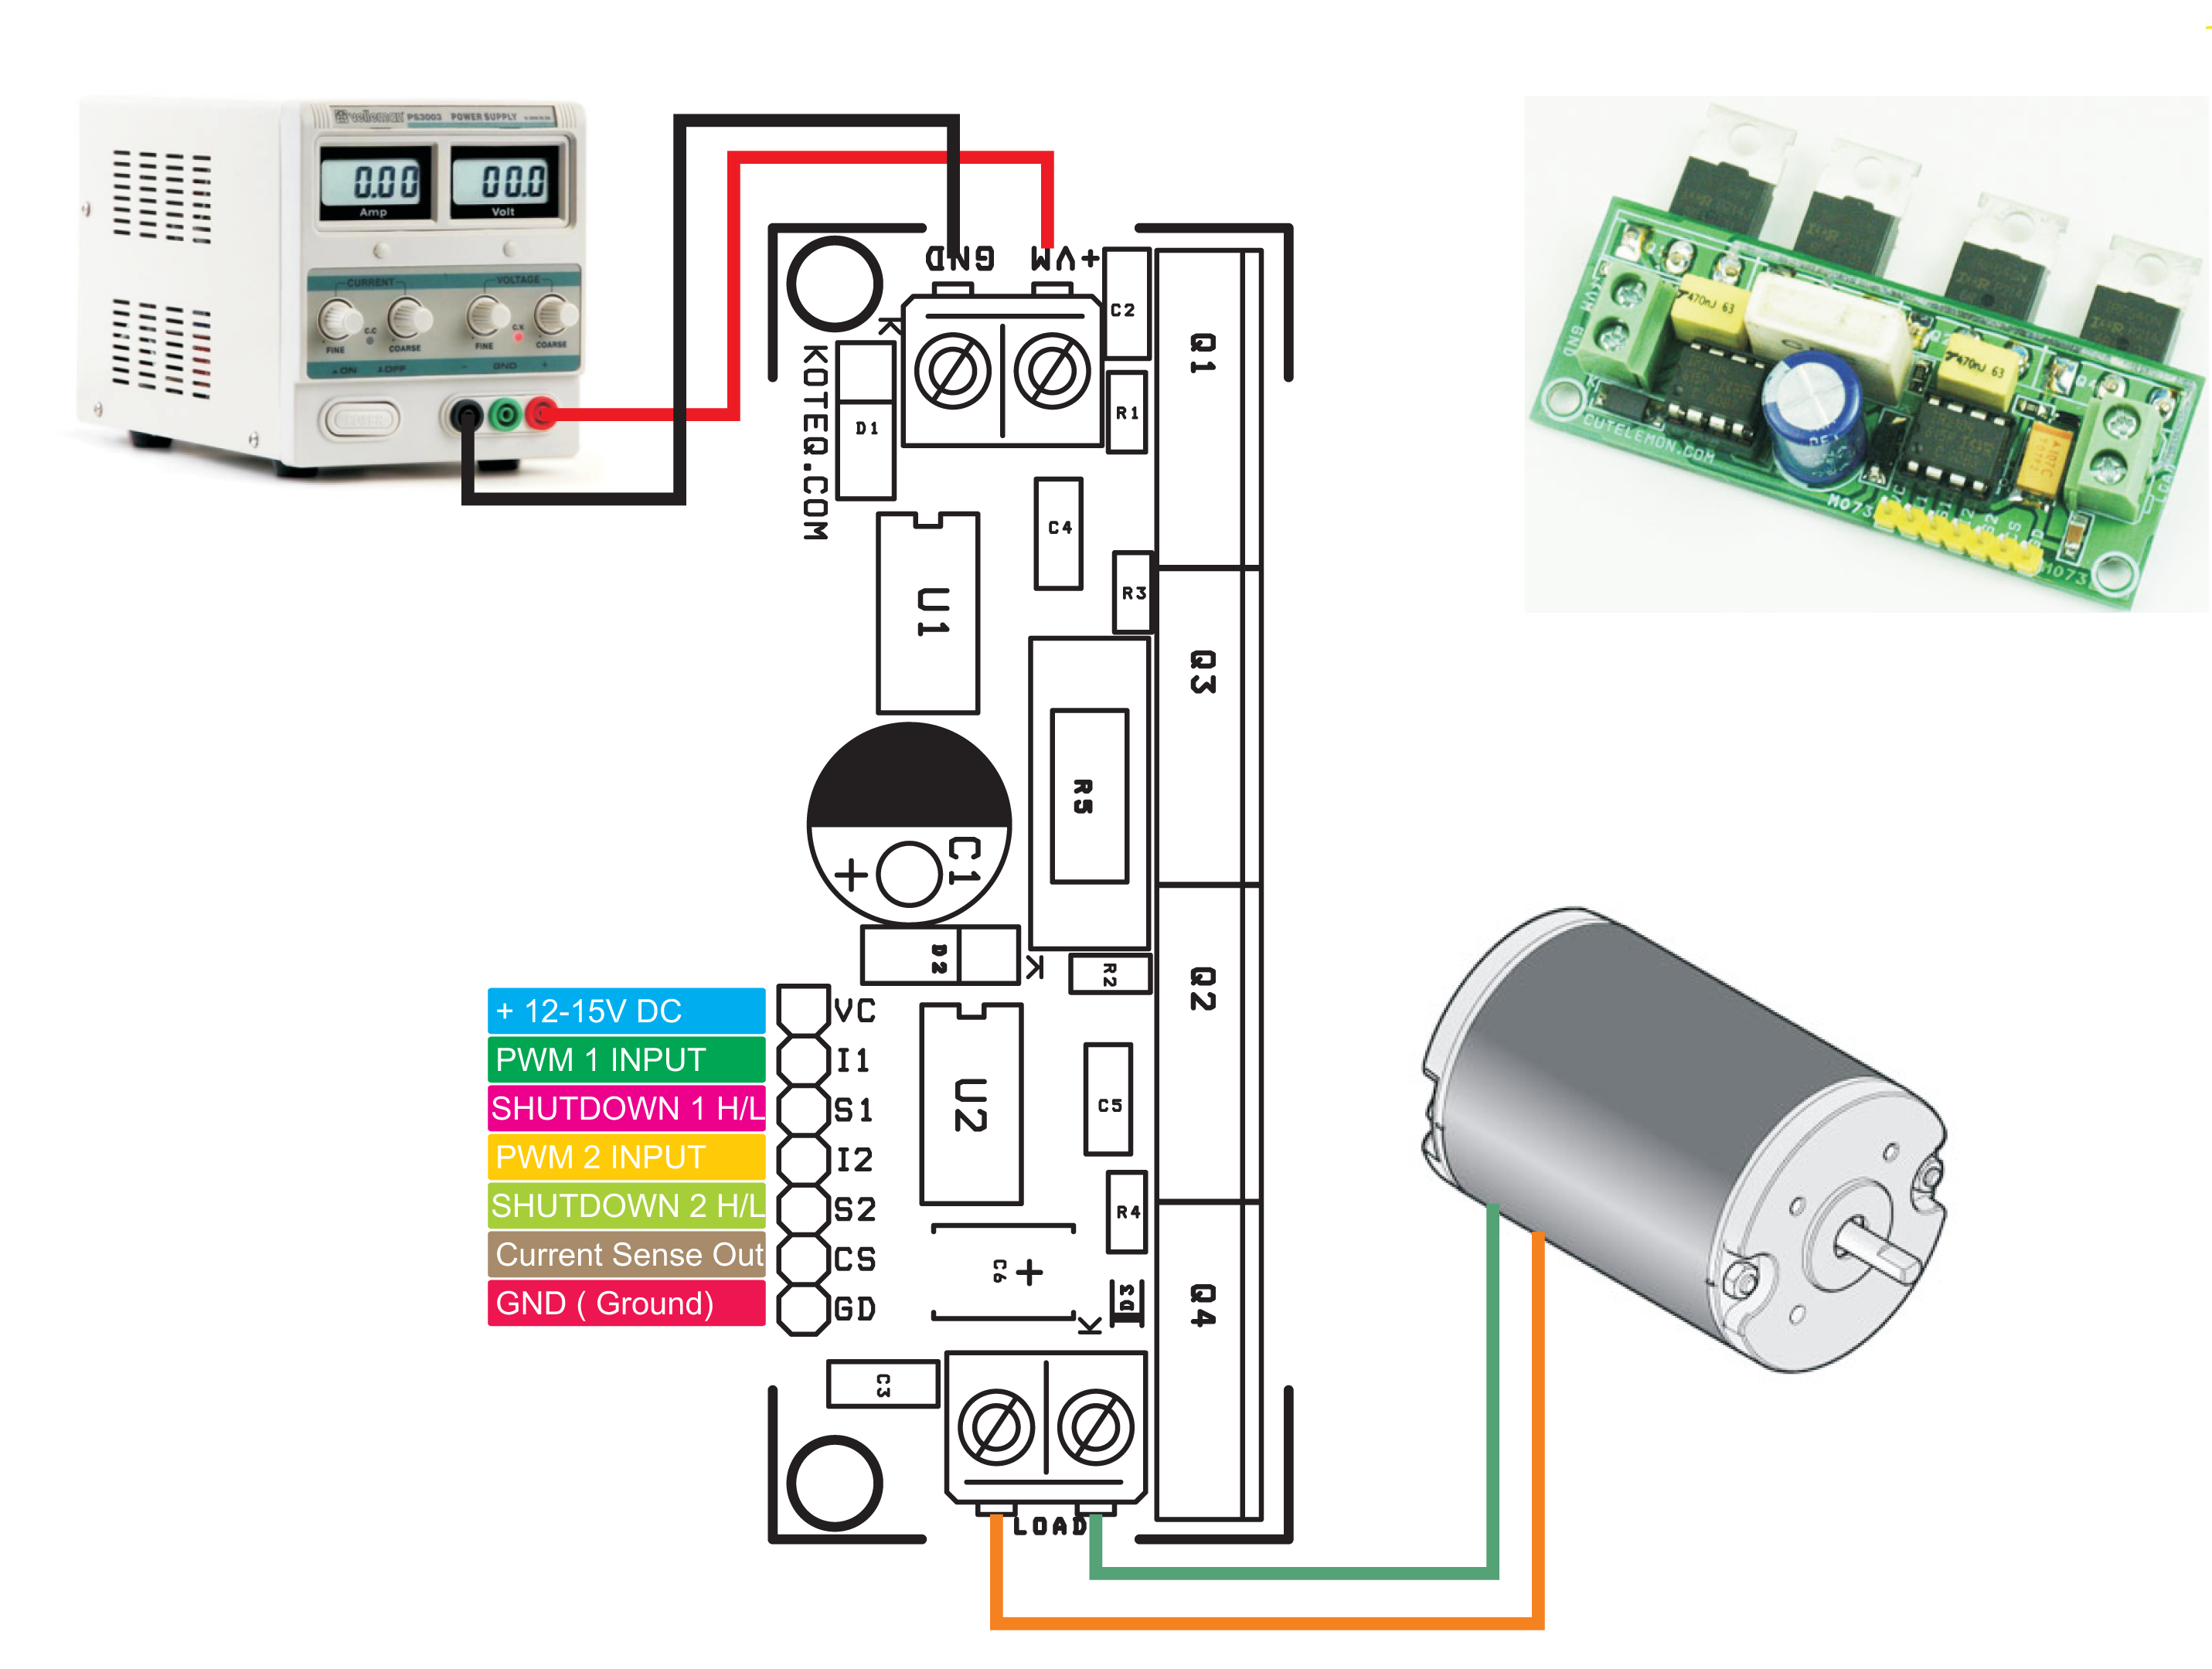
Connection Diagram / Waveforms
To drive the H-Bridge you will need a microcontroller or Arduino board to produce a PWM wave with frequency 20Khz and adjustable 0-99% Duty Cycle.
PWM Control Waveforms
For Forwarding Direction Operation:
IN1 Requires High PWM
IN2 Requires Low PWM
For Reverse Direction Operation:
IN1 Requires Low PWM
IN2 Requires High PWM
For Standalone use you will need a PWM Generator and pulse sequencer circuit, please find attached sequencer circuit.
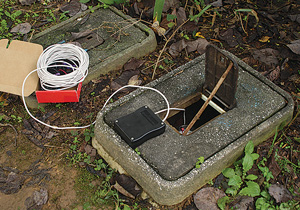
David Schneider @ spectrum.ieee.org shows us how to watch over your water usage using an Arduino and a Raspberry Pi. He writes:
California, where I once lived, is in the midst of a severe drought. Thankfully, I now reside in North Carolina, a much wetter state. But even here there have been years when water was in short supply and people were asked to conserve.
Build a Wireless Water Meter for Your Home – [Link]
This Design Idea mates a precision current source IC with precision difference amp chips to create a programmable current source or sink.
The resistor-programmable current source/sink in Figure 1 illustrates the basic topology, taking advantage of tightly matched on-chip resistor ratios instead of relying on absolute tolerances.
Precision programmable current source uses two ICs – [Link]
The DM320018 PIC32 bluetooth starter kit comes with demonstration code that allows it to communicate with smart devices that are bluetooth enabled. It features the PIC32MX270F256D MCU for central processing and the FLC-BTM805 dual-mode Bluetooth HCI module. The kit also contains Cree high output multi-color LED, three standard single color LEDs for display, five push buttons for user defined inputs, integrated 3-axis accelerometer and temperature sensor for applications intended by the user.
The development board in this starter kit has the PIC32MX270F256D microcontroller as its main component. All peripherals found in this development board are attached in the PIC32MX270F256D microcontroller. One of the peripherals is the low cost FLC-BTM805 bluetooth HCI module which allows devices to transmit or receive data from the microcontroller. The bluetooth module supports BT2.1 and later that has an HCI interface. It also supports Enhanced Data Rate (EDR) and can communicate with a data rate up to 3Mbps. Other peripherals just like the switches, LEDs, 3D accelerometer, temperature sensor, etc. are used for application development purposes.
The development board can run in three modes; host mode, device mode, and debugging mode. To operate in host mode, connect the device to the Type-A connector, port J1. To switch into device mode, connect the board to the host through port J2. The starter kit includes a PIC24FJ256GB106 USB microcontroller for debugging over USB. To select this mode, connect the starter kit to port J7. The board in this starter kit can be powered by connecting USB power to port J7 or apply VBUS (+5V) power to the micro-B USB connector found in the board.