Basic Types of Thyristors and Applications

In this article we will discuss about the various types of thyristors. Thyristors are 2 pin to 4 pin semiconductor devices that act like switches. For example a 2 pin thyristor only conducts when the voltage across its pins exceeds the breakdown voltage of the device. For a 3 pin thyristor the current path is controlled by the third pin and when a voltage or current is applied to this pin the thyristor conducts. In contrast to trasistors, thyristors only work on ON and OFF states and there is no partial conduction state between these two states. Basic types of thyristors are: SCR, SCS, Triac, Four-layer diode and Diac.

Silicon Controlled Rectifier (SCR)

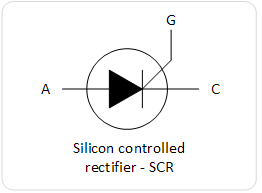
SCR

Silicon controlled rectifier is normally in OFF state but when a small current enters its gate G it goes to ON state. If the gate current is removed the SCR remains in ON state and to turn it of the anode to cathode current must be removed or the anode must be set to a negative voltage in relation to cathode. The current only flows in one direction from anode to cathode. SCRs are used in switching circuits, phase control circuits, inverting circuits etc.

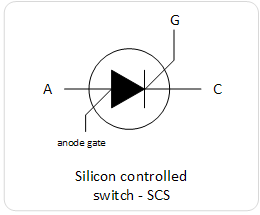
Silicon Controlled Switch (SCS)

SCS

Working of SCS is similar to SCR but also it can be turned off by applying a positive pulse on the anode gate. The SCS can also turned ON by applying a negative pulse on anode gate. The current flows only from anode to cathode. SCS are used in counters, lamp drivers, logic circuits etc.

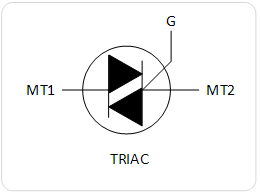
Triac

triac

Triac is similar to SCR but it conducts in both directions, means that it can switch AC and DC currents. The triac remain in ON state only when there is current in gate G and switched OFF when this current is removed. Current is flowing in both directions between MT1 and MT2.

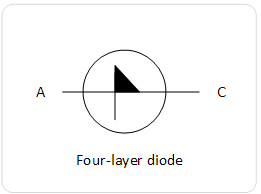
Four layer diode

four_layer_diode

Four layer diode has 2 pins and works like a voltage-sensitive switch. When the voltage between the two pins exceeds the breakdown voltage it turns ON, otherwise it’s OFF. Current flows from anode to cathode.

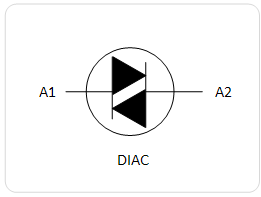
Diac

diac

Diac is similar to four-layer diode but it can conduct in both directions meaning it can contact both AC and DC currents.

Basic SCR Applications

Basic Latching Circuit

latching_circuit

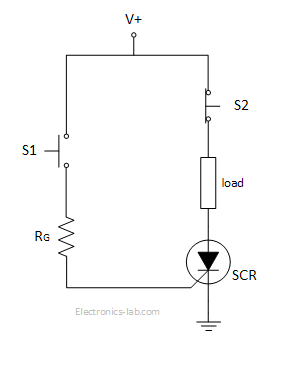
In this circuit a SCR is used to form a basic latching circuit. S1 is a normally open switch and S2 is a normally close switch. When S1 is pushed momentary a small current goes into the gate of SCR and turning it ON, thus powering the load. To turn it off we have to push the S2 push-button so the current through SCR stops. Resistor RG is used to set the gate voltage of SCR.

Power Control Circuit

scr_power_control

In this circuit a SCR is used to modify a sinusoidal signal so that the load receives less power than of what would receive if source voltage was applied directly. The sinusoidal signal is applied to the gate of SCR via R1. When the voltage on the gate exceeds the trigger voltage of SCR, it goes to ON state and Vs is applied to the load. During the negative portion of the sine wave the SCR is in OFF state. Increasing R1 has the effect of decreasing the voltage applied to the gate of SCR and thus creating a lag in the conduction time. In this was the load is receiving power for less time and thus the average power to load is lower.

DC motor Speed Controller

dc_motor_control

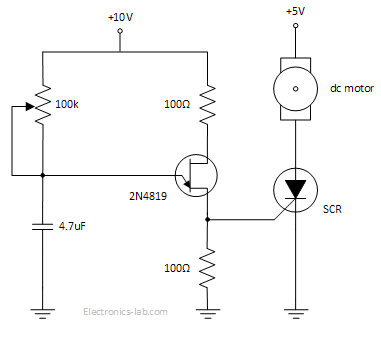
This is a variable speed DC motor controller using a UJT, a SCR and few passive components. UJT along with resistors and capacitor form an oscillator that supplies AC voltage to the gate of SCR. When the gate voltage exceeds the triggering voltage of SCR, the SCR turns ON and motor is running. By adjusting the potentiometer the output frequency of oscillator is changing and thus the times the SCR triggered is changing, which in turn changes the speed of the motor. In this way the motor is receiving a series of pulses that average over time and the speed is adjusted.

Basic TRIAC Applications

AC Light Dimmer

ac_light_dimmer

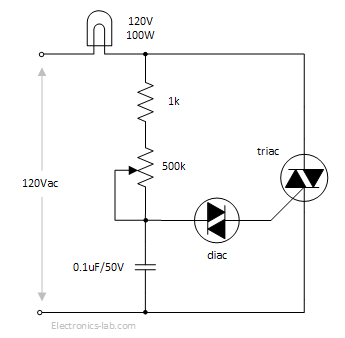
This is an AC light dimmer formed by a diac, a triac and some passive components. The capacitor is charging through the two resistors and when the voltage on one end of the diac exceeds the breakdown voltage it goes ON and sends a current to the gate of triac putting the triac to ON state and thus powering the lamp. After the capacitor is discharged to a voltage below the breakdown voltage of diac, the diac, triac and lamp turn off. Then the capacitor is charged again and so on. So the lamp is only powered for a fraction of time during the full sinewave. This happens very quickly and the lamp seems dimmed. Brightness is adjusted using the potentiometer.

Don’t be afraid of heatsinks modifications

obr1764_uvod

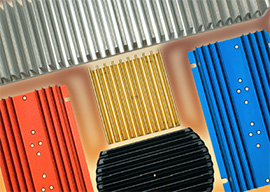
If you´d like to use some of standard heatsink profiles, but you need for example an extra opening, we´ll supply it to you customized according to your needs.

Perhaps everyone of us is familiar with a sentence mentioned in various catalogues, á la “upon request we can supply you a customized version”. Naturally that sounds good, but sometimes it is associated with a significantly higher price or with a considerable minimum order quantity (MOQ). That´s why we don´t want to generalize, as every producers behaves differently, but we´d rather like to mention one concrete example – on a heatsink.Aluminium heatsinks certainly belong to a group of components, where a small mechanical modification is very often required. Length, openings, threads, milled ribs,… In fact a small modification, which can make a production of your device significantly easier is available for a quite affordable charge. For example drilling of two openings upon request plus 2x M2,5 threads into some of standard heatsinks costs approx. 0.6-1 Eur, already at 50 pcs order (depending on a producer and a heatsink type).

In case, you don´t have a precise CNC equipment for accurate work with metals ( what´s perhaps the status of majority of small and mid-size companies), a possibility to get such a custom-modified heatsink is usually highly welcome. Maybe it´s worth mentioning, that it´s not about drilling of openings “somewhere” on a heatsink with a questionable position and accuracy, but a quite precise CNC operation.
Small price difference is usually acceptable for every product and you – as a producer – are relieved of further complications with a mechanical modification “in house” or at your local companies.

That´s why, next time you´ll face a question, how to modify a given heatsink, let us know – maybe you´ll be pleasantly surprised.


Don’t be afraid of heatsinks modifications – [Link]

How to Set Up the DHT11 Humidity Sensor on an Arduino

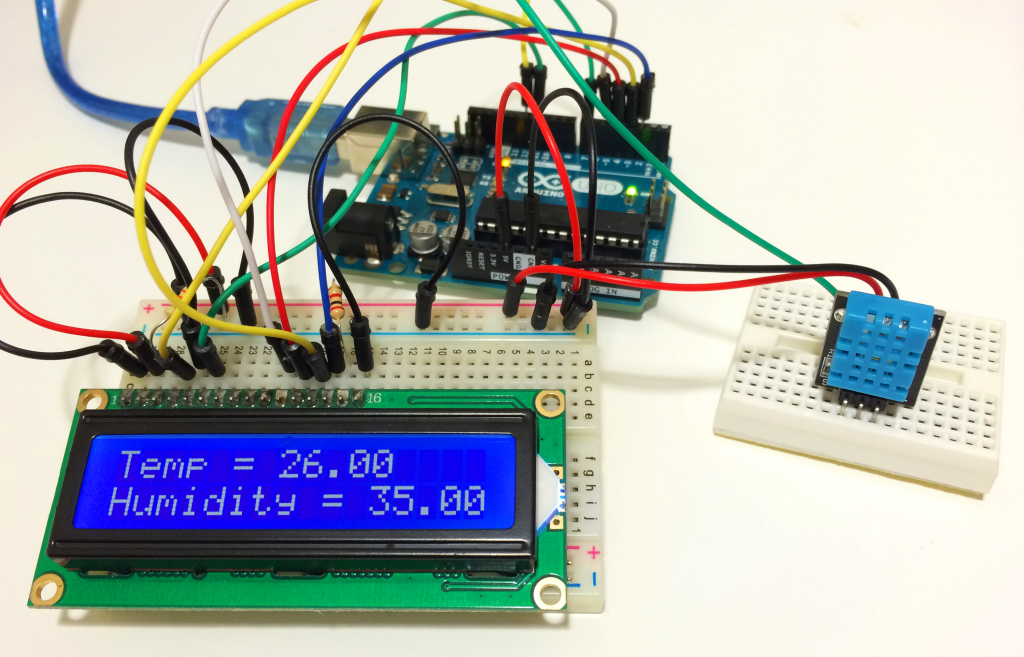
Arduino-DHT11-Humidity-and-Temperature-Sensor-With-LCD-Output

by circuitbasics.com:

Because of their low cost and small size, DHT11 humidity and temperature sensors are perfect for lots of different DIY electronics projects. Some projects where the DHT11 would be useful include remote weather stations, home environment control systems, and agricultural/garden monitoring systems. The DHT11 is a digital sensor that lets you easily get relative humidity and temperature readings in your projects. In this post, I’ll first go into a little background on what humidity is, then I’ll explain how the DHT11 measures humidity. After that, I’ll show you how to connect the DHT11 to the Arduino and give you some example code so you can use the DHT11 in your own projects.

How to Set Up the DHT11 Humidity Sensor on an Arduino – [Link]

Signal Generation with MATLAB. Example of DTMF in telephony

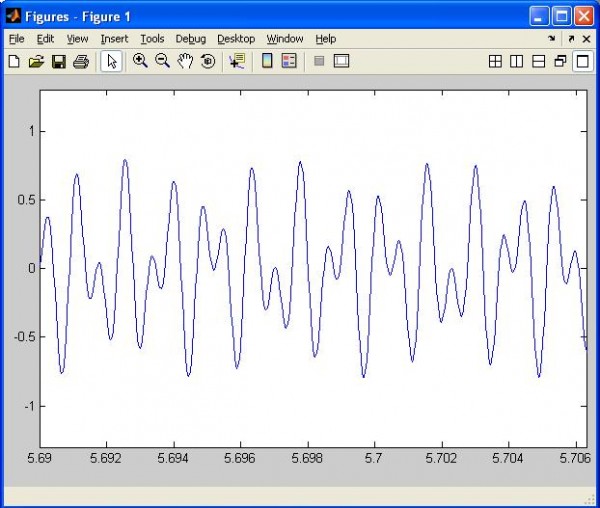
generatore_di_segnale_mediante_grafico2

by  Maurizio @ dev.emcelettronica.com:

In mathematics a signal is a real function of a real variable f(t). In electronics it represents the evolution of a voltage (or a current) over the time and depends on the performances of the stage of the amplifier. Through a memory buffer, samples move to a digital-to-analog converter that produces a voltage signal, after an amplification stage that can limit the generation of the signal. A possible analysis consists of use Matlab with a PC sound card and an example of DTMF.

Signal Generation with MATLAB. Example of DTMF in telephony – [Link]

Adding Sensors to Monitor Hive Health

bees

by Nathan Seidle @ makezine.com:

The Digital Beehive uses Wi-Fi to broadcast a beehive’s weight, humidity, temperature, and battery voltage every minute to SparkFun’s data channel service called Phant. The raw data can be seen here but you can view some prettier graphs of the data here on analog.io (sign-in required).

Adding Sensors to Monitor Hive Health – [Link]

Not a battery, not a cap: Murata’s small energy [storage] device

151001edne-murata-umac_pr_rev1.3

by Graham Prophet @ edn-europe.com:

To meet what the company sees as a gap in the available range of energy storage solutions, Murata has developed the UMAC, a small, high-capacity cylinder-type energy device for use in wearable and wireless sensor applications. Although lithium-ion based, Murata differentiates it from a battery.

The UMAC is a miniature device with a high energy storage capacity, low internal resistance, fast charging and discharging and the ability to withstand load fluctuations. It may be used as a secondary battery in the same way as a capacitor. The UMAC achieves better charge/discharge characteristics and has an extended cycle life superior to conventional batteries. Suited for use as a power supply for wearable devices or sensor nodes for wireless sensor networks, the UMAC maintains flat voltage characteristics while accommodating a wide range of load characteristics.

Not a battery, not a cap: Murata’s small energy [storage] device – [Link]

Logic PCB Business Card

IMG_1224

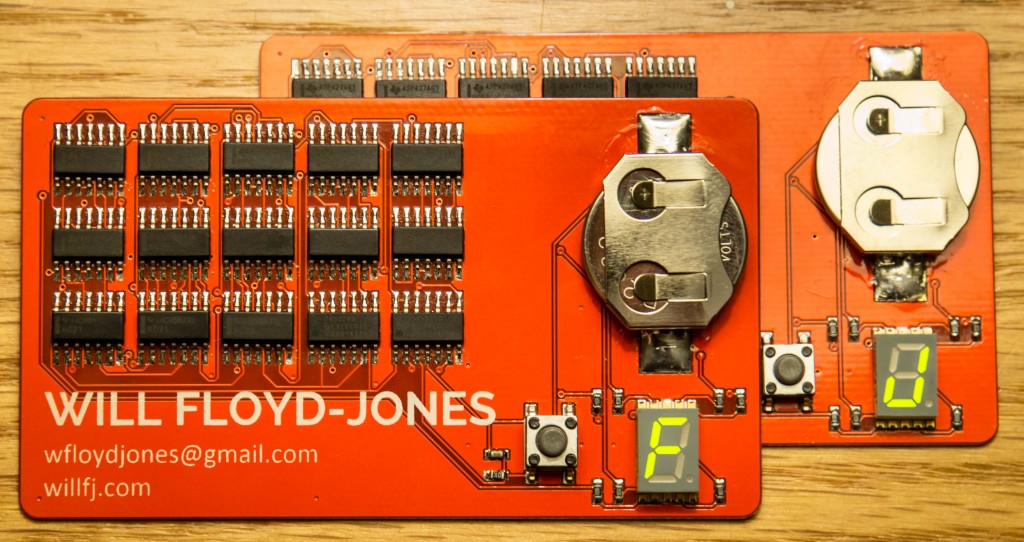
Floyd-Jones designed his own business card using logic circuitry. He writes:

The card implements a digital finite-state machine which displays the next character of my last name on a 7-segment display each time the button is pressed. Luckily all 11 characters in my name can be reasonably shown, essentially spelling out FLoyd-JonES. I simulated the design in Altera’s Quartus II FPGA software before constructing it in Eagle.

Logic PCB Business Card – [Link]

Arduino WiFi Shield 101 is on sale

thumbnail-e1443034979113

by Zoe Romano @ blog.arduino.cc:

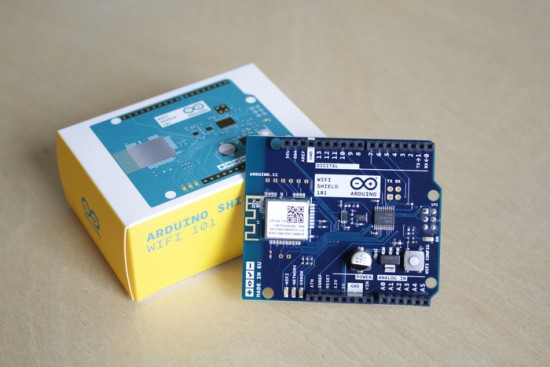
We are excited to announce that Arduino Wifi Shield 101 developed with Atmel is now available for purchase on the Arduino Store US (49.90$).

Arduino WiFi Shield 101 is a powerful IoT shield with crypto-authentication that connects your Arduino or Genuino board to the internet wirelessly. Connecting it to a WiFi network is simple, no further configuration in addition to the SSID and the password are required. The WiFI library allows you to write sketches which connect to the internet using the shield.

Arduino WiFi Shield 101 is on sale – [Link]

JIGMOD Electronic Circuit Building System

JIGMOD

Succeed with your Innovations by building reliable, high quality electronic circuits. by JIGMOD:

Most electronic components aren’t compatible with breadboards. JIGMOD bridges the gap between those components and your breadboard.
Don’t work hard – work smart! Avoid wasted time spent debugging and troubleshooting.
Be amongst the first to use this revolutionary development platform.
Develop circuits with high quality, reliable results every time
Satisfy your curiosity easily
Succeed in your innovations
Maximize your ability to test and demonstrate your circuits

JIGMOD Electronic Circuit Building System – [Link]

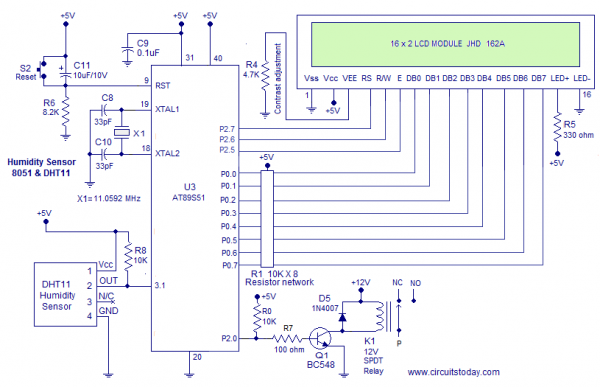
Humidity sensor using 8051

humidity-sensor

by circuitstoday.com:

This project is about a simple humidity sensor based on 8051 microcontroller. Humidity sensor is also called hygrometer. This circuit can sense relative humidity (RH) from 20% to 95% at an accuracy of 5%. The humidity information is displayed on a 16×2 LCD display. A relay is also provided which is set to be active when the humidity crosses a certain trip point. The circuit is mains operated and it is very easy to install. DHT11 is the humidity sensor used here. The details and working of the DHT11 humidity sensor is given below.

Humidity sensor using 8051 – [Link]

TOP PCB Companies