Cloom Published a new Article: “Wiring Harness: The Ultimate Custom Guide”

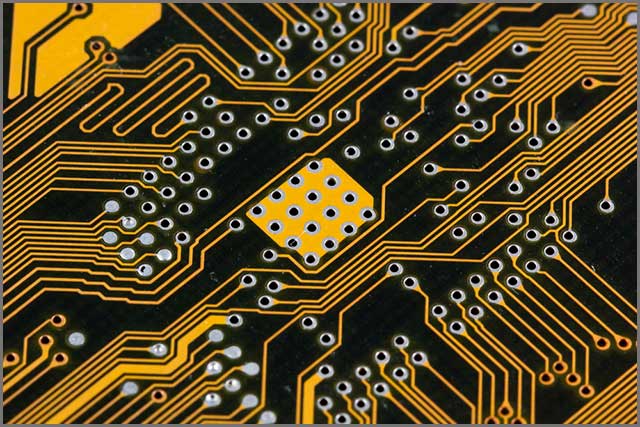
Cloom, a reliable wire harness, and cable assemblies manufacturer, today published a “Wiring Harness: The Ultimate Custom Guide.” It has eight chapters that cover some useful terms about Wiring Harness knowledge.

The publication is available here for free. This guide sheds insightful light on these Wiring Harness properties.

“The Cloom R&D team adapts quickly to the changing market needs. The R&D team helps customers in developing the design, advising on the material, developing new products, and ensuring that the essential requirements for ROHS, REACH and halogen-free for wiring harnesses are met,” said Mr. Hommer, General manager of Cloom.

Among the key subjects on this Wiring Harness include:

  1. Everything you should know about a Wiring Harness: This section briefly introduces everything you should know about a Wiring Harness.
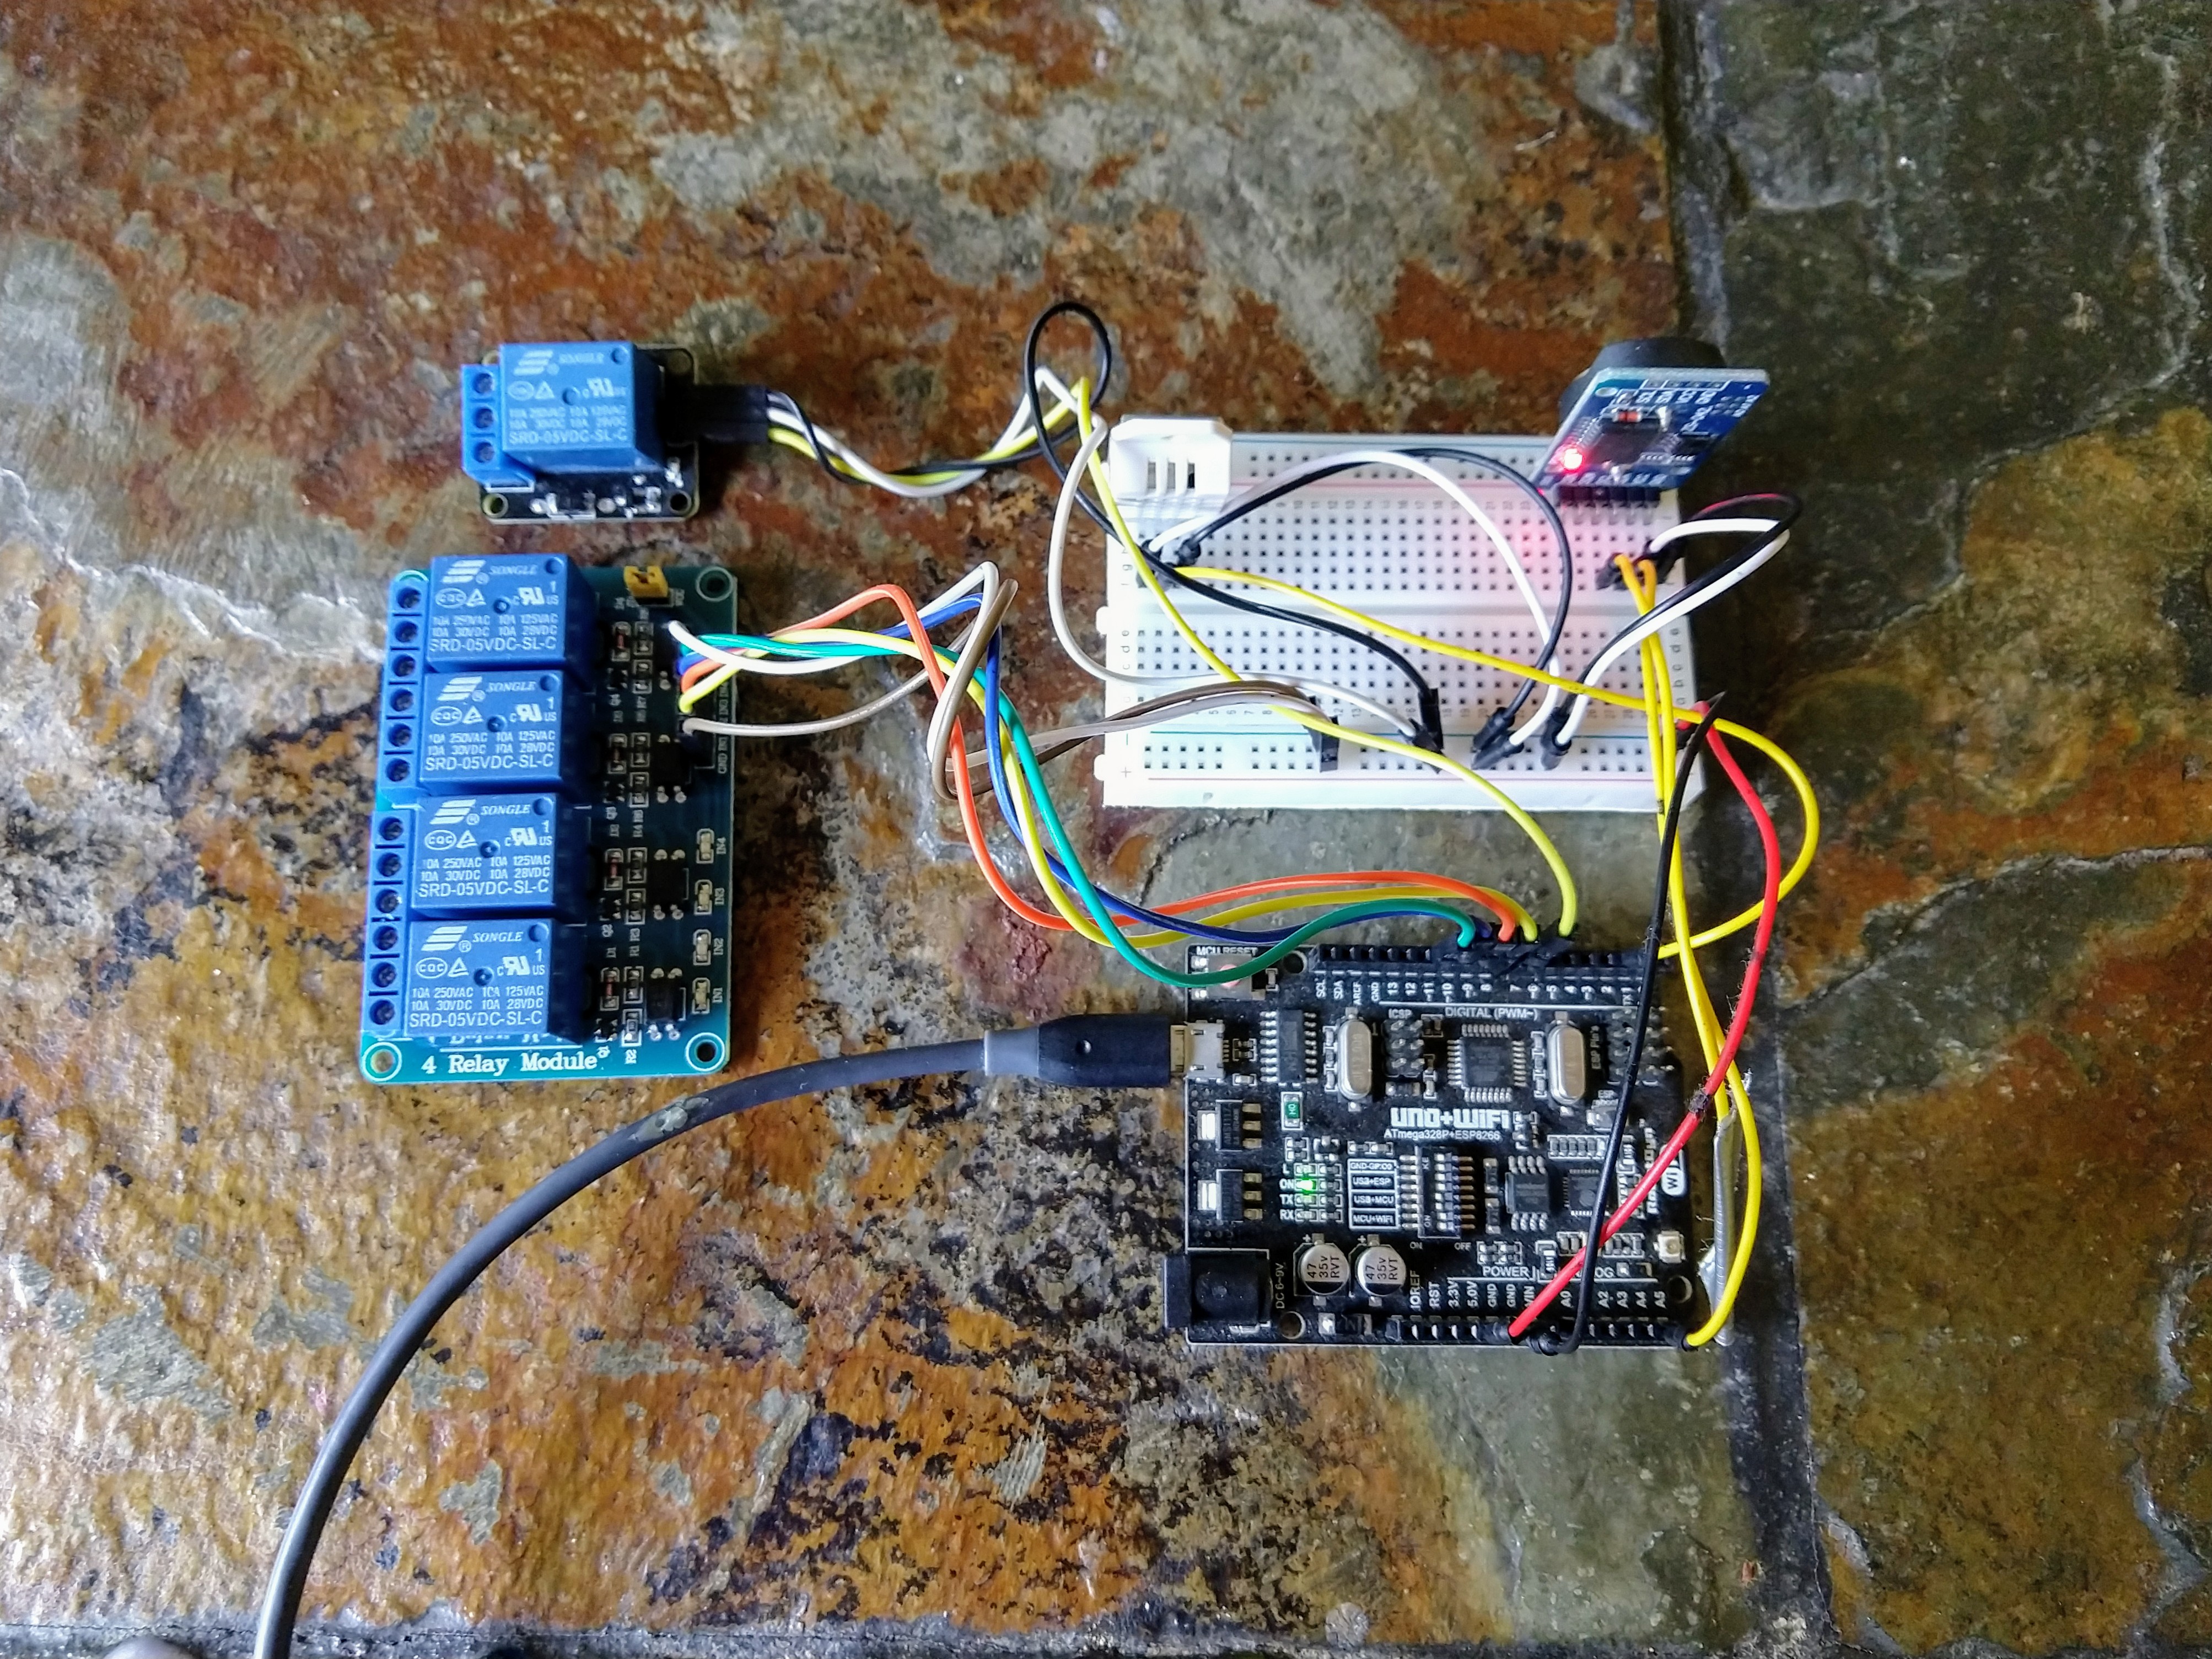
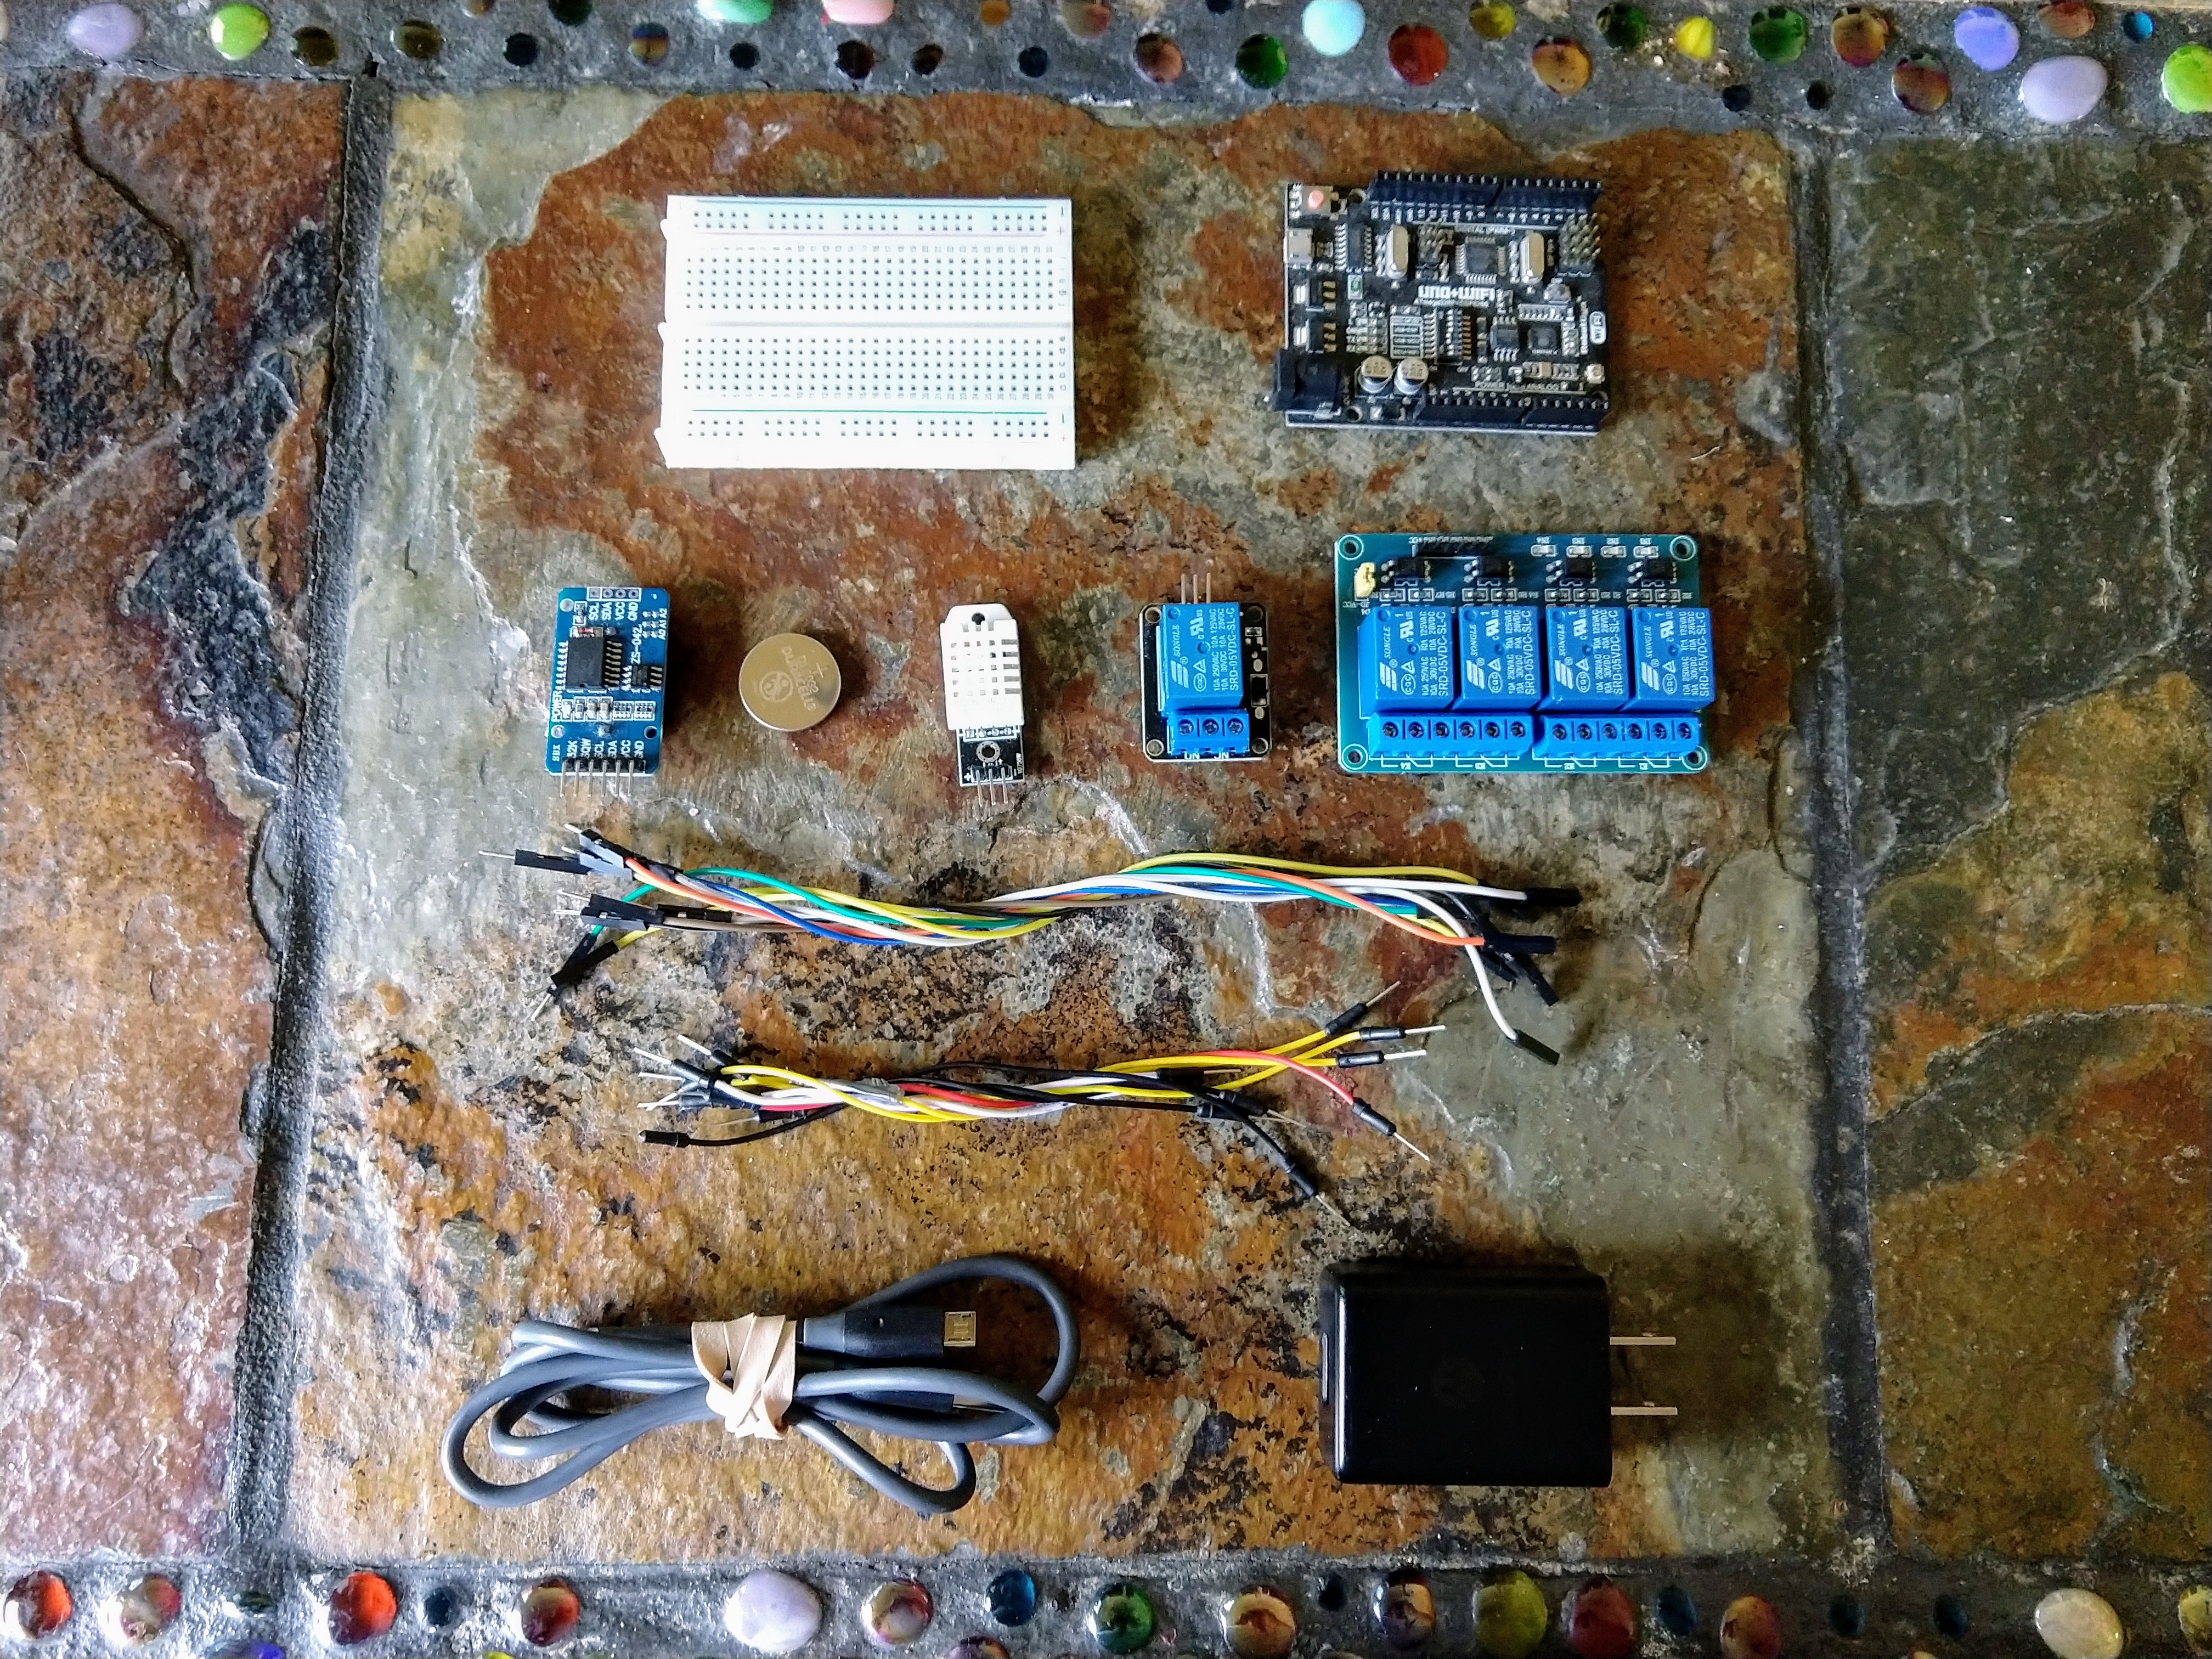
  2. Things you need to make your custom Wiring Harness: Before making your custom wiring harness, the first and most important thing to have is a design or wiring diagram. And the following tools are needed in making a wiring harness: Wire Cutter, Wire Stripper, Crimping Plier/Ratcheting Crimpers, Heat Gun, Multimeter, Heat shrink, Wires, Terminals, and Zip Ties.
  3. How to use a wiring harness diagram: The circuit design/diagram is very foundational to make a custom wiring harness successfully. Ideally, every cable harness circuit diagram will have the following: Symbolized components, Optimum positioning, Splice positions, and Wire colors.
  4. Types of Wiring Harness: Two major factors determine the type of wire harness to make. Firstly, the application, secondly, the environment. Based on these two factors, there are three types of cable harness that you can make. They include the Open Bundle, Closed Bundle, and Waterproof harnesses.
  5. How to custom Trailer Wiring Harness: This chapter describes the steps for custom Trailer Wiring Harness in detail.
  6. How to make custom Stereo Wiring Harness: This chapter describes the steps for custom Stereo Wiring Harness in detail.
  7. How to make custom Engine Wiring Harness: This chapter describes the steps for custom Engine Wiring Harness in detail.
  8. How we Custom Wiring Harness in Cloom: This section describes our design experts follow the following steps meticulously at customizing a wiring harness to suit your applications.

Also, Worth the read, right? We hope you can now boldly say I’m a wiring harness professional. We have more than adequate experience in Electronics wiring harnesses, Power cables, Signal wiring harness, and Automobile wiring harnesses. You can send us an inquiry for the custom wiring harness you need, and we’d reach you promptly.

About Cloom

Cloom is one among the excellent wire harness service companies, covering Electronics wiring harness, Power cable, Signal wiring harness, Automobile wiring harness. Its covers include the value-added business of Wire harness production, assembling, custom design, and most efficient delivery route.

From Prototype, you are developing the design, production, packing, and delivery, Cloom will the one point sourcing. You are welcome to contact Cloom for the cost-effective wiring harness and assembly design and service!

Media Contact

OurPCB Published a new Article: “How to choose PCB substrate material”

High tech electronic PCB (Printed circuit board) with processor and microchips. 3d illustration

SHIJIAZHUANG, China, July 11, 2019 (Newswire.com) –OurPCB, a multi-national PCB Manufacturing, and PCB Assembly company,

The publication is available on the https://www.ourpcb.com/pcb-substrate-material.html section of the company’s website for free.

It has six chapters that cover every detail about PCB Substrate Material.

Among the key subjects on PCB Substrate Material include:

  1. Copper Foil Requirements: This section gives a brief overview of the application of line spacing (S) and line width (L) in HDI PCB boards, and the effect of surface roughness on the quality of the PCB.
  2. Insulating Dielectric Laminates: This section mainly describes the MAPA and SAP technologies used in insulating dielectric laminates and the importance of laminated dielectric materials to SAP.
  3. Why High Speed and High Frequency Are Important for Your PCB: This section provides an in-depth overview of the reasons why high speed and high frequency are essential to PCBs. It also describes the types of substrate materials that can use for high-frequency PCB types: Fluorine- Series resin, PPO or PPE resin, Modified epoxy resin.
  4. Thermal Requirements of PCBs: This section details the PCB substrate material is the key to handling heat dissipation and resistance. The best choice for thermal conductivity is aluminum.
  5. How to Choose PCB Substrate Materials: For Rigid, Flexible, Flex-rigid, how to choose the best substrate material for these three types of PCB.
  6. Where to Manufacture PCBs?: The advantages of OurPCB in this section are: selecting the required board type, custom order, simple ordering process

Finally, the focus of this article is to let you understand Choosing the right PCB substrate material can significantly affect board performance, durability, and other characteristics.

About OurPCB

OurPCB is a multi-national PCB Manufacturing and PCB Assembly company that provides Global service and support while utilizing its Chinese manufacturing capabilities.

Our Assembly factory has received ISO9001 certification. For bare PCB manufacturing, we also received ISO and UL certifications.

Media Contact

  • Contact Person: Hommer Zhao (General Manager)
  • Email: sales@ourpcb.com
  • Tel: +86-311-85981900
  • Website: https://www.ourpcb.com

AOPEN DE5500 – SFF PC features 7th generation Intel® Core

The Digital Engine DE5500 is supported by the 7th generation Intel® Core(available in i3, i5 and i7). It consumes little power due to the of this mobile processor. It supports a DDR4 dual channel memory with a maximum capacity of 32GB. The standard Digital Engine small form factor can easily be integrated into a kiosk or behind a screen for a digital signage application. Furthermore, the latest AOPEN intelligent Control Unit (AiCU) is optional. This feature provides an easy management tool that can monitor and control the device.

Small form factor

This form factor ensures an easy integration into kiosks or behind screens. The AOPEN small form factor is a standard that is used for Digital Engine (DE) models. The size of our Digital Engine series is set to maximum 166x48x177 mm. Its width set to 166 mm. Do the math and you will see that a Digital Engine is an investment that will last, even after replacing the item in a kiosk or mount that already exists.

Trusted Platform Module 2.0

The TPM is a dedicated micro controller, designed to secure hardware through integrated cryptographic keys. This means the data on your hard drive will be encrypted to ensure your data is safe, even when your device gets stolen.

Intel Core-i Desktop platform

The DEX5550 and the DE5550 are both based on the Intel Core-I platform. More specifically, on the 6th generation Kaby Lake platform technology. These computing devices are available in i3, i5 and i7, and therefore in different SKU’s.

Integrated HEVC/H.265 10bit codec

These units support native hardware decoding for modern codecs like the HEVC/H265 10 bit. Offloading the CPU, the GPU handles the decoding of the video. This creates a fluent playback up to 60fps.

More information

No pricing or availability information was provided for the Digital Engine DE5500. More information may be found in the DE5500 announcement and product page.

Norman – Arduino Library for climatic simulation of natural daylight, temperature, and humidity cycles

Norman is a climatic simulation library designed to run on an Arduino Uno for indoor and greenhouse automation projects. Arduino Library for mathematical climatic simulation of natural daylight, temperature, and humidity cycles using minimal data sets.

Given a set of parameters for a target locale, the library returns values for temperature, dew point, Relative Humidity, and daylight cycles (using the Dusk2Dawn library by DM Kishi). Because the library operates on mathematical projections instead of live-streamed climate data, this enables botanists and growers to simulate real-time climatic shifts not only for remote locations, but for specific seasonal windows within those locations.


How does it work?

Daylight

Norman makes extensive use of the Dusk2Dawn library, by DM Kishi. It relies on Dusk2Dawn to retrieve daily times for sunrise and sunset based on latitude, longitude, and timezone of the target location. Optionally, it anchors these daily light cycles to solar noon of local daylight schedules. This enables users utilizing a greenhouse to incorporate photoresistors and PWM driver control for the purposes of energy-efficient supplemental lighting if so desired.

Temperature and Humidity

Yearly temperature and dew point trends can be loosely expressed by a sine wave in most climates. This means we can project daily minima and maxima as long as we have minimum and maximum values for the hottest and coldest days of the year, as well as the indexed locations of these days for the target location. Seasonal lag was loosely accounted for by modifying the width of this sine wave based on the number of days between the hottest and coldest days of the year (relative to the current time). Daily patterns for temperature and dew point were more complicated. I used a polynomial function for daytime shifts, an exponential function for nightly decay, and a regressive anchoring system in order to create smooth transitions between day and night cycles while continuing to follow the annual sine wave. Relative humidity is retrieved using these temperature and dew point projections. This enables users to incorporate these projected values into climate control applications using popular temperature and humidity sensors (DHT11, DHT22, BMP280, etc.).

Does it only calculate values for the current day?

No. It can be programmed to mimic conditions for any time of the year, from any time of the year. Optionally, users can designate the length and starting point of a “season,” and repeat the projected conditions of this time period over and over again without having to re-flash the sketch. This method retains the (optional) functionality of anchoring target daylight cycles to local cycles happening in real time.

Norman Arduino Setup

How accurate is it?

That’s a complicated question. You can see for yourself at my plot.ly page. I tested a dozen US cities to see how my projections would stack up, and I think it did alright, considering how crude it is. Seems to do a lot better in coastal and continental climates than mountains and deserts. I’ve got some ideas of how to improve its consistency, but addressing those issues would necessitate the time and labor of people who actually know what they’re doing. As it is, I’m ready to move on to other projects, so we’re calling it as done as done gets.

Norman Parts

Why are you writing all this?

Because I hope that my dumb little project will inflame the curiosity of smart people. I want other people to do this better, because I think a comprehensive mathematical model that can accurately simulate remote climatic conditions might have some exciting implications for agricultural development and botany. If you are interested in taking a swing at it, contact me. I can put you onto some questions and observations that might help you get started. Probably the first order of business would be whipping up some sunrise and sunset functions that build and fade naturally based on solar elevation and azimuth. It would also be rad if someone sent me a picture of them growing passion fruit in Siberia using my garbage code and a $10 microcontroller.

Although testing scripts can be run on an Uno with no additional modules, a working prototype requires a temperature/humidity sensor (such as a DHT22), a real-time clock module with battery backup (I prefer a DS3231), and some means to control the operation of external growing equipment (lights, fans, heaters, AC units, humidifiers, etc). I used Songle 5v SPDT relays in my working prototype (pictured), but a 433mhz RF or WiFi transmitter would be more scalable for larger projects.

nanoSplatch™ nSP250 Embedded WiFi/WLAN Antenna

The nanoSplatch™ nSP250 is a surface-mount antenna for embedded WiFi/WLAN and other 2.4 GHz or 5.8 GHz ISM or U-NII frequency band applications.

It uses a grounded-line technique to achieve outstanding performance in a tiny surface-mount package. The nSP250 exhibits low proximity effect with a very hemispherical radiation pattern, making it ideal for handheld devices and applications typically subject to interference.

Linx Technologies – a Merlin, OR based developer and manufacturer of IoT Products and Solutions – is pleased to announce that its popular, low cost MicroSplatch™ Series antenna is now available on tape and reel. Designed for high volume production, this new packaging feature helps to further lower the total cost of purchase and assembly.

Over the past few years, the MicoSplatch™ Series antennas by the Antenna Factor part of Linx has become extremely popular. Now on tape and reel, customers can appreciate the added savings of this product in their production lines as well as reduce impact on the environment with improved packaging options. – Kris Lafko, VP of Marketing and Sales

About the MicroSplatch™ Antenna

The MicroSplatch™ is the first true alternative for those wishing to avoid the high cost, long lead times or limited frequency choices of chip antennas. The MicroSplatch™ antenna from Linx Technologies represents a groundbreaking advance in our reflow-compatible planar antennas. Using advanced simulation tools, Linx designed the MicroSplatch™ with performance similar to our standard Splatch antenna, but only uses one third of the critical board space. The small size and low cost makes the MicroSplatch™ an excellent choice for handheld devices such as remote controls and small data transmission systems.

Features

  • Ultra-compact package (9.6 mm x 8.4 mm x 1.1 mm)
  • Excellent performance with smallest ground plane (40 mm x 20 mm)
  • Resistant to proximity effect
  • Omnidirectional radiation pattern
  • Direct surface-mount PCB attachment
  • Reflow- or hand-solder assembly
  • High gain (2.7 dBi at 2.4 GHz, 3.7 dBi at 5.8 GHz)
  • High efficiency (66% at 2.4 GHz, 69% at 5.8 GHz)

Applications

  • Single- and dual-band WiFi/WLAN/802.11
  • Bluetooth® and ZigBee®
  • Smart Home networking
  • Sensing and remote monitoring
  • Hand-held devices
  • Internet of Things (IoT) devices
  • U-NII and ISM applications

Adding the MicroSplatch™ to your design is simple—the only things needed are a footprint for the antenna and associated proximity ground plane. The MicroSplatch™ is available in the 403MHz, 418MHz, 433MHz, 868MHz, 916MHz and 2.4GHz bands. Custom designs within the 400MHz–3GHz range are available.

“We designed the MicroSplatch™ specifically as a chip buster aimed at high volume customer applications, where lowest cost is a leading consideration”, explains Tolga Latif, CEO of Linx. “In most cases, we can beat a chip antenna on price and performance.”

For more information about the MicroSplatch™ antenna on tape and reel, call Linx at +1 800 736 6677 (+1 541 471 6256 outside the United States) or visit www.linxtechnologies.com.

Click here to learn more

Build a Cluster Computer using 7x Raspberry Pi Compute Modules

In the spirit of cluster computing, the Turing Pi Clusterboard brings another dimension in the world of cluster computing for makers and hackers. The Pimoroni’s Cluster HAT gave us the power to connect up to 4 Raspberry Pi Zeros to create a cluster computer, the MiniNodes’ 5 Node Raspberry Pi 3 CoM Carrier Board provide support for connecting up to 5 Raspberry Pi compute modules for cluster computing, and we also see some other similar boards.

The Turing Pi Clusterboard takes a step further for those wanting more performance by stepping the cluster computing game to provide support for up 7 Raspberry Pi compute modules. Based on the Mini ITX-sized boards, the Turing Pi Clusterboard allows a user to connect up to seven Raspberry Pi Compute Modules and is being advertised for applications that support Docker, Machine Learning, Kubernetes, Apache Spark, and similar applications, also including  serverless stacks.

Turing Pi Cluster Board

The 7x Raspberry Pi Computer Modules are connected via a 1Gbps Ethernet network, making it possible to run cloud-based applications on edge. A good thought will be to try the Jetson Nano’s on the Turing Pi Clusterboard, but sadly, that doesn’t seem possible since the Jetson nano is a DDR3 form factor, and the Computer module are DDR2.

Measuring around 170 by 170mm, the Turing Pi features DDR2 style sockets, seven MicroSD card slots which is meant for each compute module, an HDMI port, Gigabit Ethernet port, MIPI DSI connector, 8x USB ports. You also have a 3.5mm audio jack, provision for a dual MIPI-CSI connector if you are interested in adding some cameras. Each cluster slot has its 40-pin GPIO port for extending the compute module functionality. The board provides a power supply jack through a 12V-20V DC jack or an ATX power supply.

Turing Pi Cluster Breakout

The Turing Pi Cluster is available for pre-order for $128 with shipments due in autumn. More information may be found on Turing Pi’s Turing Pi Cluster product page. Although the price of the Turing Pi Cluster is $128, when loaded with the seven Raspberry Pi Computer module 3, with each costing $28, then the total price would reach around $325.

APP NOTE: Digital potentiometer to control LED brightness

Controlling LED brightness through digital potentiometer and a LED driver from ON Semiconductor.

Light-emitting diodes (LEDs) require a regulated current, and their brightness is proportional to the current that flows through them. Some LED drivers use an external resistor to set the LED current. A digital POT can replace a discrete resistor with the advantage of providing an adjustable value allowing the LED brightness to dynamically change. Most digital POT circuits have the ability to store permanently the resistor value in non-volatile memory.

APP NOTE: Digital potentiometer to control LED brightness – [PDF]

6CY7 dual triode valve amplifier

Josh built this 6CY7 dual triode valve amplifier:

I’ve always wanted to know what the “tube magic” was all about. There is much opinion in the science of music production, probably because music and its perception is highly personal and subjective. Ive always imagined that since transistor amplifiers were “perfect” with their large amounts of negative feedback, great linearity, and low THD that tube amplifiers must add something to sound that generates their appeal. From the reading I’ve done it has to do with harmonics.

6CY7 dual triode valve amplifier – [Link]

Cluster HAT – Cluster Computing Made Easy Using 4 Raspberry Pi Zero

Cluster Computing brings the power of multiple computing units to serve one single purpose. If you are looking for some performance boost and you got yourself some freely available computing units, cluster computing might be what you need. Unfortunately, building yourself one is not that a smooth ride and might be overwhelming for the average newbie.

Cluster Computing using the Cluster HATs with 4 Pi Zero.

Raspberry Pi is one of those single-board computers you can easily find around, and most importantly, they are quite affordable and they do it great in the performance department as well. At $5, the Raspberry Pi Zero is even an unimaginable margin with the 1GHz processor, there so much more you can do with it. Imagine packing multiples of the Pi Zero to build a single unit computer, not only will you have a way powerful computing unit (power is relative though 🙂 ), but also at ultra-low-cost. Thanks to Cluster Hat, you can quickly build a cluster computing infrastructure leveraging on the Raspberry Pi Zeros and any of the major Raspberry Pi as the host or controller.

Raspberry Pi Zero

Cluster HAT leverages the flexibility of Raspberry Pi and the ever-growing maker movement by allowing hackers, engineers, students, makers, and enthusiasts to experiment with cluster computing. Building your cluster computer enables you to explore things like big data computing and others.

The Cluster HAT acts as an interface between a (Controller) Raspberry Pi A+/B+/2/3 with 4 Raspberry Pi Zeros. It leverages the USB Gadget mode as the form of interface. The HAT is compatible with any of the major Raspberry Pis, but nothing sure about the newly released Raspberry Pi 4.

The Cluster HAT acts as an interface between a (Controller) Raspberry Pi A+/B+/2/3 with 4 Raspberry Pi Zeros.

It comes with four onboard USB 2.0 hub which is used for connecting to the Pi Zeros. It’s compatible with both the ordinary Pi Zero and the Pi Zero W. The USB Gadget Mode is supported in Ethernet and serial console. Each Pi Zero power can be controlled and powered via the Controller Pi GPIO, which provides support for a connector for the controller serial console. It is possible to reboot the controller Pi without interrupting power to the Pi Zeros.

Although the Cluster HAT is expected to work with most Raspberry Pi stated, consideration has to be taken when using it with the Raspberry Pi 3 because Pi 3 may reduce the CPU speed when hot.

The HAT is available for purchase from Pimoroni for about $35 or £28, and it comes with the following:

  • 1x Cluster HAT
  • HAT standoffs and screws
  • Short USB rope
Cluster Computing using the Cluster HATs with 4 Pi Zero.

Using the Cluster HAT with the Pi Zeros requires a micro SD memory card for each Pi Zeros plus an additional memory card for the controller. Fortunately, it seems there is a way around using the whole setup with just one SD card according to a reviewer.

More information is available on the product page here. Assembly instructions here, Software setup, and Control setup are also available.

TOP PCB Companies