
LilyGO TTGO T5-4.7 E-Paper Weather Station
- Emmanuel Odunlade
- 3.002 Views
- easy
- Tested
- SKU: EL130921
- Quote Now
- 0 Likes

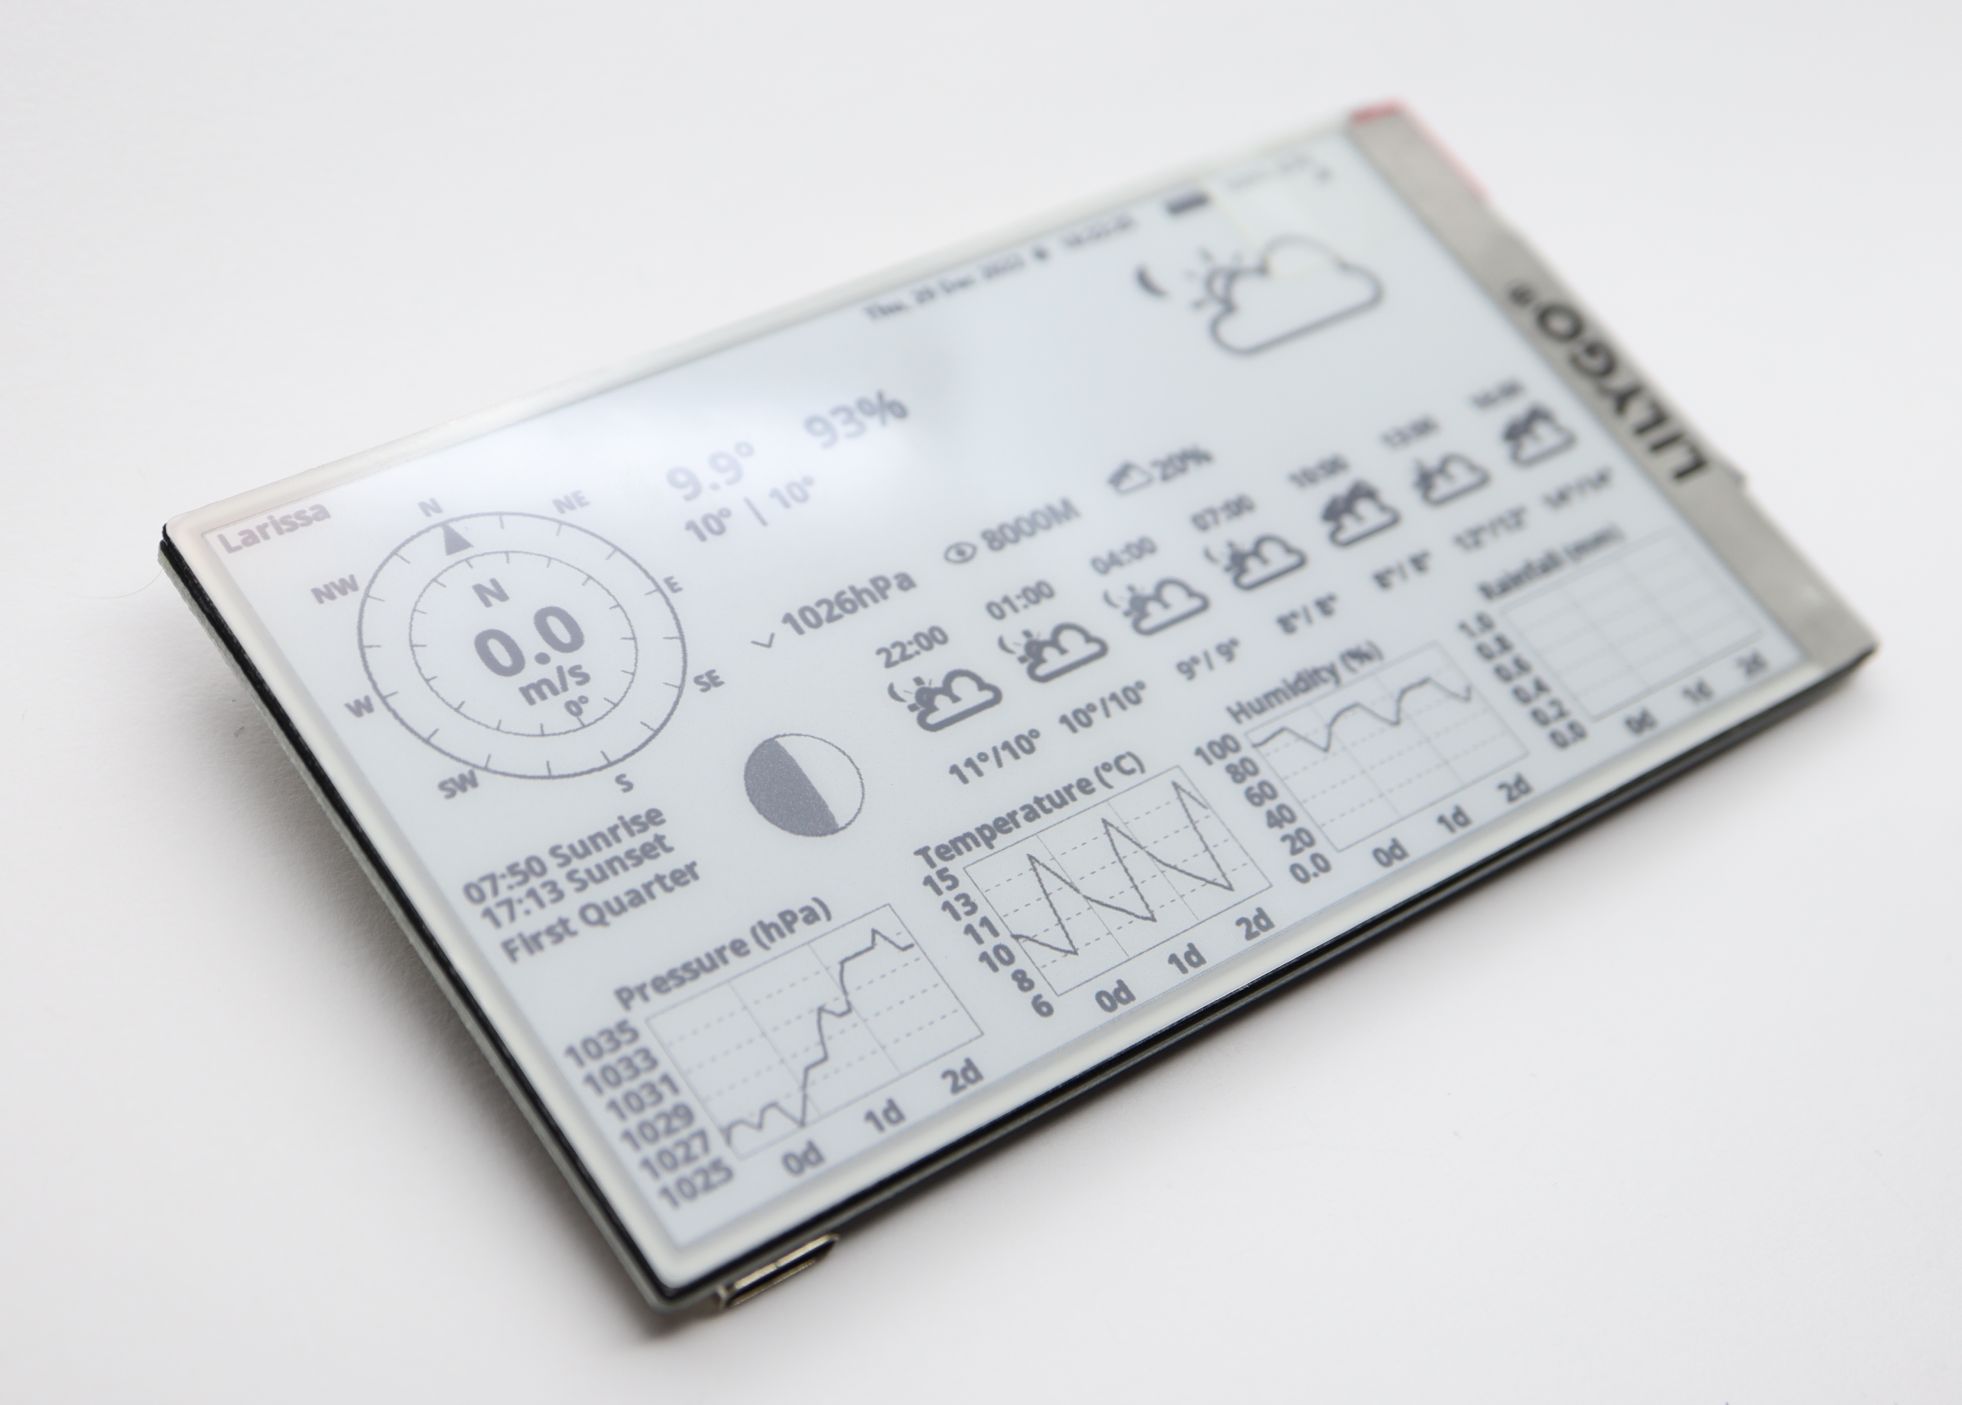
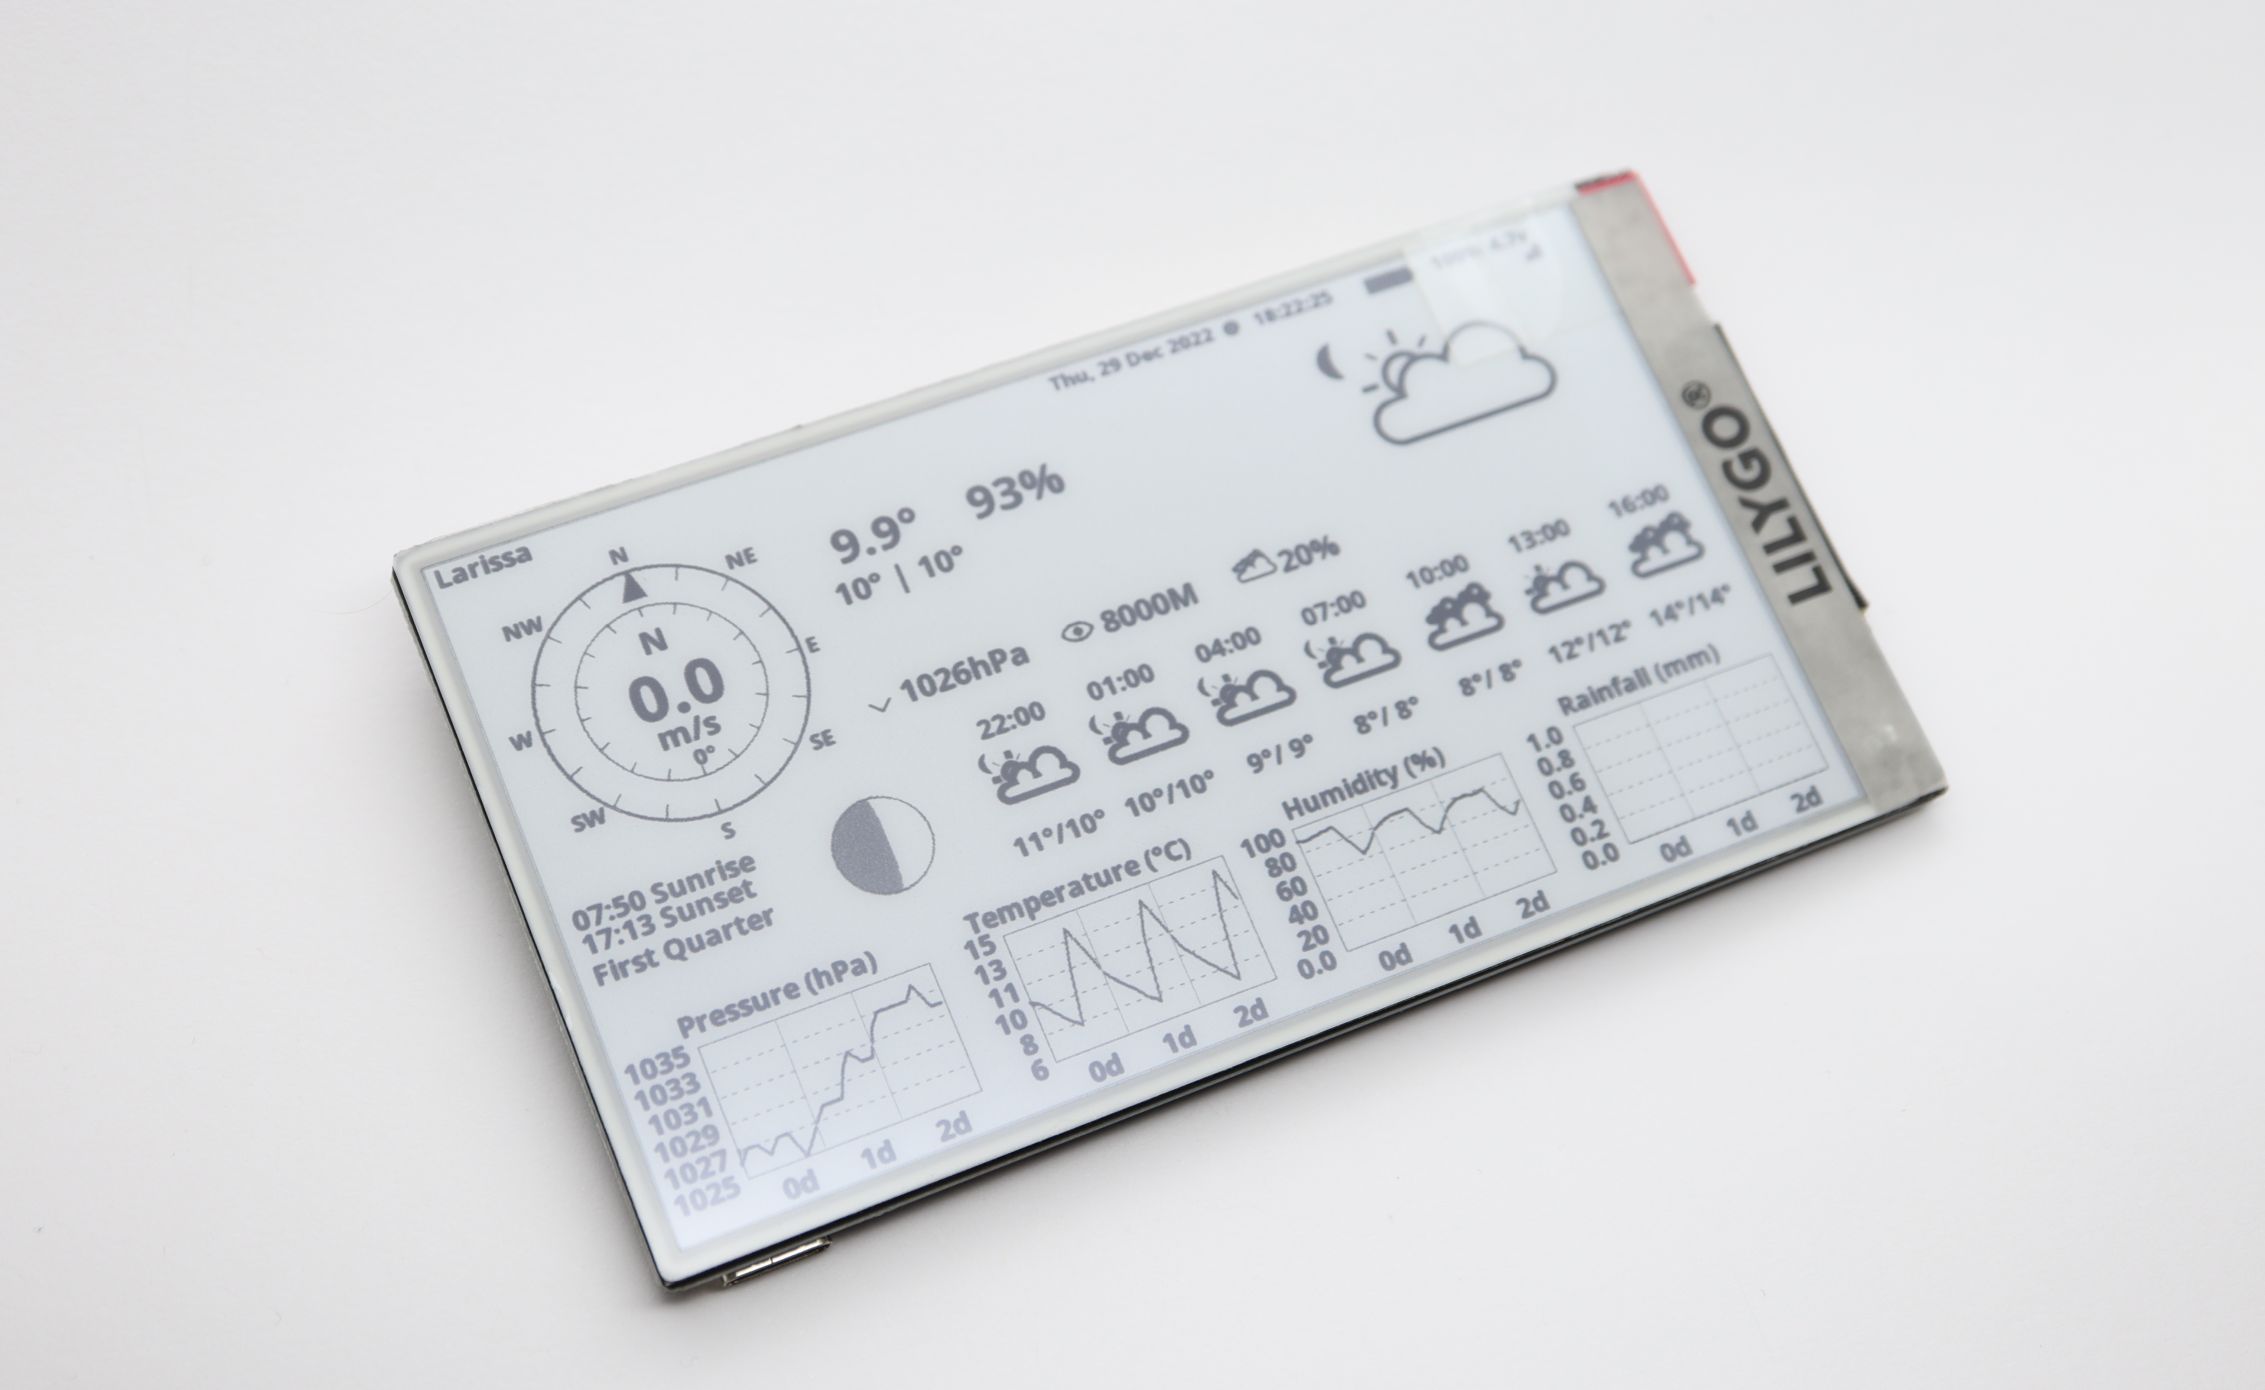
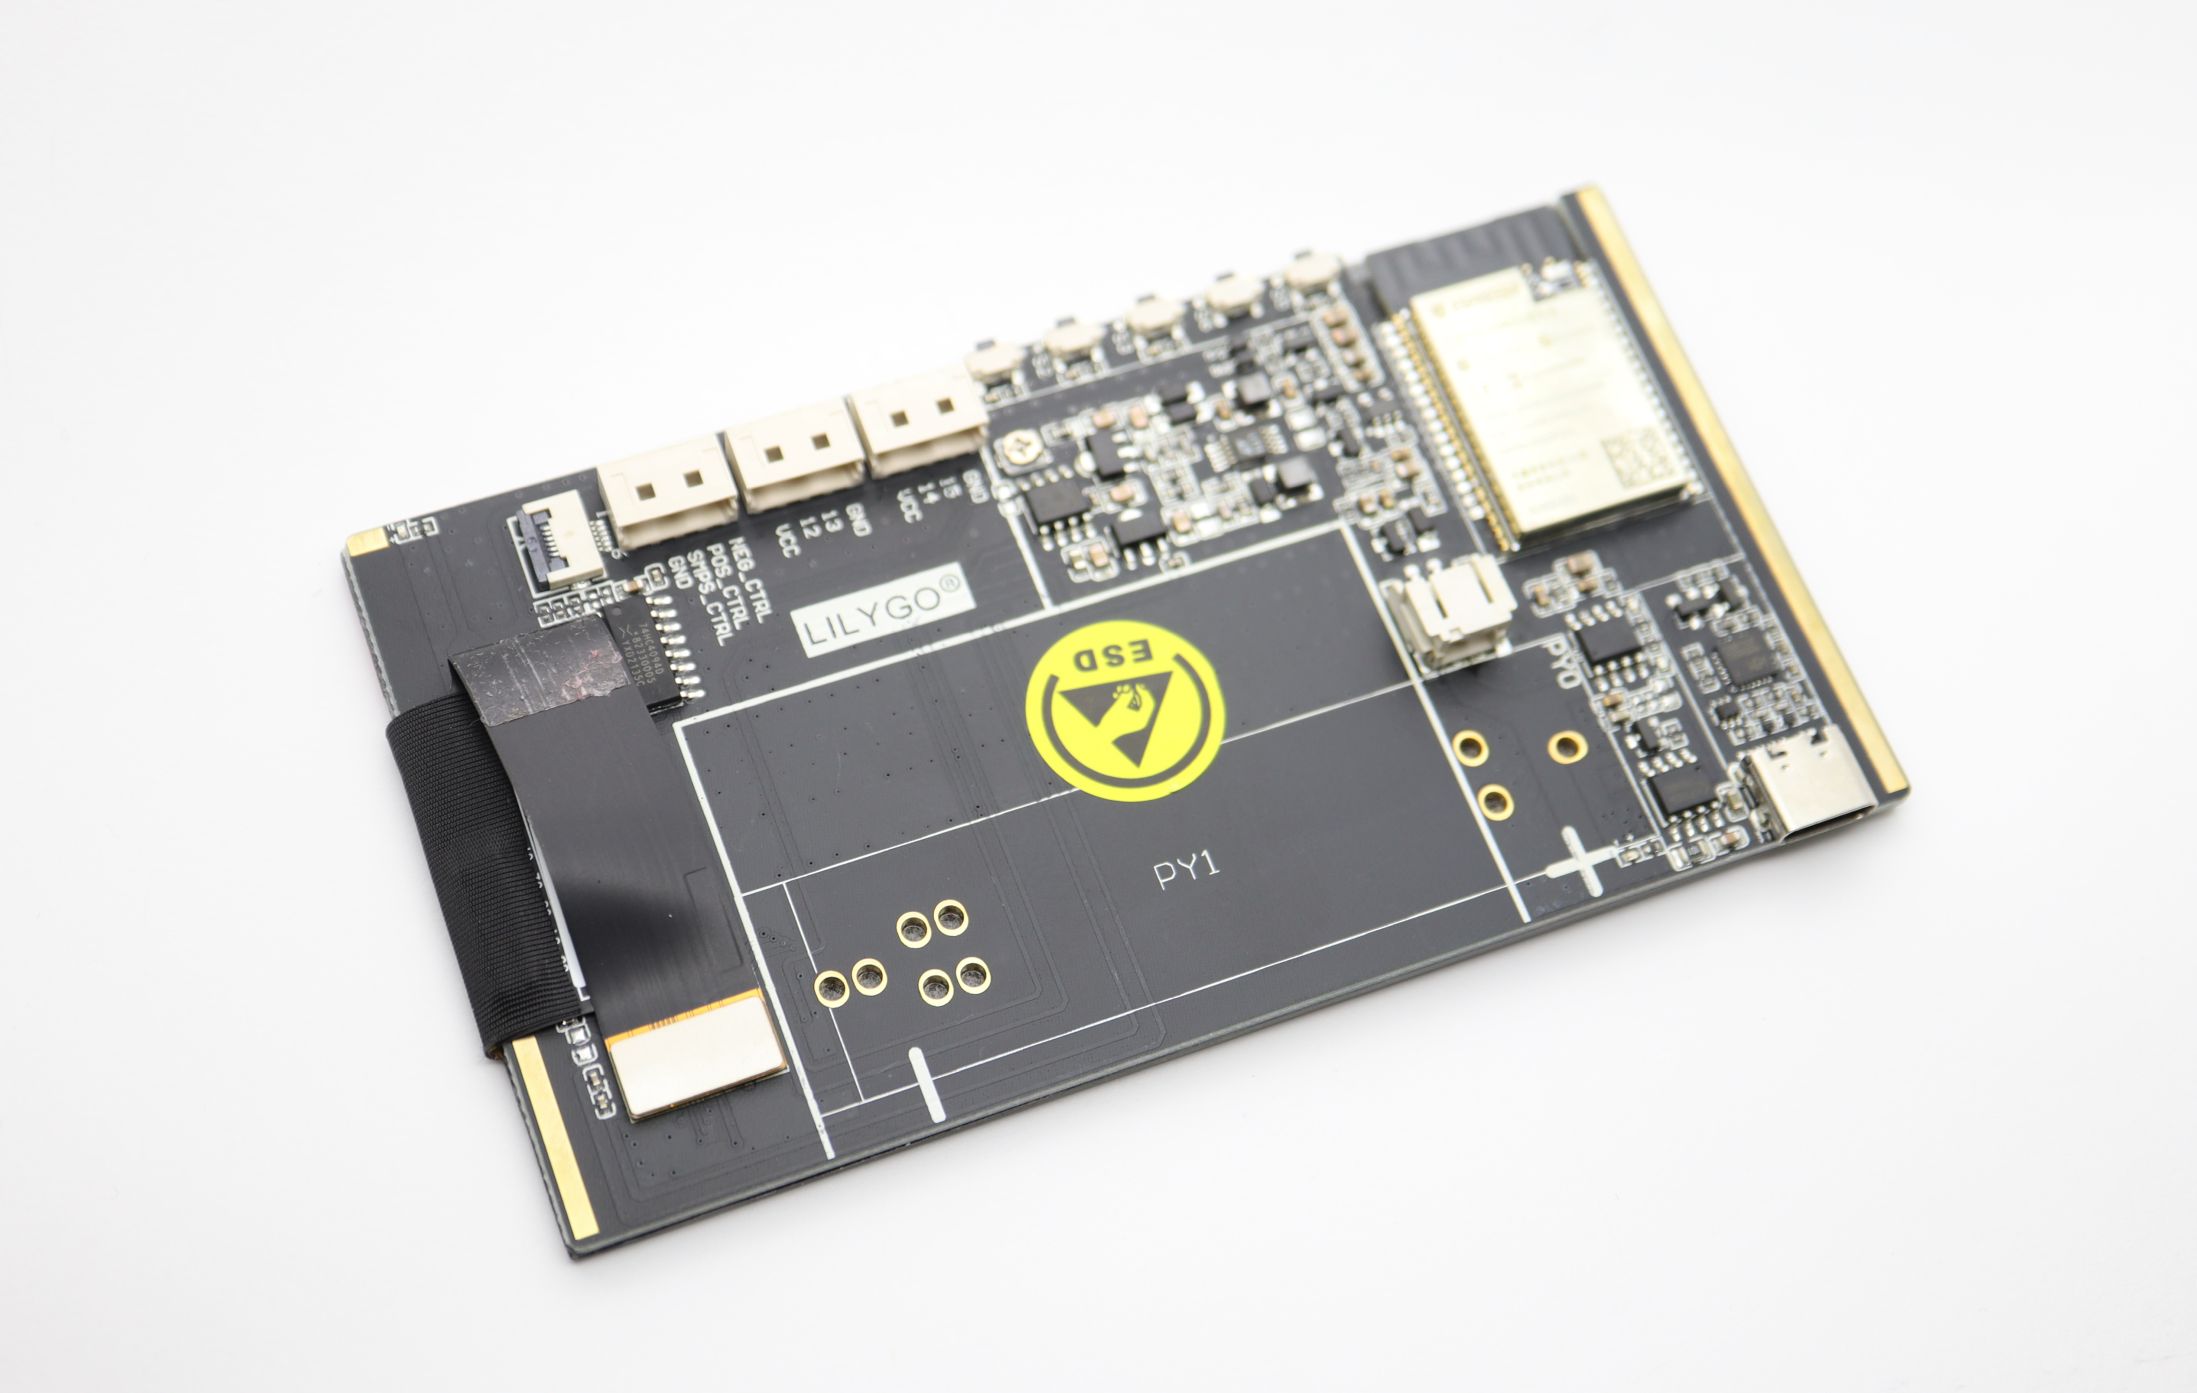
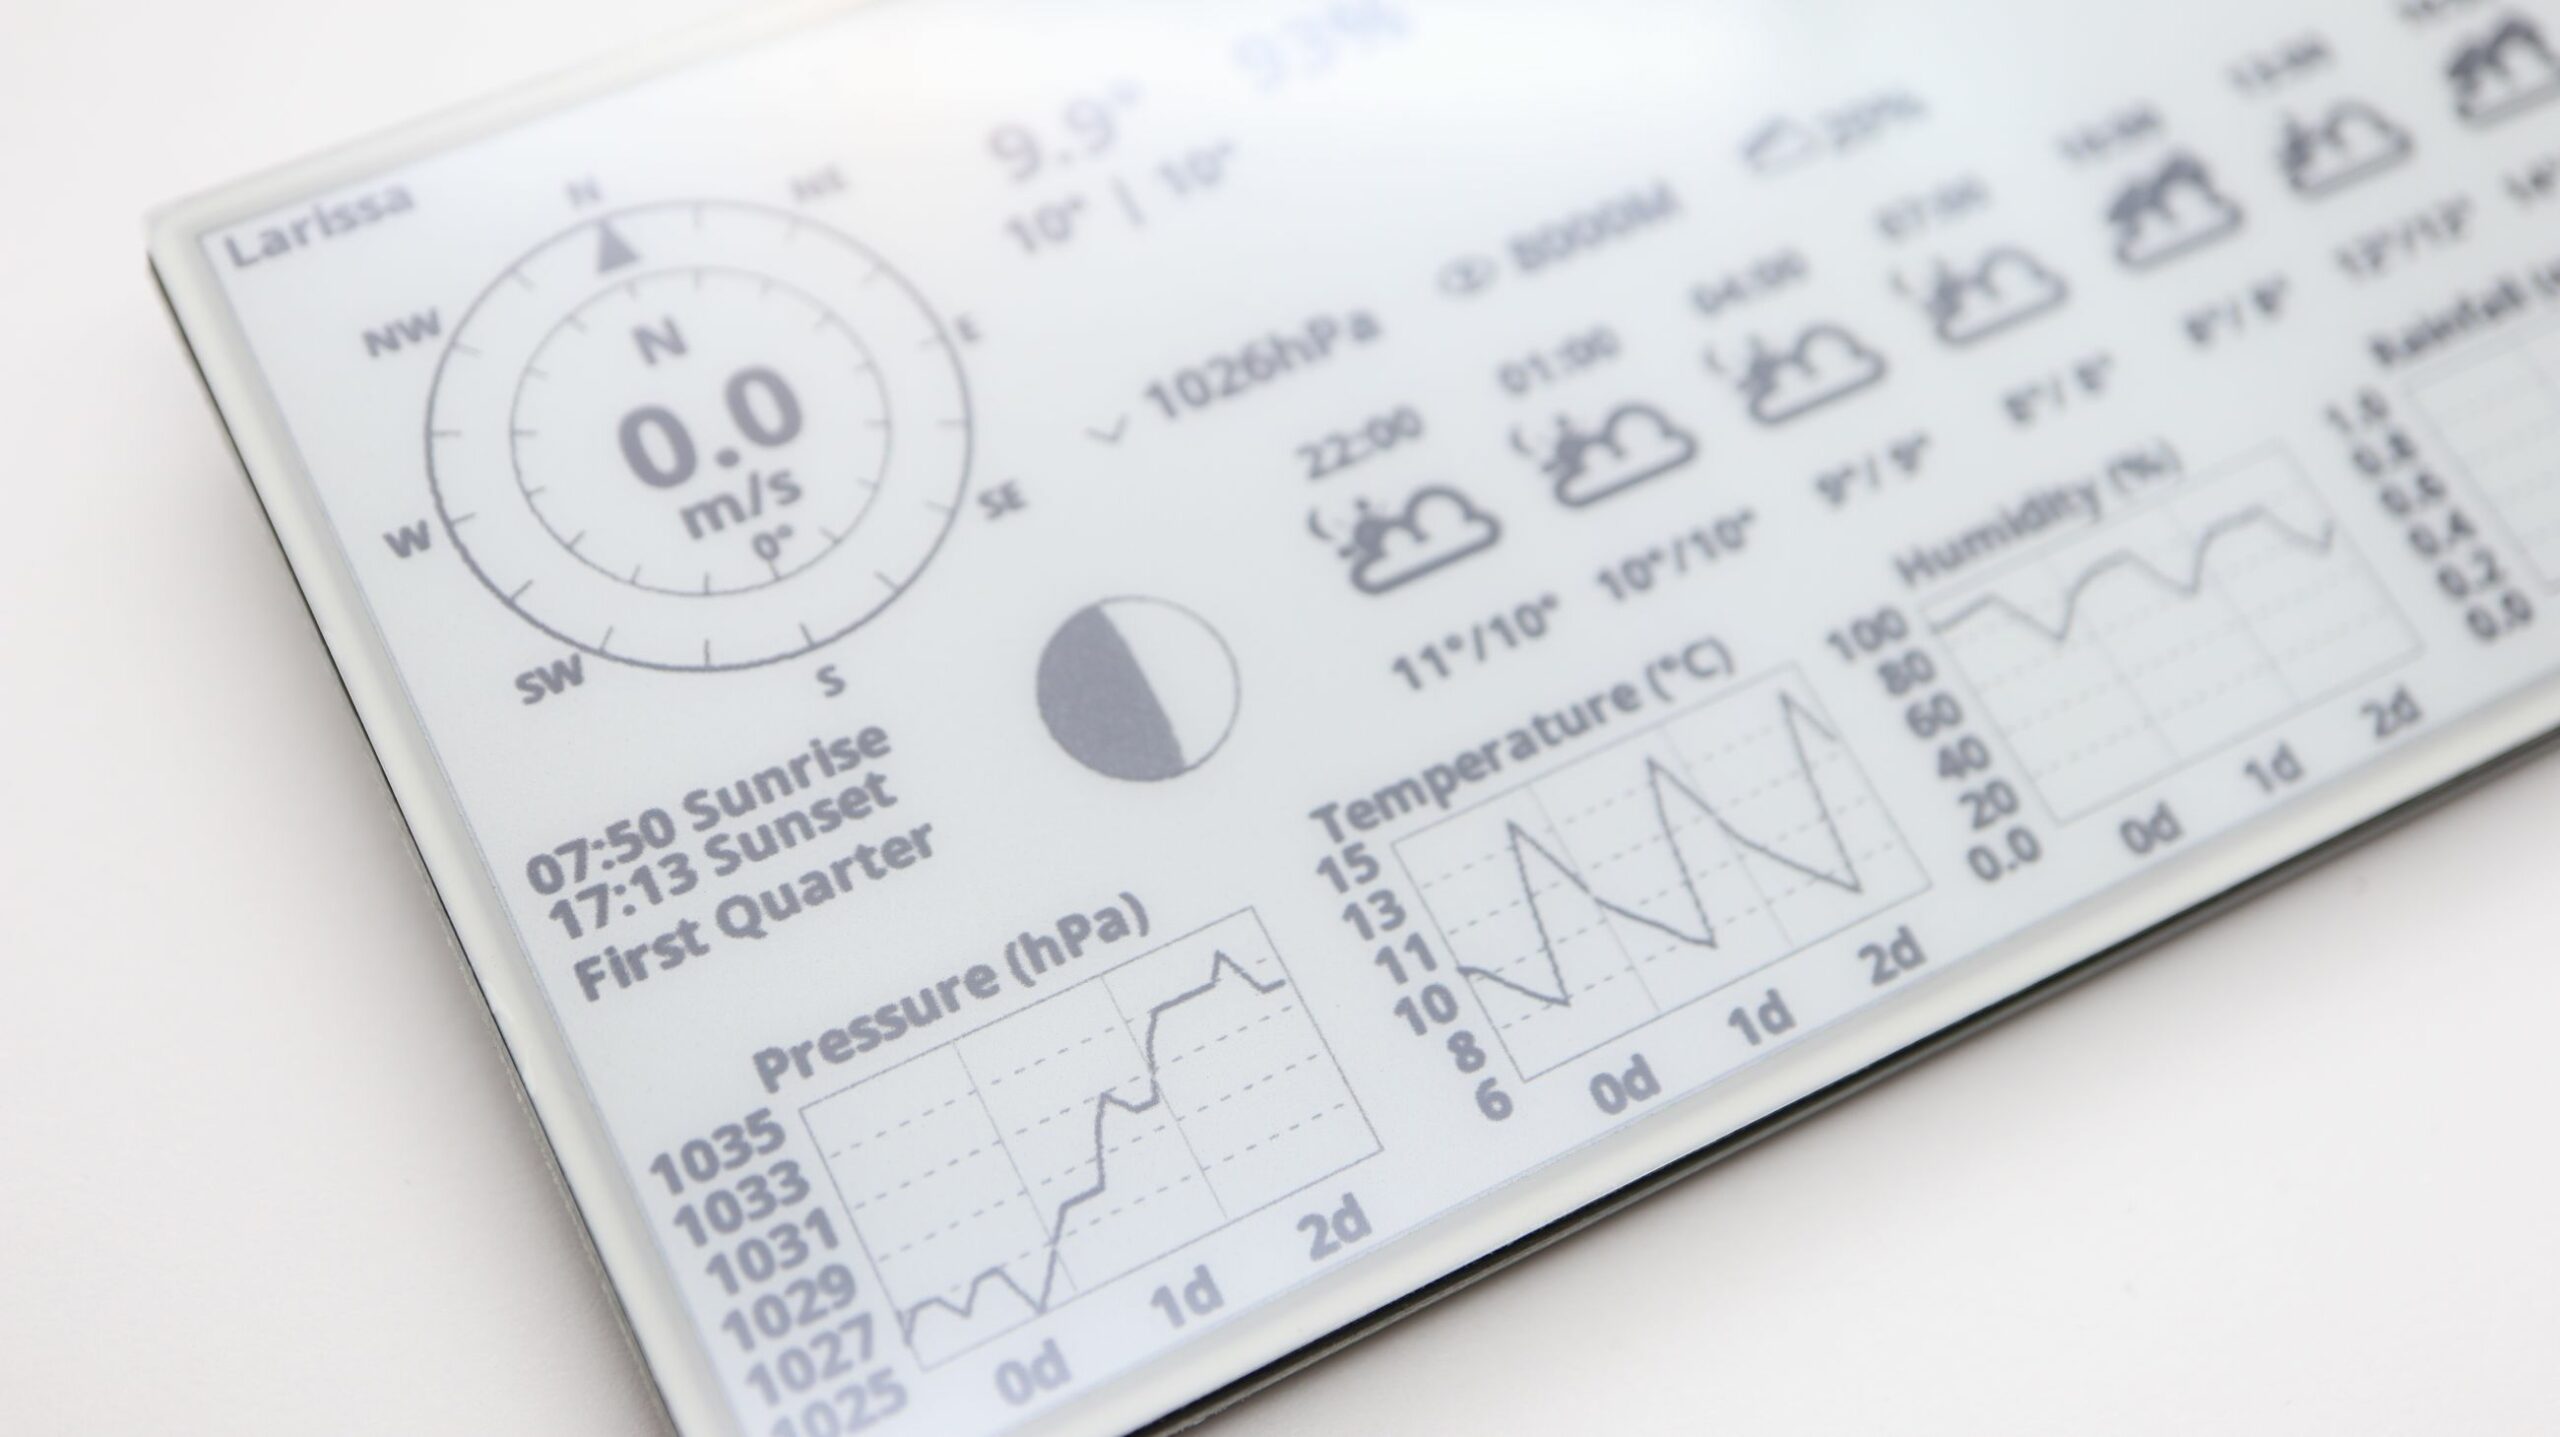
The LILYGO T5 4.7 inch E-Paper ESP32 Development Board is an exciting 4.7″ e-paper display integrated with an ESP32 WiFi/Bluetooth module. The board’s processor is ESP32-WROVER-E with 16MB of FLASH memory and 8MB of PSRAM. The ESP32 module supports Wi-Fi 802.11 b/g/n and Bluetooth V4.2+BLE and can easily be programmed with Arduino IDE, VS Code, or ESP-IDF. The board can be purchased on Alliexpress for 38.33 EUR + shipping or Tindie for 28.13 + shipping. This display is ideal for building a weather station that will fetch weather data from OpenWeatherMap via simple API usage. So in this tutorial, we will follow the steps to make a weather station like the photo above. We will work on a Windows PC to program the display, but the same can be done in Linux or Mac OS.
Specifications
- MCU: ESP32-WROVER-E (ESP32-D0WDQ6 V3)
- FLASH: 16MB
- PRAM: 8MB
- USB to TTL: CP2104
- Connectivity: Wi-Fi 802.11 b/g/n & Bluetooth V4.2+BLE
- Onboard functions: Buttons: IO39+IO34+IO35+IO0, Battery Power Detection
- Power Supply: 18650 Battery or 3.7V lithium Battery (PH 2.0 pitch)
- Driver IC: GDEH0213B72
- 4.7 inches, 540(H)X960(V) resolution, , supports partial refresh
- 6pin FPC touchscreen expansion connector
- 16 Gray Level ED047C1
- 4-pin 2.0 Molex 4 p 53015-0410 x 3
- RST button x 1
- Custom button x 3
- USB: TYPE-C
- Battery charge and discharge protection chip
- USB input power 5V@1A
- 4pin expansion interface output is 3.3V
- Sleep mode current@~170uA
Requirements
First of all, we will need to install the USB to Serial (CH343) Drivers if we don’t have this done previously. Depending on your Windows version you will need:
- Windows 8, and 10 users need to install https://www.wch.cn/download/CH343SER_EXE.html (page is in Chinese but you only need a click to get the driver download)
- Windows 11 will install the driver automatically.
Download and install Arduino IDE 2.0
Arduino IDE Configuration
Add ESP32 boards support
Click File, click Preferences, and select the Settings tab. Enter the following URL to Additional boards manager URLs: https://raw.githubusercontent.com/espressif/arduino-esp32/gh-pages/package_esp32_index.json
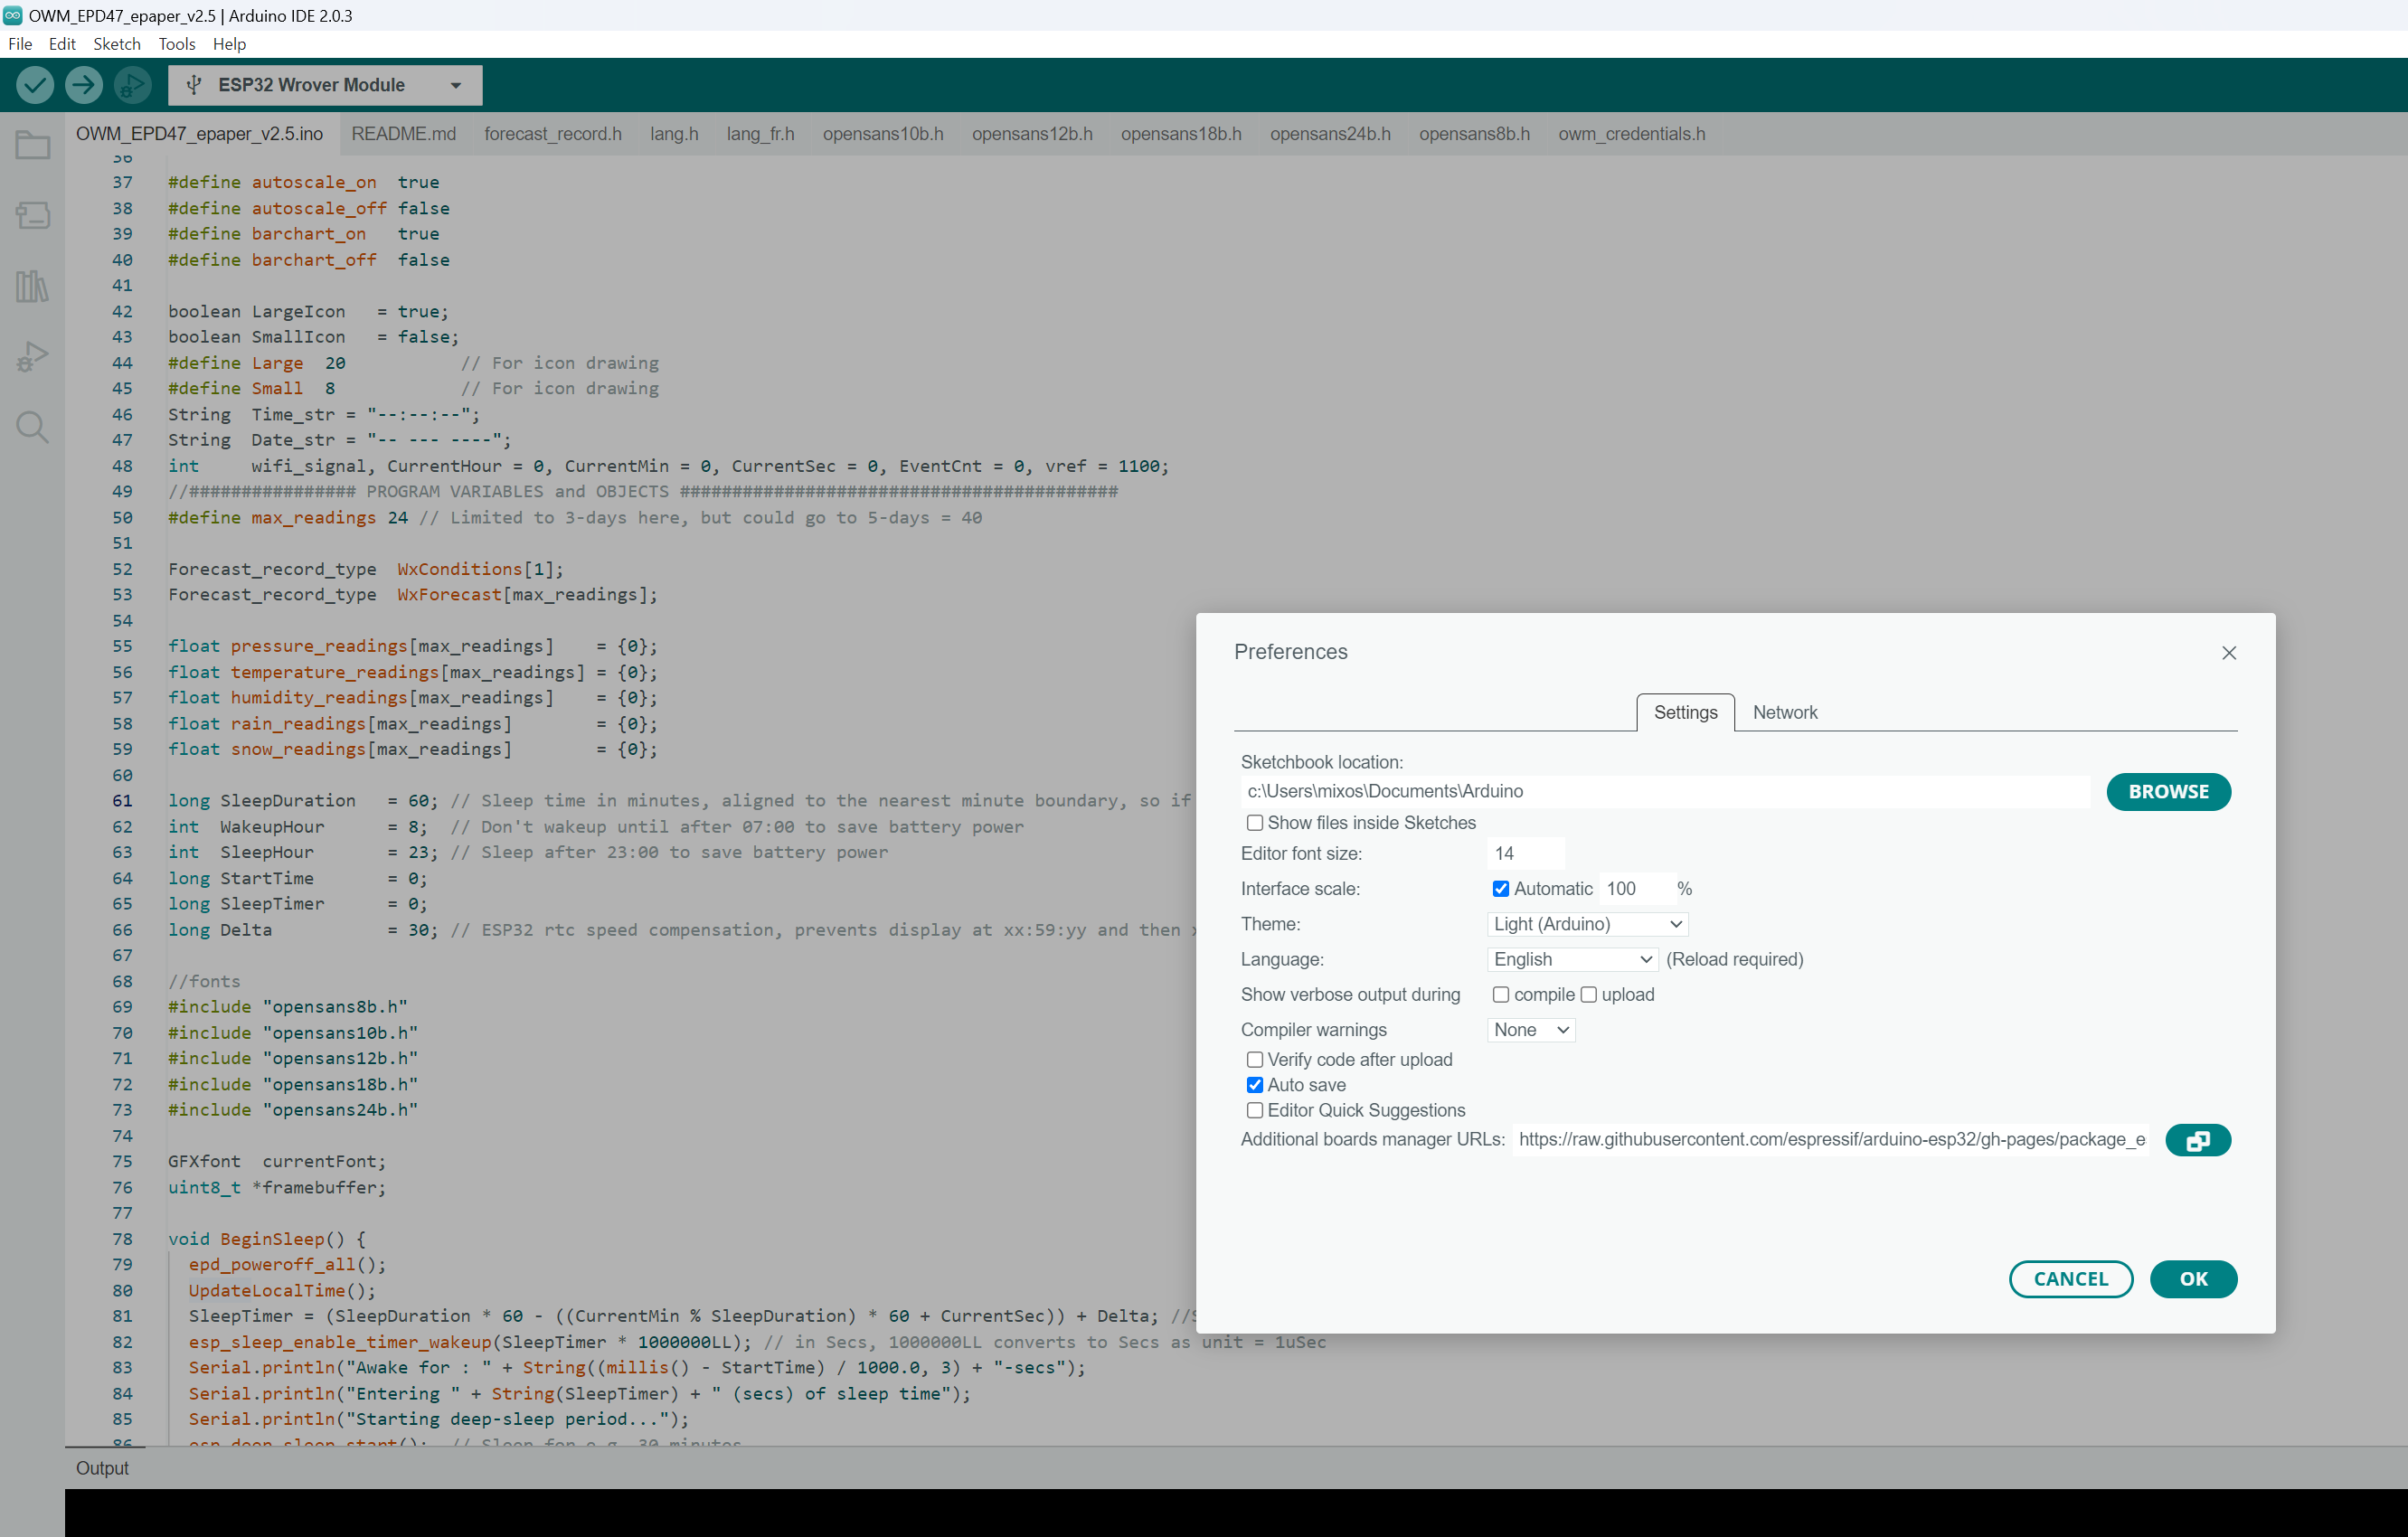
Click Ok.
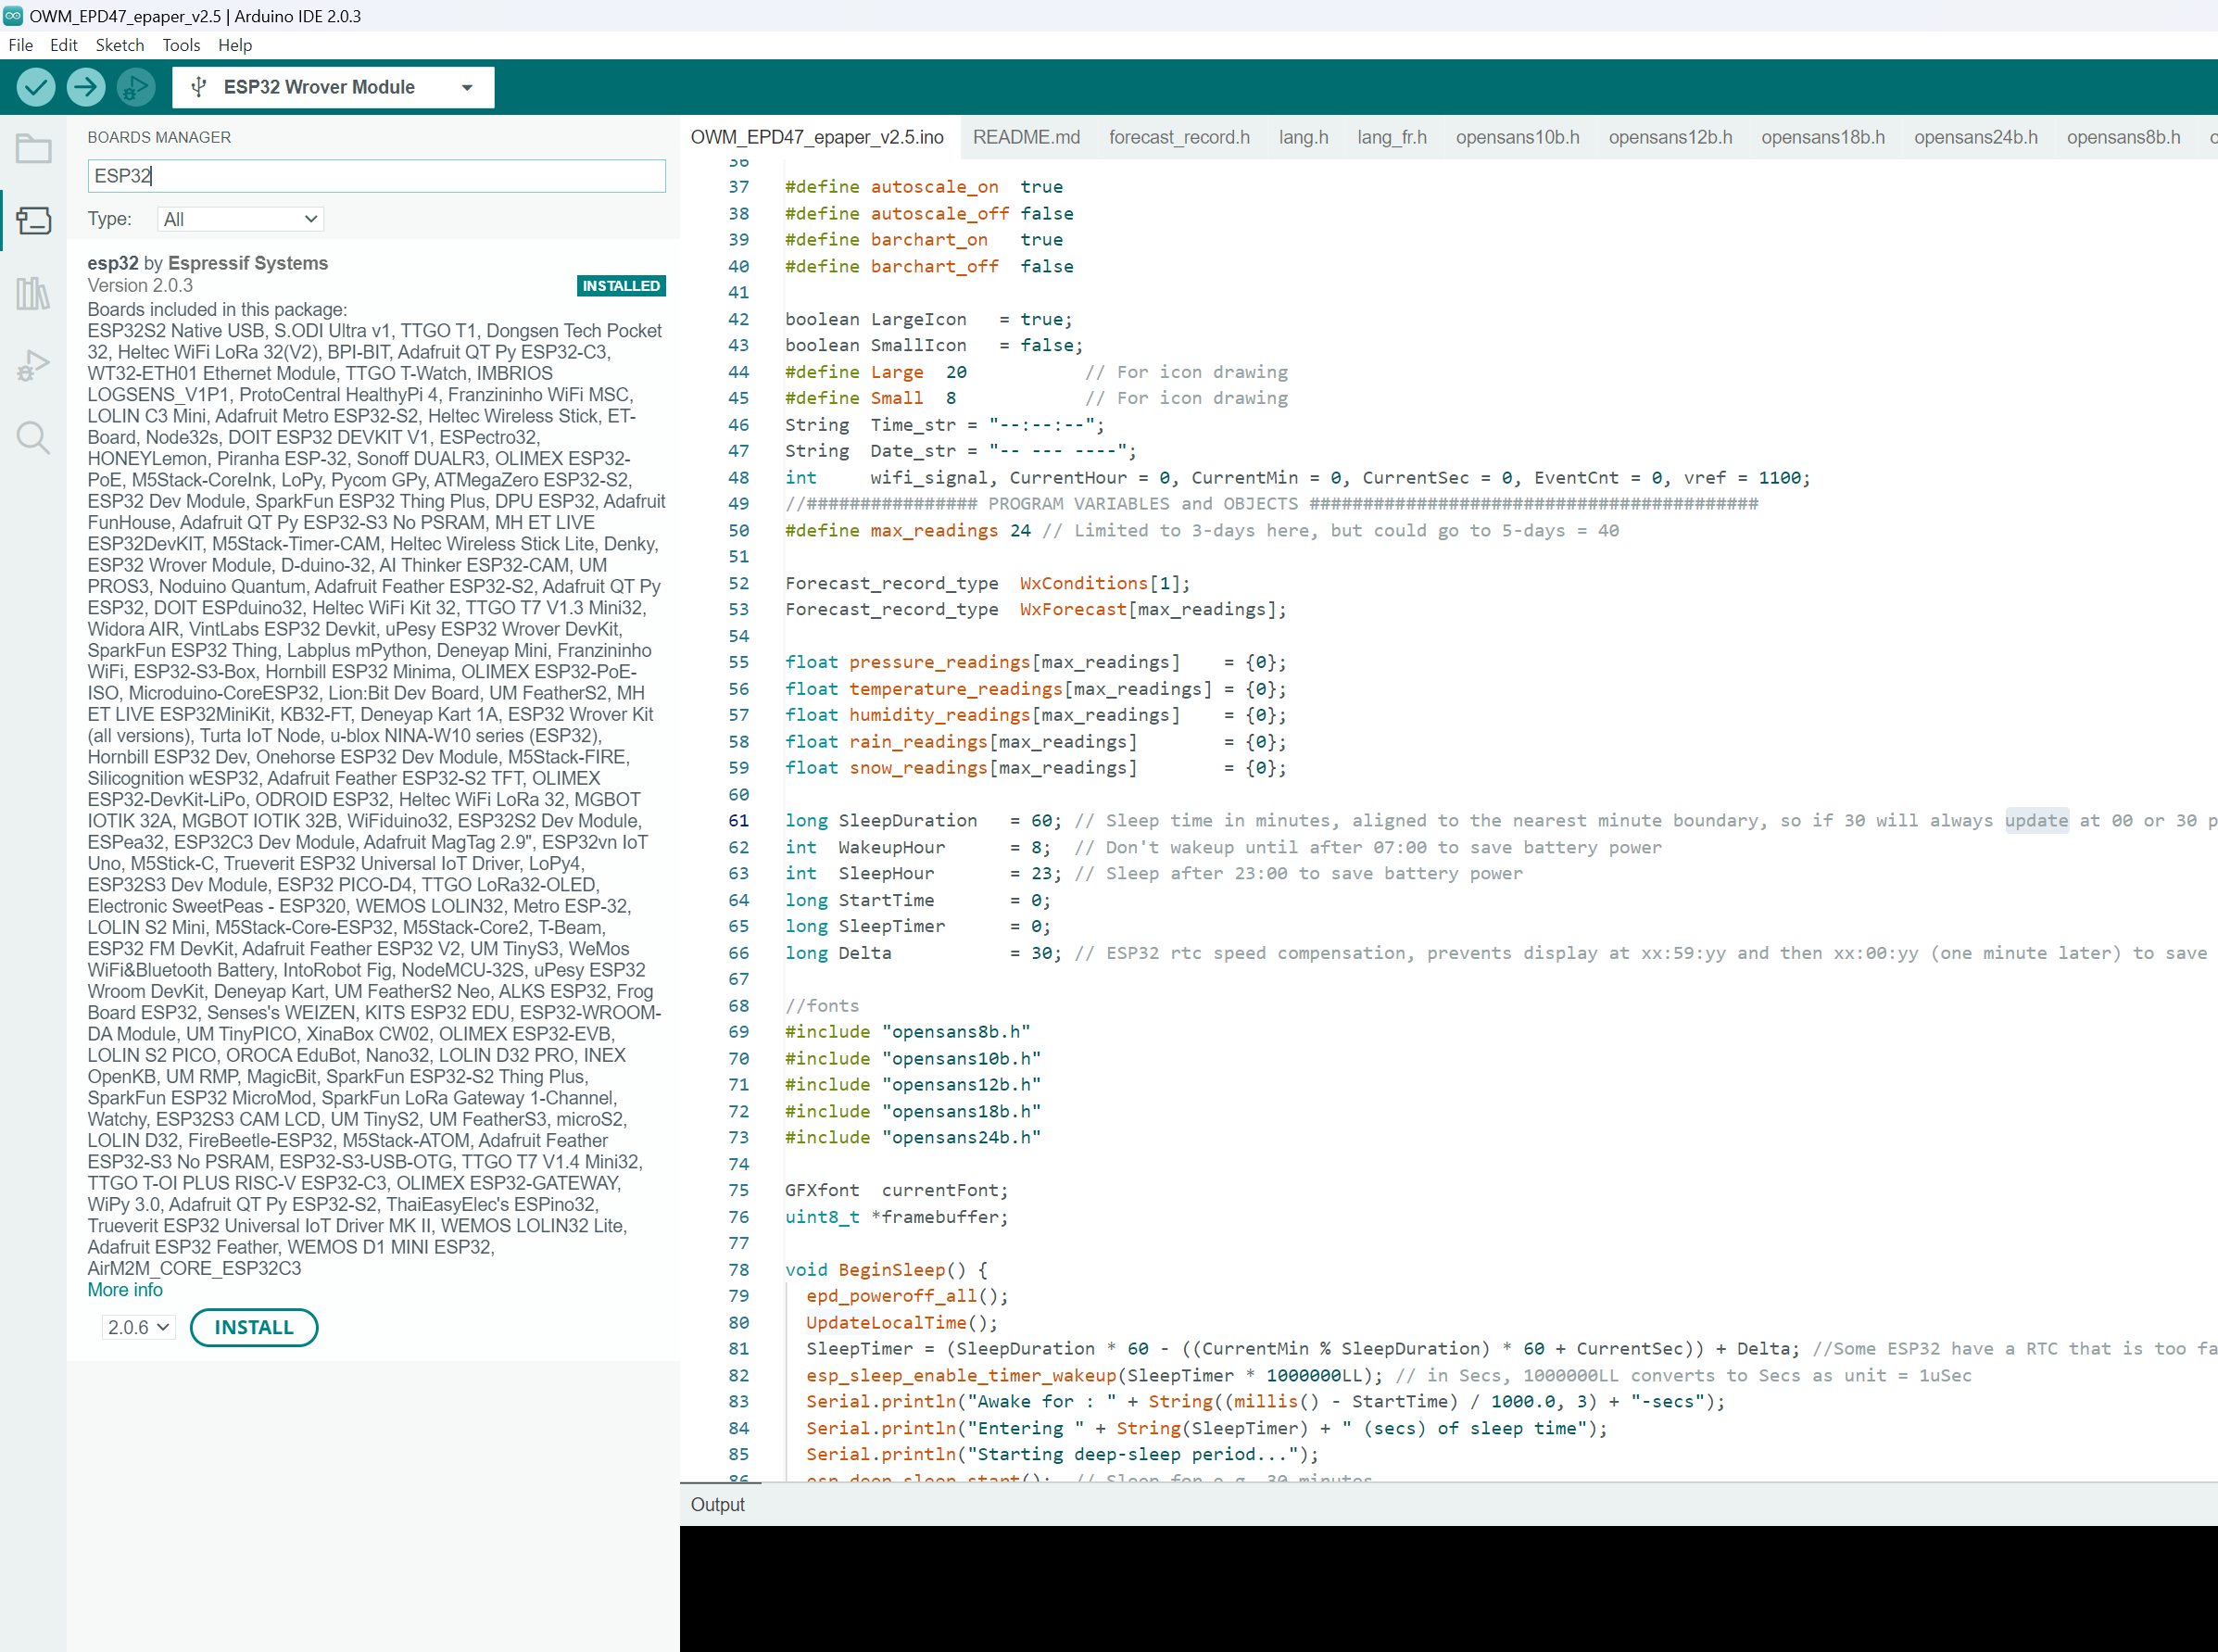
Next click Tools, and select Boards: -> Boards Manager . It will open the left pane with a list of boards. Type ESP32 into the search field. Find ESP32 by Espressif Systems, and click Install.
Preparing the Code
Download LilyGo-EPD47 library to the C:\Users\YOUR_USERNAME\Documents\Arduino\libraries folder on your system:
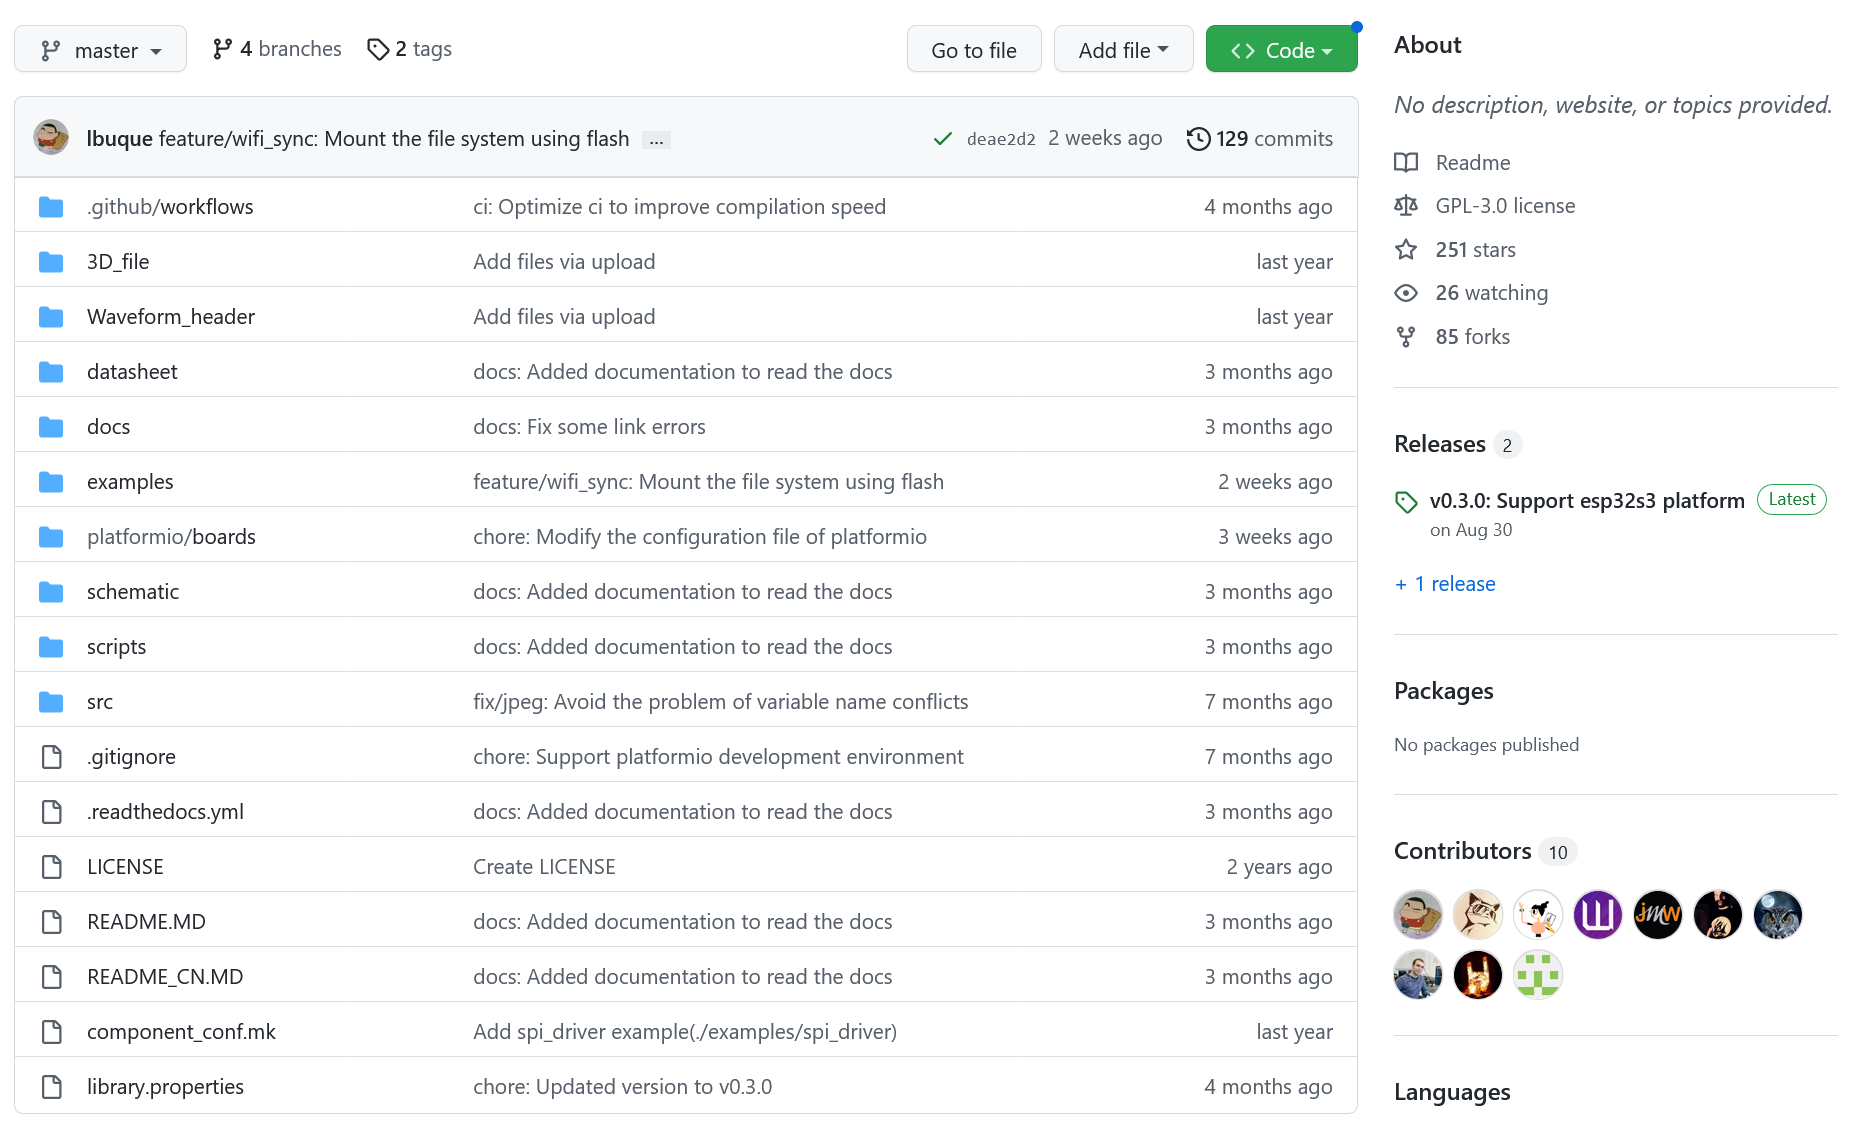
Download and extract LilyGo-EPD-4-7-OWM-Weather-Display to your directory with Arduino projects. This directory is normally located in C:\Users\YOUR_USERNAME\Documents\Arduino.
The project folder name should match the name of the source code file (OWM_EPD47_epaper_v2.5). This is done to avoid the unnecessary step of moving the files later.
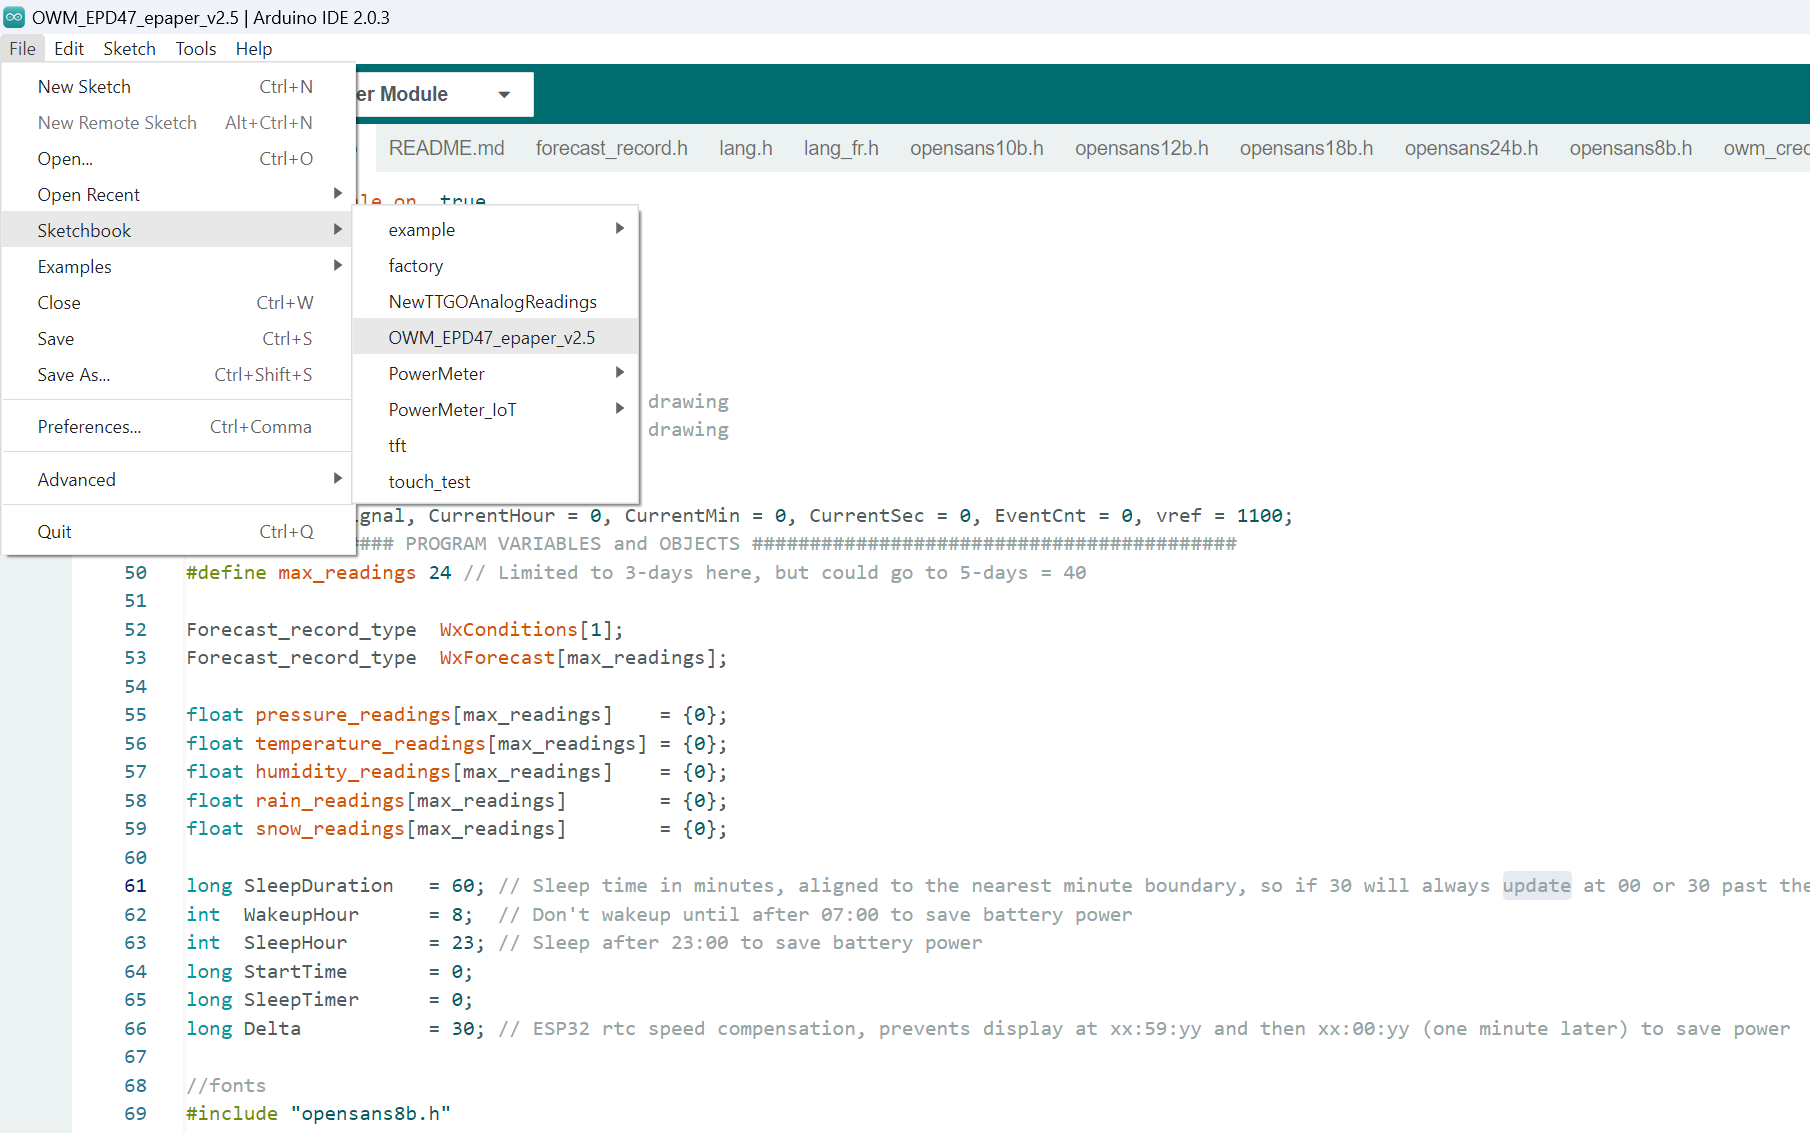
Open Arduino IDE 2.0, click File, -> Sketchbook, -> OWM_EPD47_epaper_v2.5.
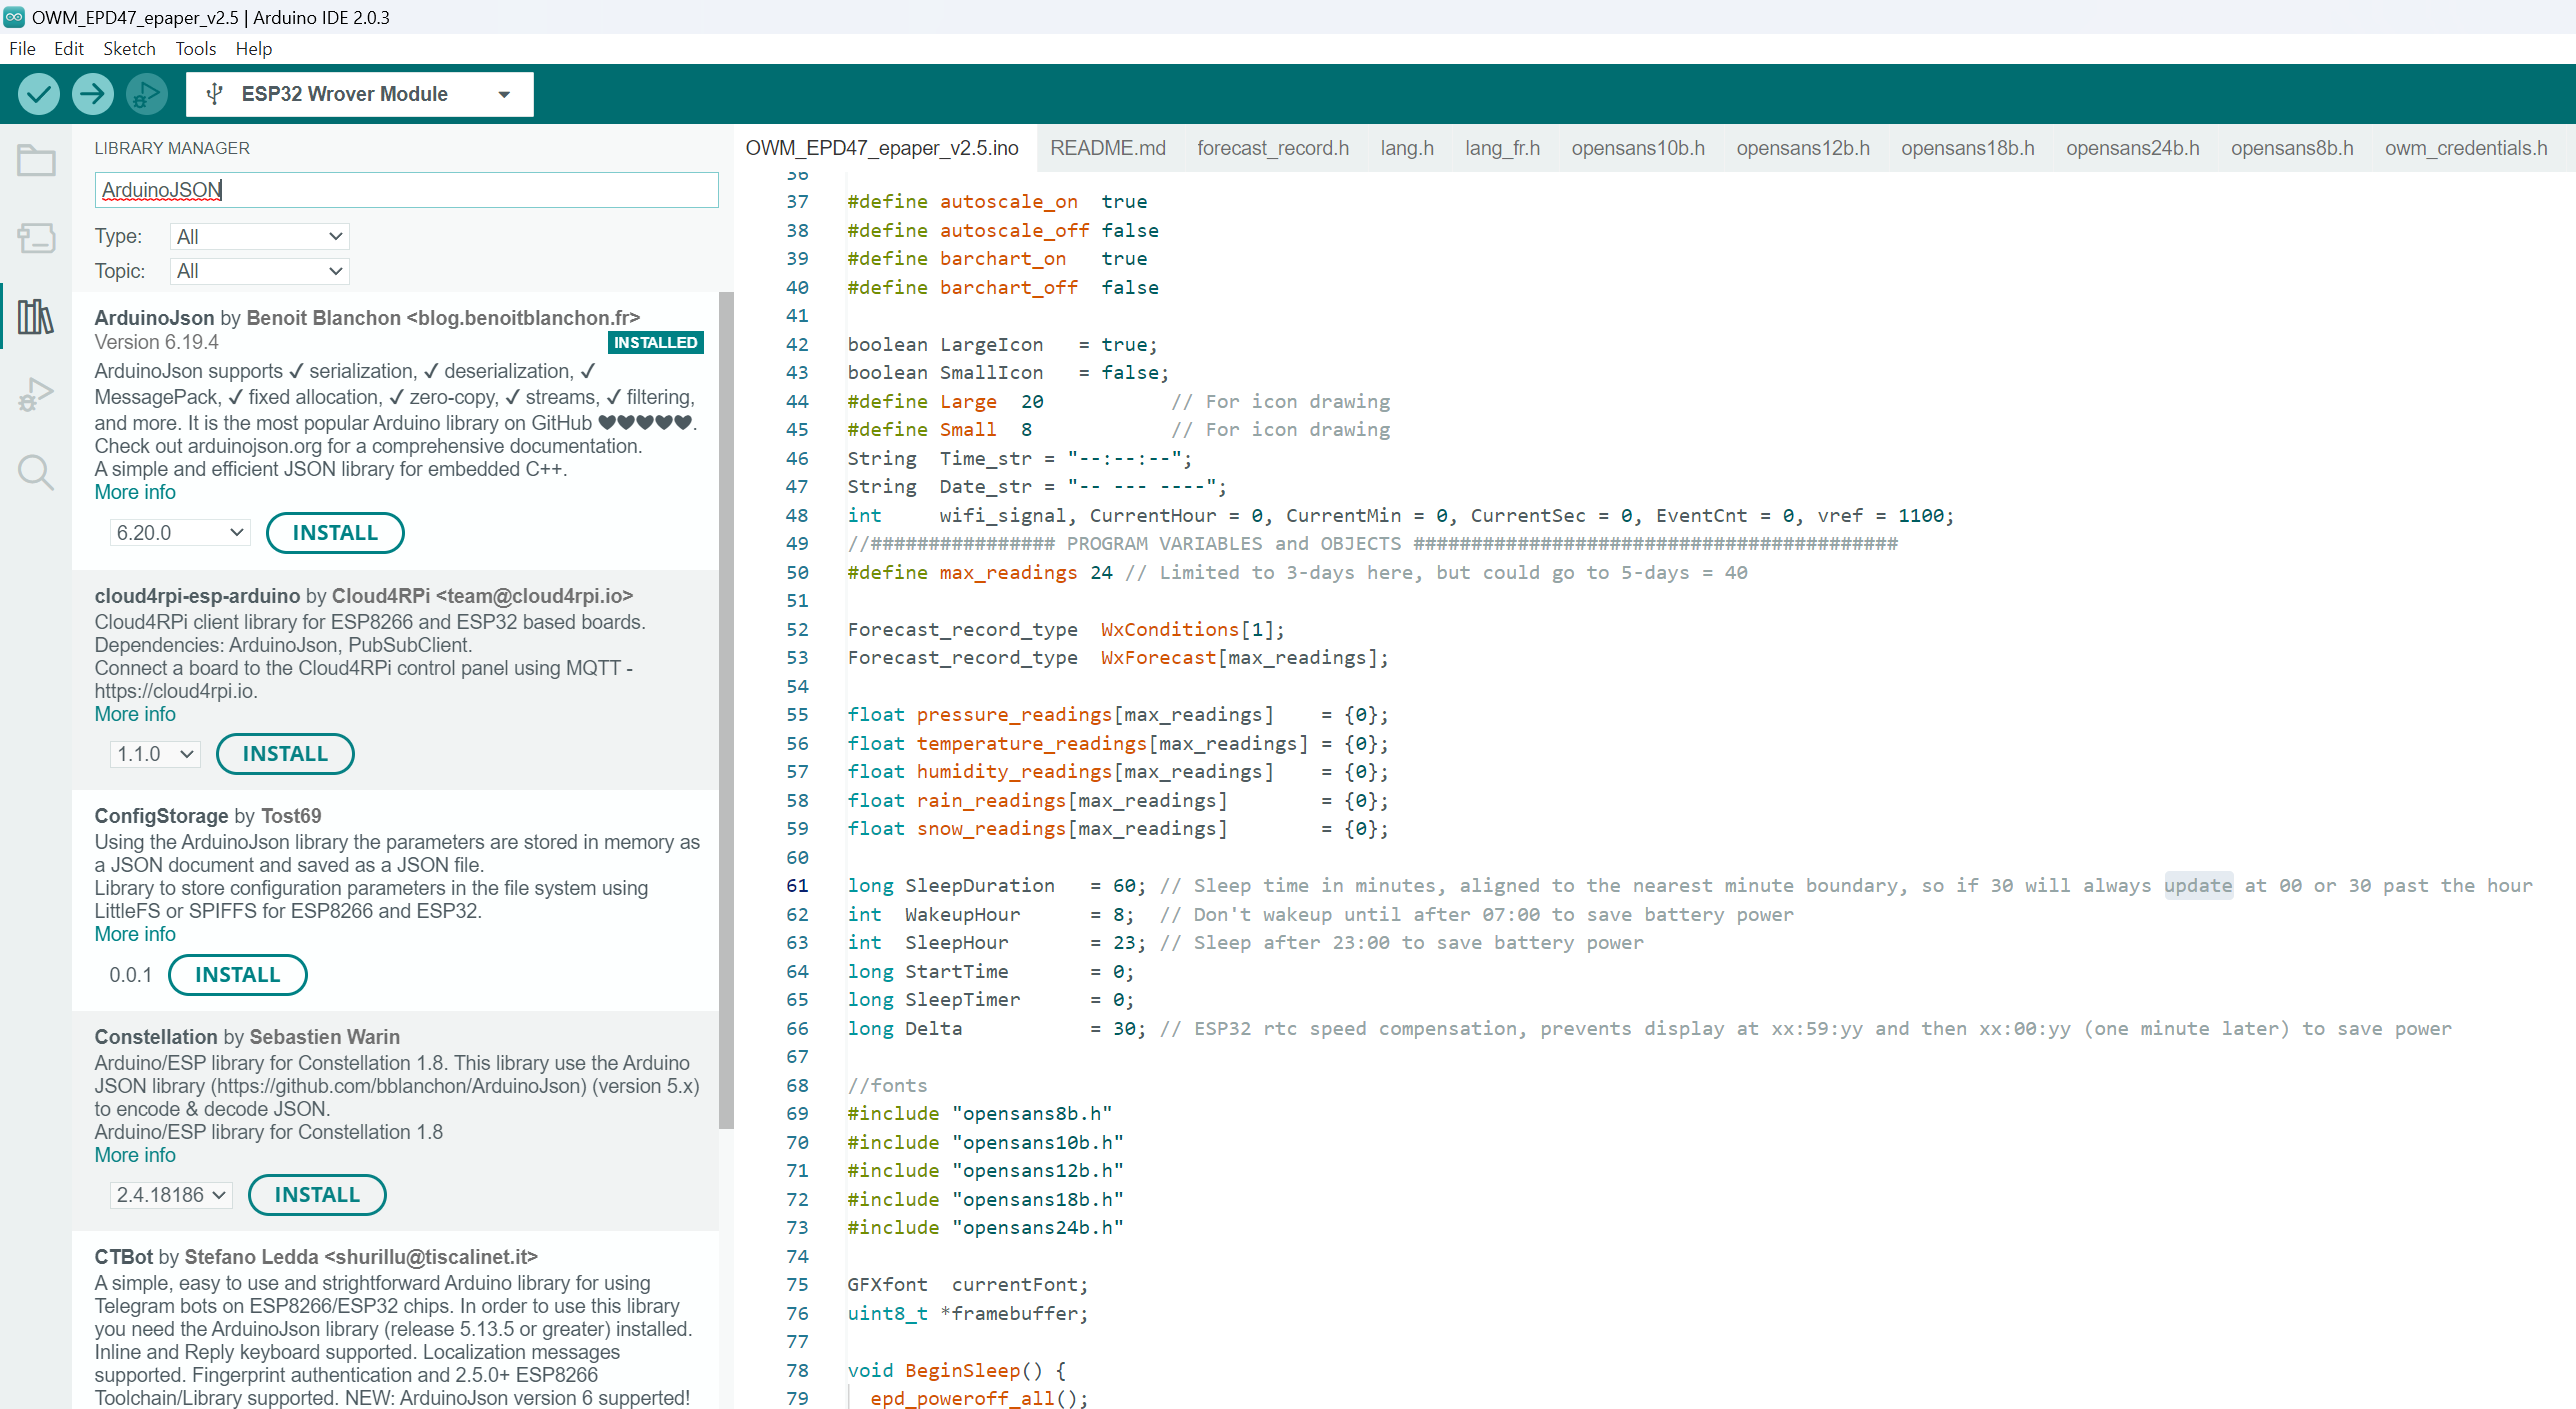
The sketch requires ArduinoJson Library to successfully build.
Click Tools, ->Manage libraries. The pane with Library Manager will open, then type ArduinoJson into the search field. Find ArduinoJson by Benoit Blanchon, click Install.
Then click the tick button on the top menu to compile the code. If everything is successful it should show:
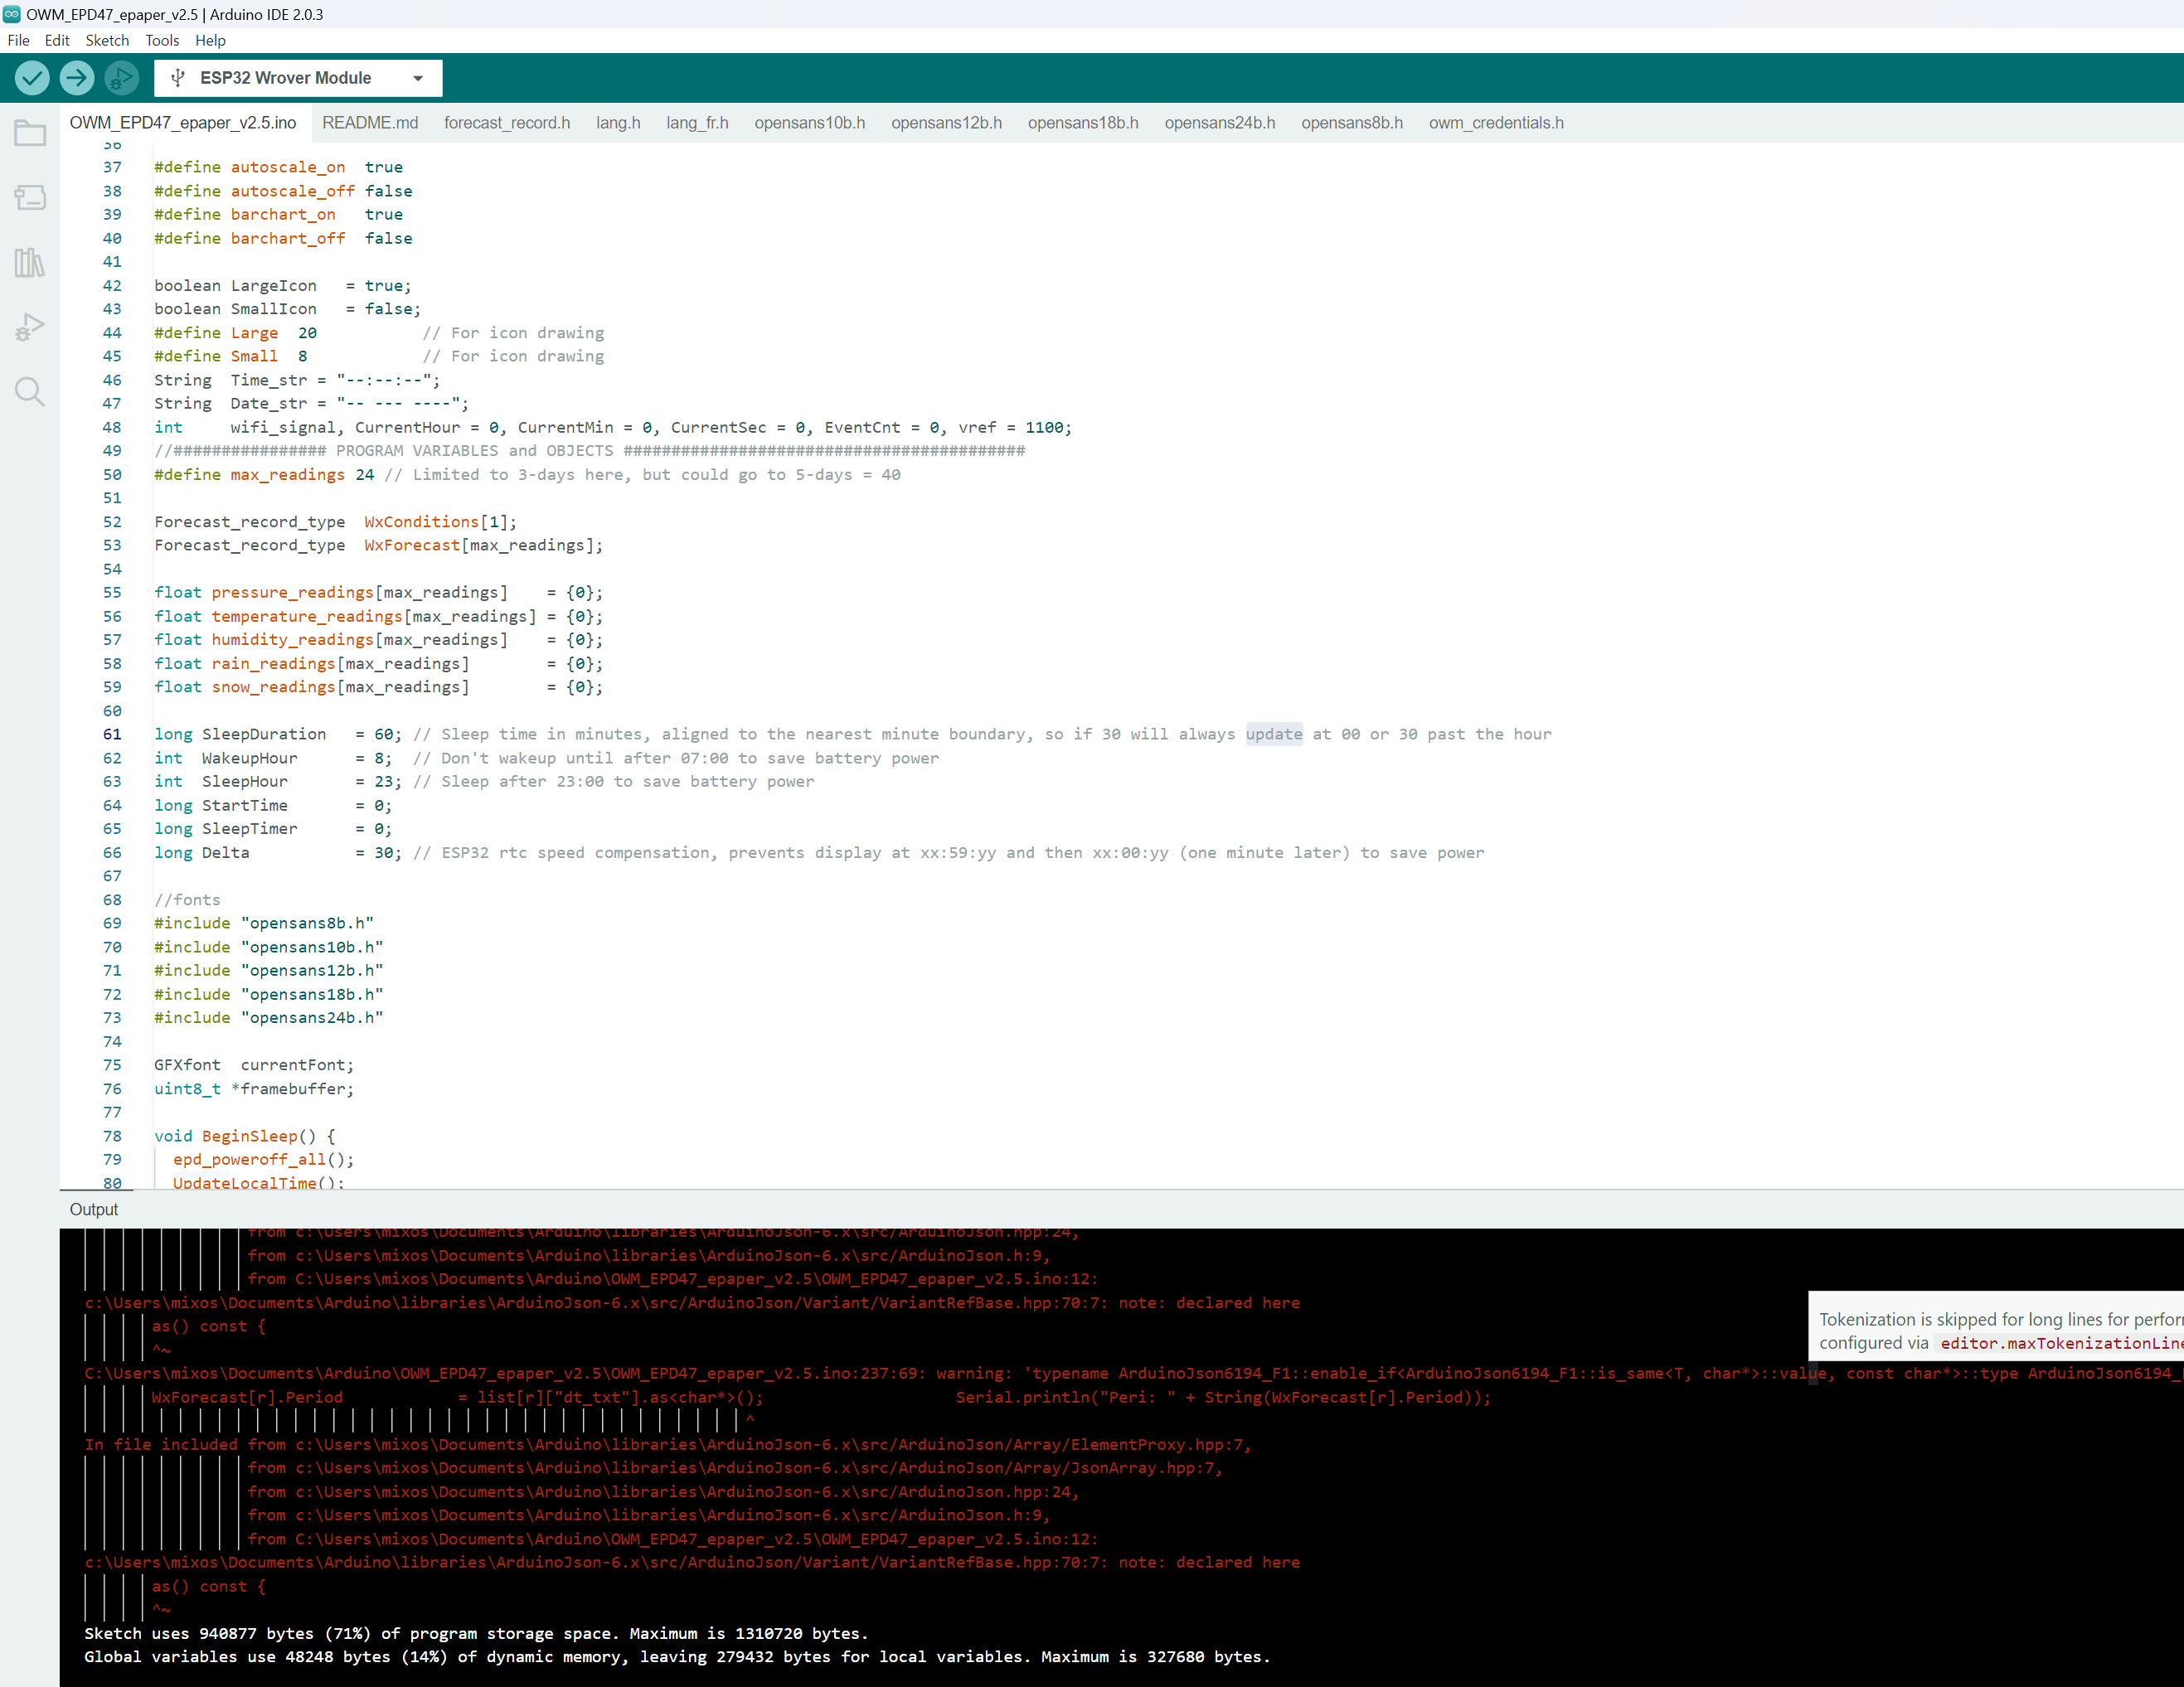
Once you verify that the code is compiled you can move on to the next step.
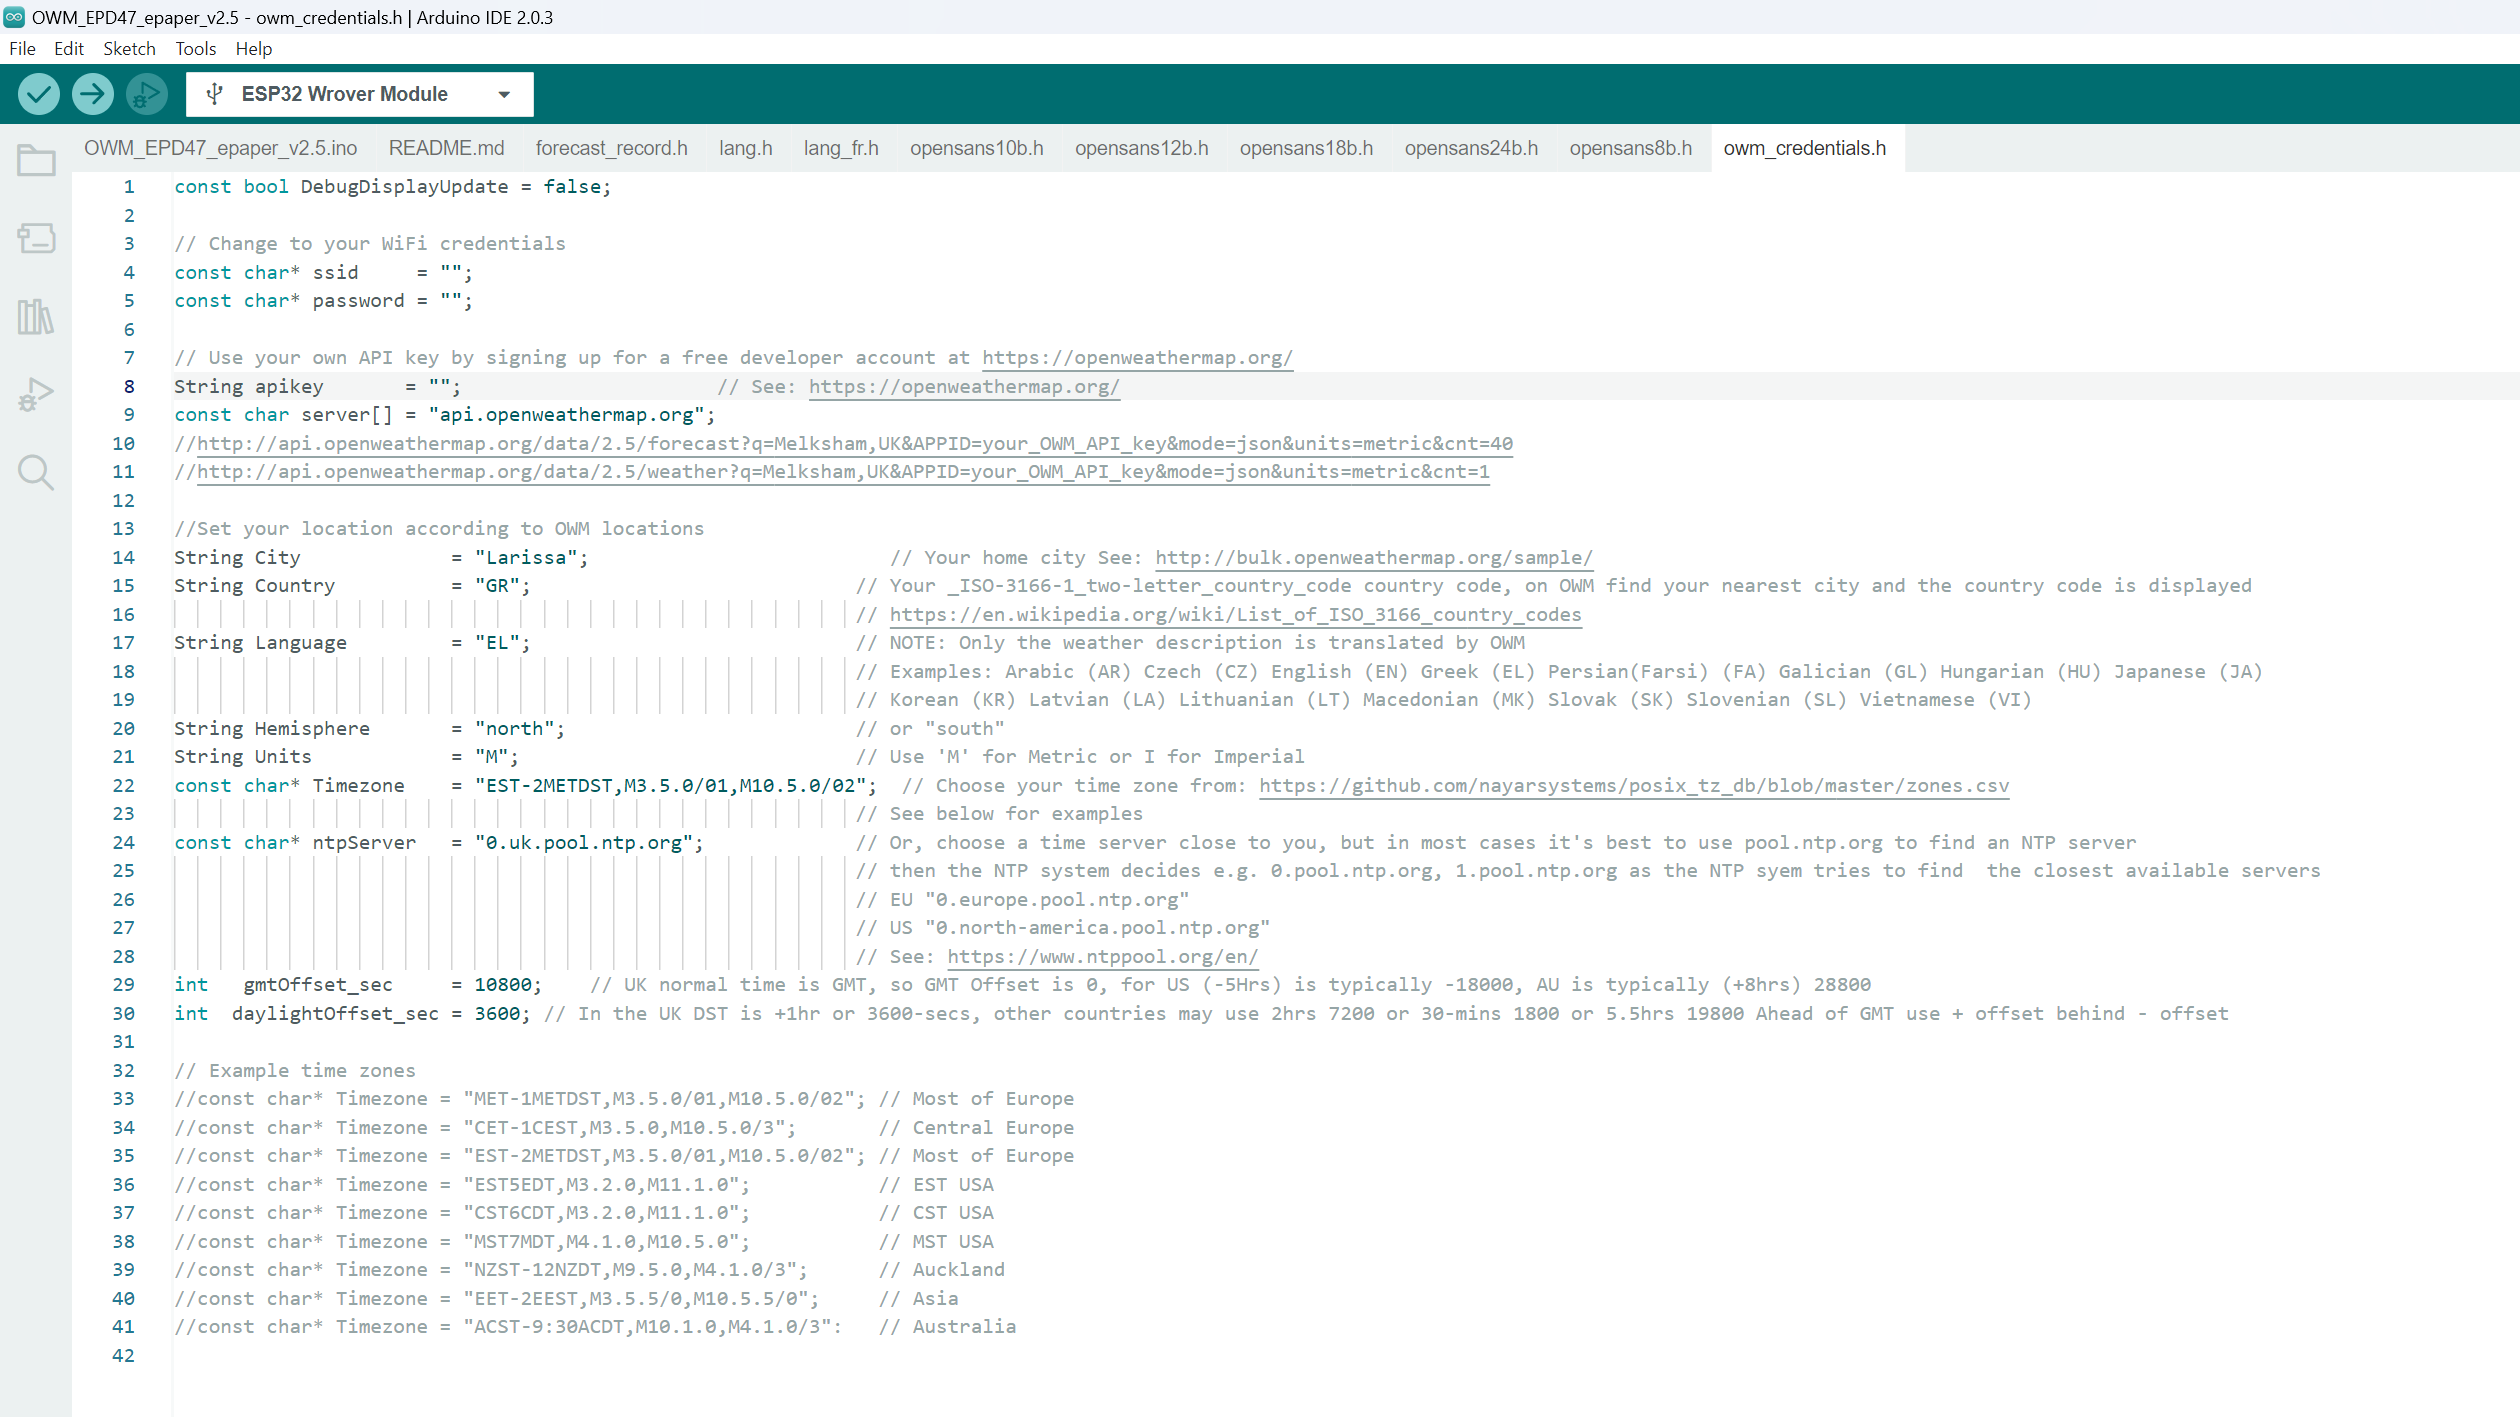
Configuring Parameters
Open the file owm_credentials.h and configure ssid, password, apikey, City, and Country.
The project is fetching data from openweathermap.org so you will need to create a new free account in order to get API key.
Power Saving
The project code supports power saving, so if you’re flashing in the early before 08.00 or after 23.00, you might notice that nothing appears on the display.
To change the power-saving options open file OWM_EPD47_epaper_v2.5.ino and change WakeupHour and SleepHour to a value that suits your schedule.

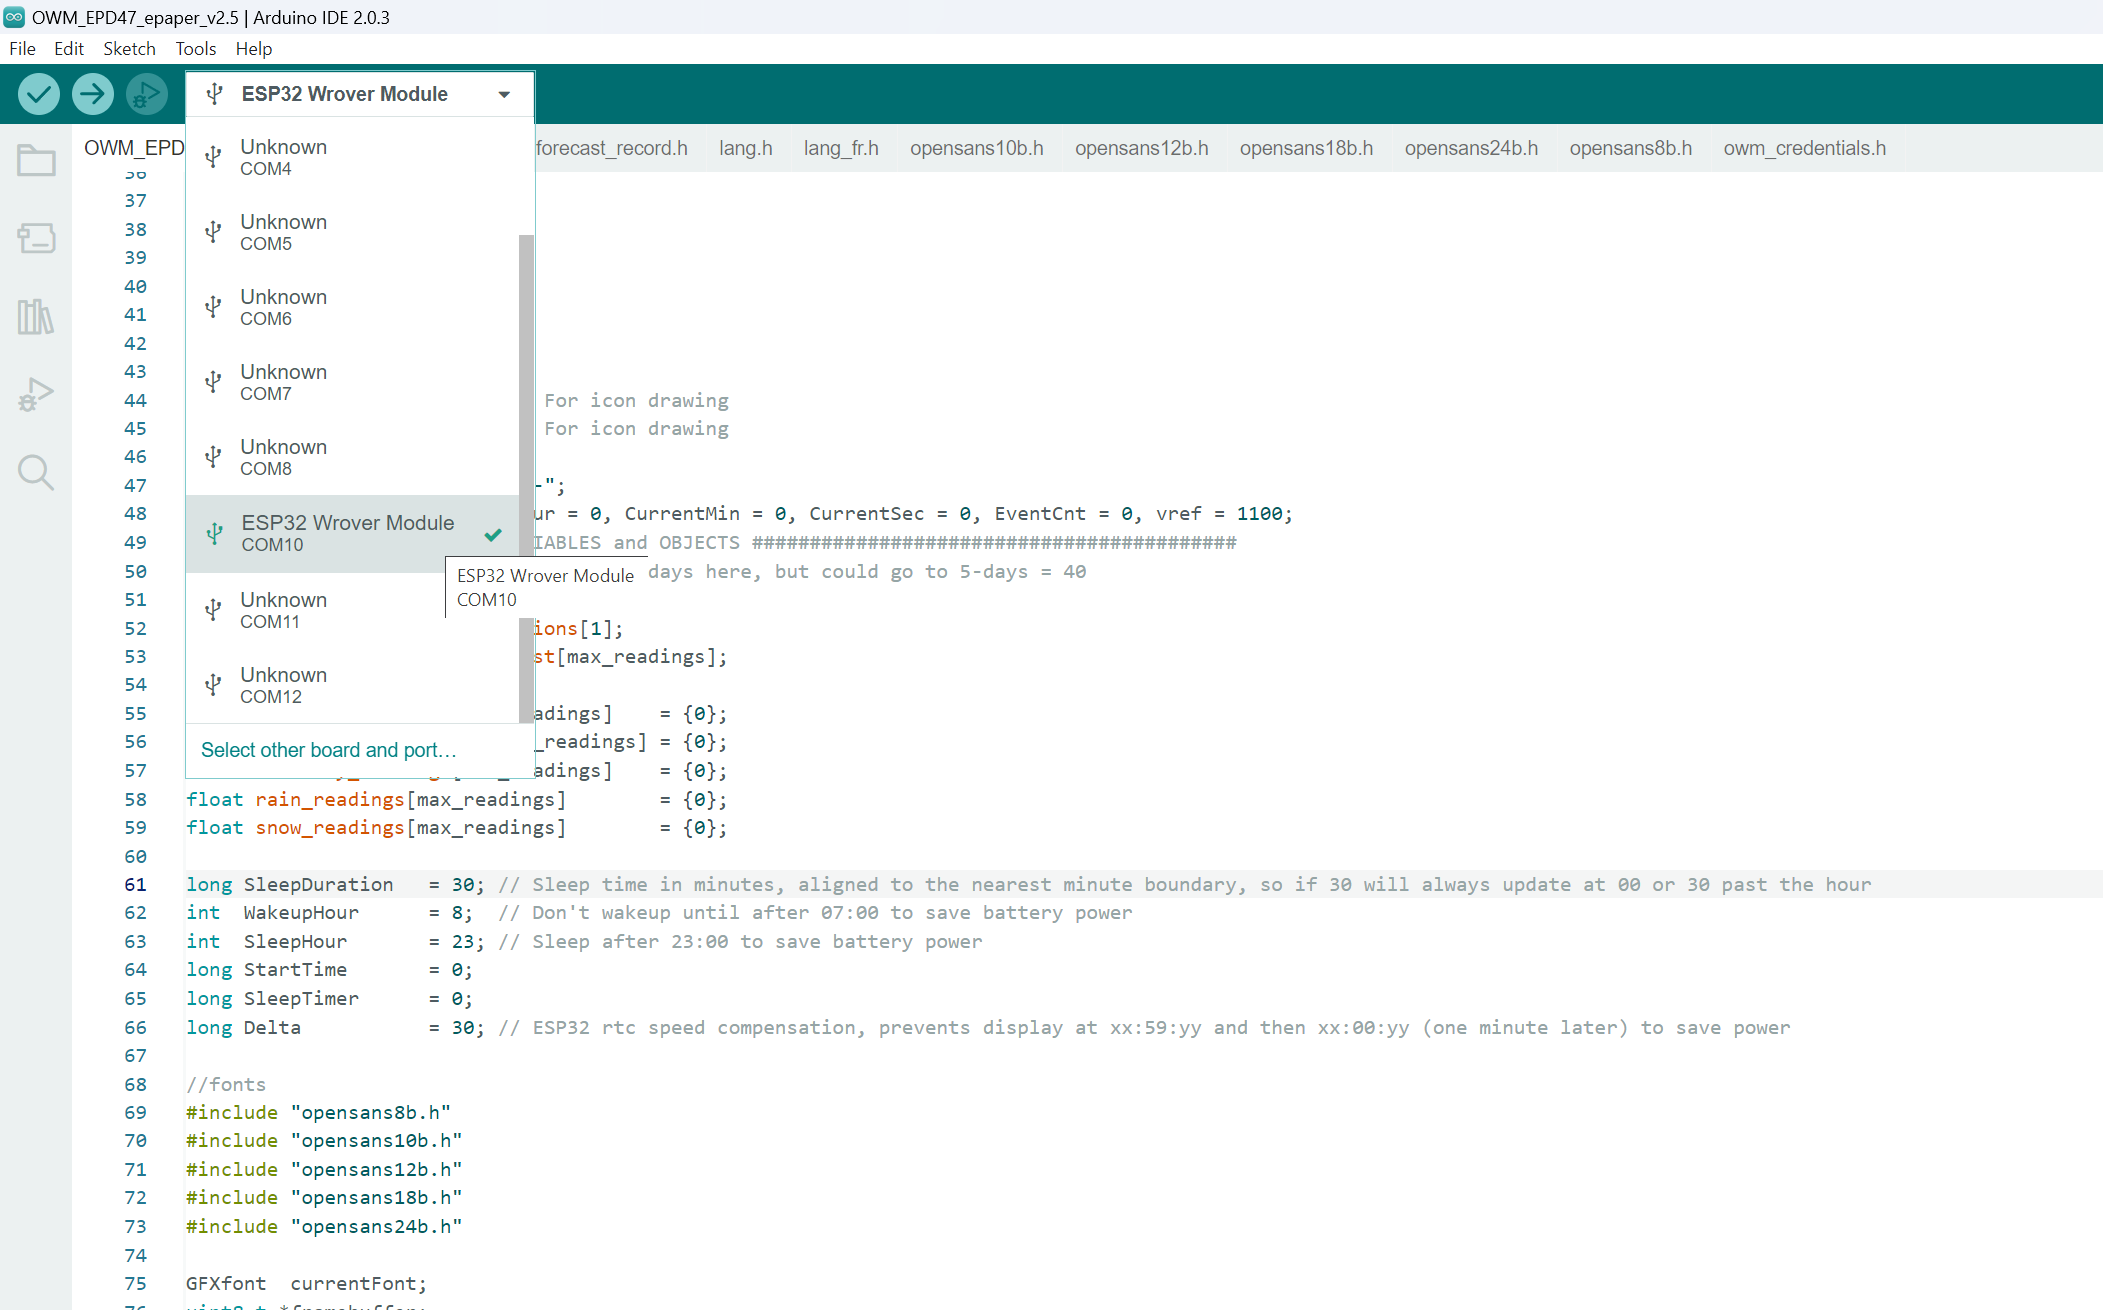
Uploading the Code
Connect the LilyGO T5 4.7-inch e-paper display to your PC-> Select the board from the dropdown in the toolbar. Search for the ESP32 Wrover module and click Ok.
Click the Upload button.
If the flashing is successful, your weather will be displayed on the e-paper like the photos below.
Photos
References
- Weather Station and Mosquitto MQTT Values for LilyGO T5 4.7 inch e-paper display
- Weather display for LilyGO TTGO T5-4.7″ E-Paper ESP32 deployed using Arduino IDE 2.0
- LilyGo EPD47 GitHub
- 3D Printed Enclosure
Please follow and like us:


Only works with ArduinoJson version=6.19.4 and below.
Thanks for the info Brad, it worked for me!
I can build it with that tip from Brad, but now I’m in a boot doom loop.
Hi..
I’ve same problem like you.
Did you solve this problem?
Please let me know.
Is it possible to set the start time of the 3h forecast in relation to the current time?
In the sample images here the current time is 6:22 p.m. and the 3-hour forecast starts at 10:00 p.m.
Is it possible to change the 3 hour forecast e.g. to display 8:00 p.m
Has anyone succeeded with this lately? I have ArduinoJson installed at version=6.19.4 and everything compiles and uploads, but the screen does nothing. I’ve tested that the screen is not bad with examples and those work properly. I don’t know what to think when I don’t see any errors, or working outcome. Hmm..
I have same problem. Success build, succes upload and LCD stop working, LCD not responds to reset… 🙁 Other projects working correctly
Its an issue with the timezone, if changed this happens
for some reason the timezones in that list may be formatted incorrectly, I asked chatgpt and it actually fixed the problem, I gave it this one “
CST6CDT,M3.2.0,M11.1.0" and it corrected it to this "CST6CDT,M3.2.0/02,M11.1.0/02" which actualy works. also you might need to add "String State = ” “;” and “,” + State + “,” to your code or it might choose the wrong cityanyone found similar problem while compiling?
Compilation error: ‘class WiFiClass’ has no member named ‘setAutoConnect’; did you mean ‘setAutoReconnect’?
followed strictly your manual and can`t find what is the issue
Hello, i get the error:
Its mentioned here that WiFi.setAutoConnect is depricated and WiFi.Begin() should be useed instead.
Commenting out the line calling WiFi.setAutoConnect lets the compilation continue (not sure if it solves the problem or if WiFi is working. In the thread linked above its mentioned that WiFi is NOT connecting).
Anyway, several other errors pop up:
error: invalid conversion from ‘int*’ to ‘int32_t*’ {aka ‘long int*’} [-fpermissive]
1037 | get_text_bounds(¤tFont, data, &xx, &yy, &x1, &y1, &w, &h, NULL);