Using the ILI9481 3.5″ Color TFT Display with Arduino
- Nick Koumaris
- http://educ8s.tv
- info@educ8s.tv
- 59.495 Views
- moderate
- Tested
Displays are one of the best ways to provide feedback to users of a particular device or project and often the bigger the display, the better. For today’s tutorial, we will look on how to use the relatively big, low cost, ILI9481 based, 3.5″ Color TFT display with Arduino.
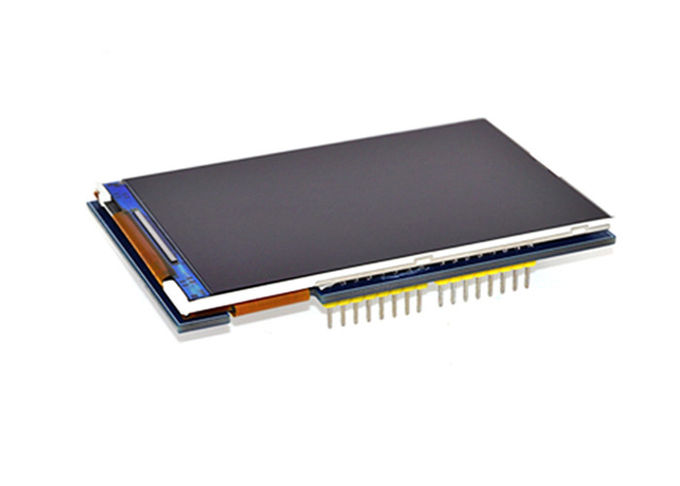
This 3.5″ color TFT display as mentioned above, is based on the ILI9481 TFT display driver. The module offers a resolution of 480×320 pixels and comes with an SD card slot through which an SD card loaded with graphics and UI can be attached to the display. The module is also pre-soldered with pins for easy mount (like a shield) on either of the Arduino Mega and Uno, which is nice since there are not many big TFT displays that work with the Arduino Uno.
To show how the display works and how to use it with Arduino based projects, we will run simple demos to display graphics and texts on the display.
Required Components
The following components are required to replicate this tutorial:
The module is compatible with either of the Arduino Uno or the Arduino Mega, so feel free to choose between them or test with both. As usual, these components can be bought via the links attached to them.
The power bank included in the component list is for those who want to test the projects when not connected to a PC.
Schematics
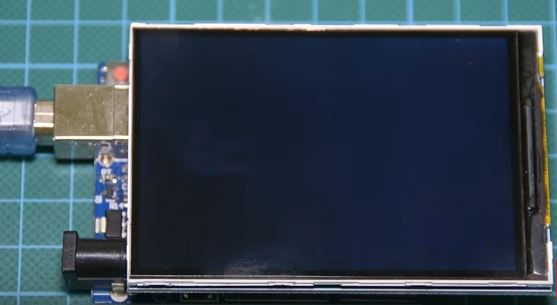
One of the good things about this module is the ease with which it can be connected to either of the Arduino Mega or Uno. For this tutorial, we will use the Arduino Uno, since the module comes as a shield with pins soldered to match the Uno’s pinout. All we need to do is snap it onto the top of the Arduino Uno as shown in the image below, thus no wiring required.
This ease of using the module mentioned above is, however, one of the few downsides of the display. If we do not use the attached SD card slot, we will be left with 6 digital and one analog pin as the module use the majority of the Arduino pins. When we use the SD card part of the display, we will be left with just 2 digital and one analog pin which at times limits the kind of project in which we can use this display. This is one of the reasons while the compatibility of this display with the Arduino Mega is such a good news, as the “Mega” offers more digital and analog pins to work with, so when you need extra pins, and size is not an issue, use the Mega.
With the module connected, we can now move to the code.
Code
To easily write code to use this display, we will use the GFX and TFT LCD libraries from “Adafruit” which can be downloaded here. With the library installed we can easily navigate through the examples that come with it and upload them to our setup to see the display in action. By studying these examples, one could easily learn how to use this display. However, I have compiled some of the most important functions for the display of text and graphics into an Arduino sketch for the sake of this tutorial. The complete sketch is attached in a zip file under the download section of this tutorial.
As usual, we will do a quick run through of the code and we start by including the libraries which we will use for the project, in this case, the Adafruit GFX and TFT LCD libraries.
//Written by Nick Koumaris
//info@educ8s.tv
#include <Adafruit_GFX.h>
#include <Adafruit_TFTLCD.h>
Next, we declare the pins of the Arduino to which our LCD is connected, and create variables for fonts and colors using matching hex values.
#define LCD_CS A3
#define LCD_CD A2
#define LCD_WR A1
#define LCD_RD A0
#define LCD_RESET A4

#define BLACK   0x0000
#define BLUE    0x001F
#define RED     0xF800
#define GREEN   0x07E0
#define CYAN    0x07FF
#define MAGENTA 0xF81F
#define YELLOW  0xFFE0
#define WHITE   0xFFFF
Next, we create an object of the TFTLCD library with the pins of the Arduino to which the LCD is connected as arguments.
Adafruit_TFTLCD tft(LCD_CS, LCD_CD, LCD_WR, LCD_RD, LCD_RESET);
With this done, the Void Setup() function is next. We start the function by issuing a tft.reset() command to reset the LCD to default configurations. Next, we specify the type of the LCD we are using via the LCD.begin function and set the rotation of the TFT as desired. We proceed to fill the screen with different colors and display different kind of text using diverse color (via the tft.SetTextColor() function) and font size (via the tft.setTextSize() function).
void setup() {

  tft.reset();
  tft.begin(0x9481);
  tft.setRotation(1);
  tft.fillScreen(RED);
  tft.fillScreen(GREEN);
  tft.fillScreen(BLUE);
  tft.fillScreen(BLACK);
  delay(1000);
  tft.setCursor(80,100);
  tft.setTextColor(WHITE);
  tft.setTextSize(4);
  tft.print("Hello");

  tft.setCursor(220,100);
  tft.setTextColor(RED);
  tft.setTextSize(4);
  tft.print("YouTUBE!");

  tft.fillRect(80,200, 321, 60, RED);

  tft.setCursor(135,215);
  tft.setTextColor(WHITE);
  tft.setTextSize(4);
  tft.print("Subscribe");

  tft.drawRect(0,0,480,320,WHITE);
  delay(1000);
Next is the void loop() function. Here we basically create a UI to display the youtube subscribe button, using some of the same functions we used under the void setup() function.
void loop()
{
  tft.fillRect(80,200,321,60,BLACK);
  delay(1000);
  tft.fillRect(80,200,321,60,RED);
  tft.setCursor(135,215);
  tft.setTextColor(WHITE);
  tft.setTextSize(4);
  tft.print("Subscribe");
  delay(1000);
}
The Adafruit library helps reduce the amount of work one needs to do while developing the code for this display, leaving the quality of the user interface to the limitations of the creativity and imagination of the person writing the code.
The complete code for this example is shown below.
//Written by Nick Koumaris
//info@educ8s.tv

#include <Adafruit_GFX.h>
#include <Adafruit_TFTLCD.h>

#define LCD_CS A3
#define LCD_CD A2
#define LCD_WR A1
#define LCD_RD A0
#define LCD_RESET A4

#define BLACK   0x0000
#define BLUE    0x001F
#define RED     0xF800
#define GREEN   0x07E0
#define CYAN    0x07FF
#define MAGENTA 0xF81F
#define YELLOW  0xFFE0
#define WHITE   0xFFFF

Adafruit_TFTLCD tft(LCD_CS, LCD_CD, LCD_WR, LCD_RD, LCD_RESET);

void setup() {

  tft.reset();
  tft.begin(0x9481);
  tft.setRotation(1);
  tft.fillScreen(RED);
  tft.fillScreen(GREEN);
  tft.fillScreen(BLUE);
  tft.fillScreen(BLACK);
  delay(1000);
  tft.setCursor(80,100);
  tft.setTextColor(WHITE);
  tft.setTextSize(4);
  tft.print("Hello");

  tft.setCursor(220,100);
  tft.setTextColor(RED);
  tft.setTextSize(4);
  tft.print("YouTUBE!");

  tft.fillRect(80,200, 321, 60, RED);

  tft.setCursor(135,215);
  tft.setTextColor(WHITE);
  tft.setTextSize(4);
  tft.print("Subscribe");

  tft.drawRect(0,0,480,320,WHITE);
  delay(1000);
}

void loop()
{
  tft.fillRect(80,200,321,60,BLACK);
  delay(1000);
  tft.fillRect(80,200,321,60,RED);
  tft.setCursor(135,215);
  tft.setTextColor(WHITE);
  tft.setTextSize(4);
  tft.print("Subscribe");
  delay(1000);
}
Demo
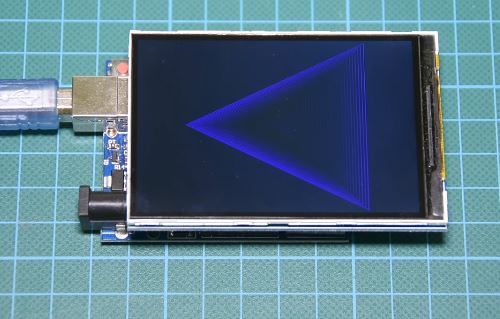
Copy the code above, and after installing the libraries, upload to your setup. You should see the display come up as shown in the image below.
That’s it for this tutorial guys, thanks for reading. If you made some cool projects based on this or you just want to ask questions about this tutorial, feel free to reach out via the comment section below.
Till next time!
The video version of this tutorial is available on youtube.




I have been struggling for a year, to make such a screen (from BuyDisplays) work.
It’s the 3.5″ capacitive unit, and I also got the shield and use it with a Mega 2560. But I cannot find the right libraries. Or something. I do not think there is anything wrong with the display or the screen that I purchased along with it.
I am about to try your solution here.
Then the next question will be how I will know which pins are available, since the shield uses all the Mega pins for location of the screen and shield. (I need to find which pins are actually being used.)
Thank you for offering hope.
The pins used can be found on the header of the code:
#define LCD_CS A3
#define LCD_CD A2
#define LCD_WR A1
#define LCD_RD A0
#define LCD_RESET A4
Hello my name is Leo. Im having a problem to download your library for 3.5″ Color TFT display ILI9481 on Arduino Uno . Could you please helt me
Check here: http://files.banggood.com/2018/08/3.5inch_Arduino_ILI9486_V1.3.zip
Doesnt work on ILI9486?? I loaded a program and it doesnt show anything, white screen. Do you know what the problem culd be? Thanks
It should work with ILI9486 as well. Please check your connections and code.
It shows “Invalid library found in C:\Program Files (x86)\Arduino\libraries\3.5inch_Arduino_ILI9486_V1.3: no headers files (.h) found in C:\Program Files (x86)\Arduino\libraries\3.5inch_Arduino_ILI9486_V1.3”.
Hey there I’m very very new to all of this but I’m having the same problem as Andrey. I’m using a mega 2560 with a ILI9486. After uploading the code the screen remained white, as this is new to me I’m not too sure what to do. All the pins are in the right place and matches the code.
Hello!
I executed the scheme, but with Atmega 2560! However, after the code is loaded, the screen (3.5″, ILI9481, 320*460) stays white. Should I change something in the code, since it is not for UNO ?!
And they were supposed to be compatible on pins? !!!
Hi,
Can you write the versions of TFTLCD and Adafruit_GFX, because with the latest versions it does not work with UNO or MEGA2560 ?!