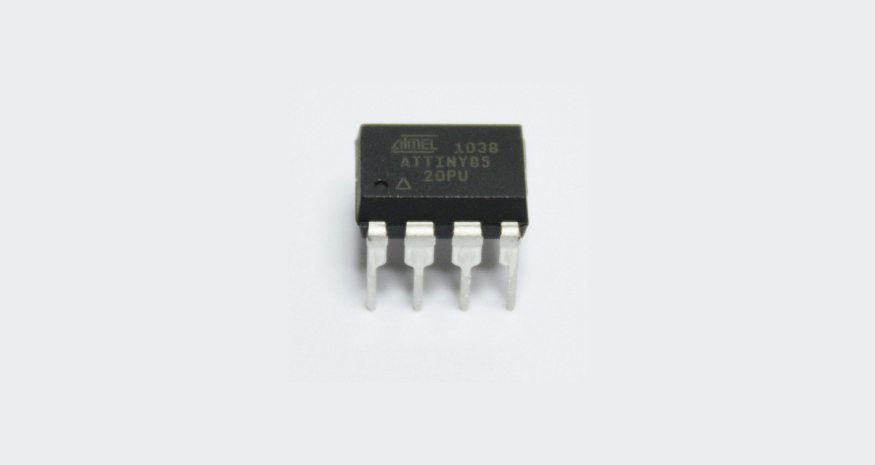
Hi! Today I’ll explain you how to recover your bricked ATtiny microcontroller using your Arduino board. ATtinys are very popular due to their small form factor yet very powerful. While working with them you may accidentally brick the ATtiny. As arduino is extremely popular and really easy to use, I guess you have one or more lying on your work table. You don’t need to purchase a HVP (High Voltage Programmer), or search for an old PC with parallel port to recover ATtiny. Just build a small circuit, plug it into Arduino board, upload a sketch and you are good to go. So let’s start…
HOW ATTINY CAN BE BRICKED?
Actually, there are many reasons. But let me explain what I mean by “bricked”. If you’ve powered it with over voltage and fried it, well, it’s not “bricked” then, rather it’s roasted. Arduino and HVP have nothing to do with it. But, if your ATtiny stopped responding due to some wrong fuse settings, then it’s “Bricked” and hopefully we can recover it using Arduino as HVP. So another question is, what is fuse settings? Well, there are 3 bytes of permanent (by permanent I mean that they stick around after power goes out, but that you can change them as many times as you’d like) storage called the fuses. The fuses determine how the chip will act, whether it has a bootloader, what speed and voltage it likes to run at, etc. Note that despite being called ‘fuses’ they are re-settable and don’t have anything to do with protection from overpowering.
To learn more about fuses, simply google about AVR fuse. Or you may check this article .
There are various mistakes one can make in fuse settings that result in a bricked ATtiny. Most common of them are Disabling ISP Programming and Selecting Wrong Clock Source. If ISP programming is disabled in fuse settings, ATtiny will not respond to an ISP Programmer. It’s just like, you have a robot that does exactly what you order him and one day you order him “Stop listening to me!”. You know what’ll happen.
And if you set fuses that select wrong clock source than you are actually providing, it will stop responding until correct clock source is provided as per fuse settings which you either don’t know or forgot.
In these situations we can say ATtiny is “Bricked”.
HOW TO RECOVER IT?
Okay, now we need to learn how we can recover our ATtiny from bricked state. As we’ve already learned, ISP programmer can do nothing anymore until fuses are reset in default mode, hence we need a High Voltage Programmer. If you want to know how a HVP works, google about it.
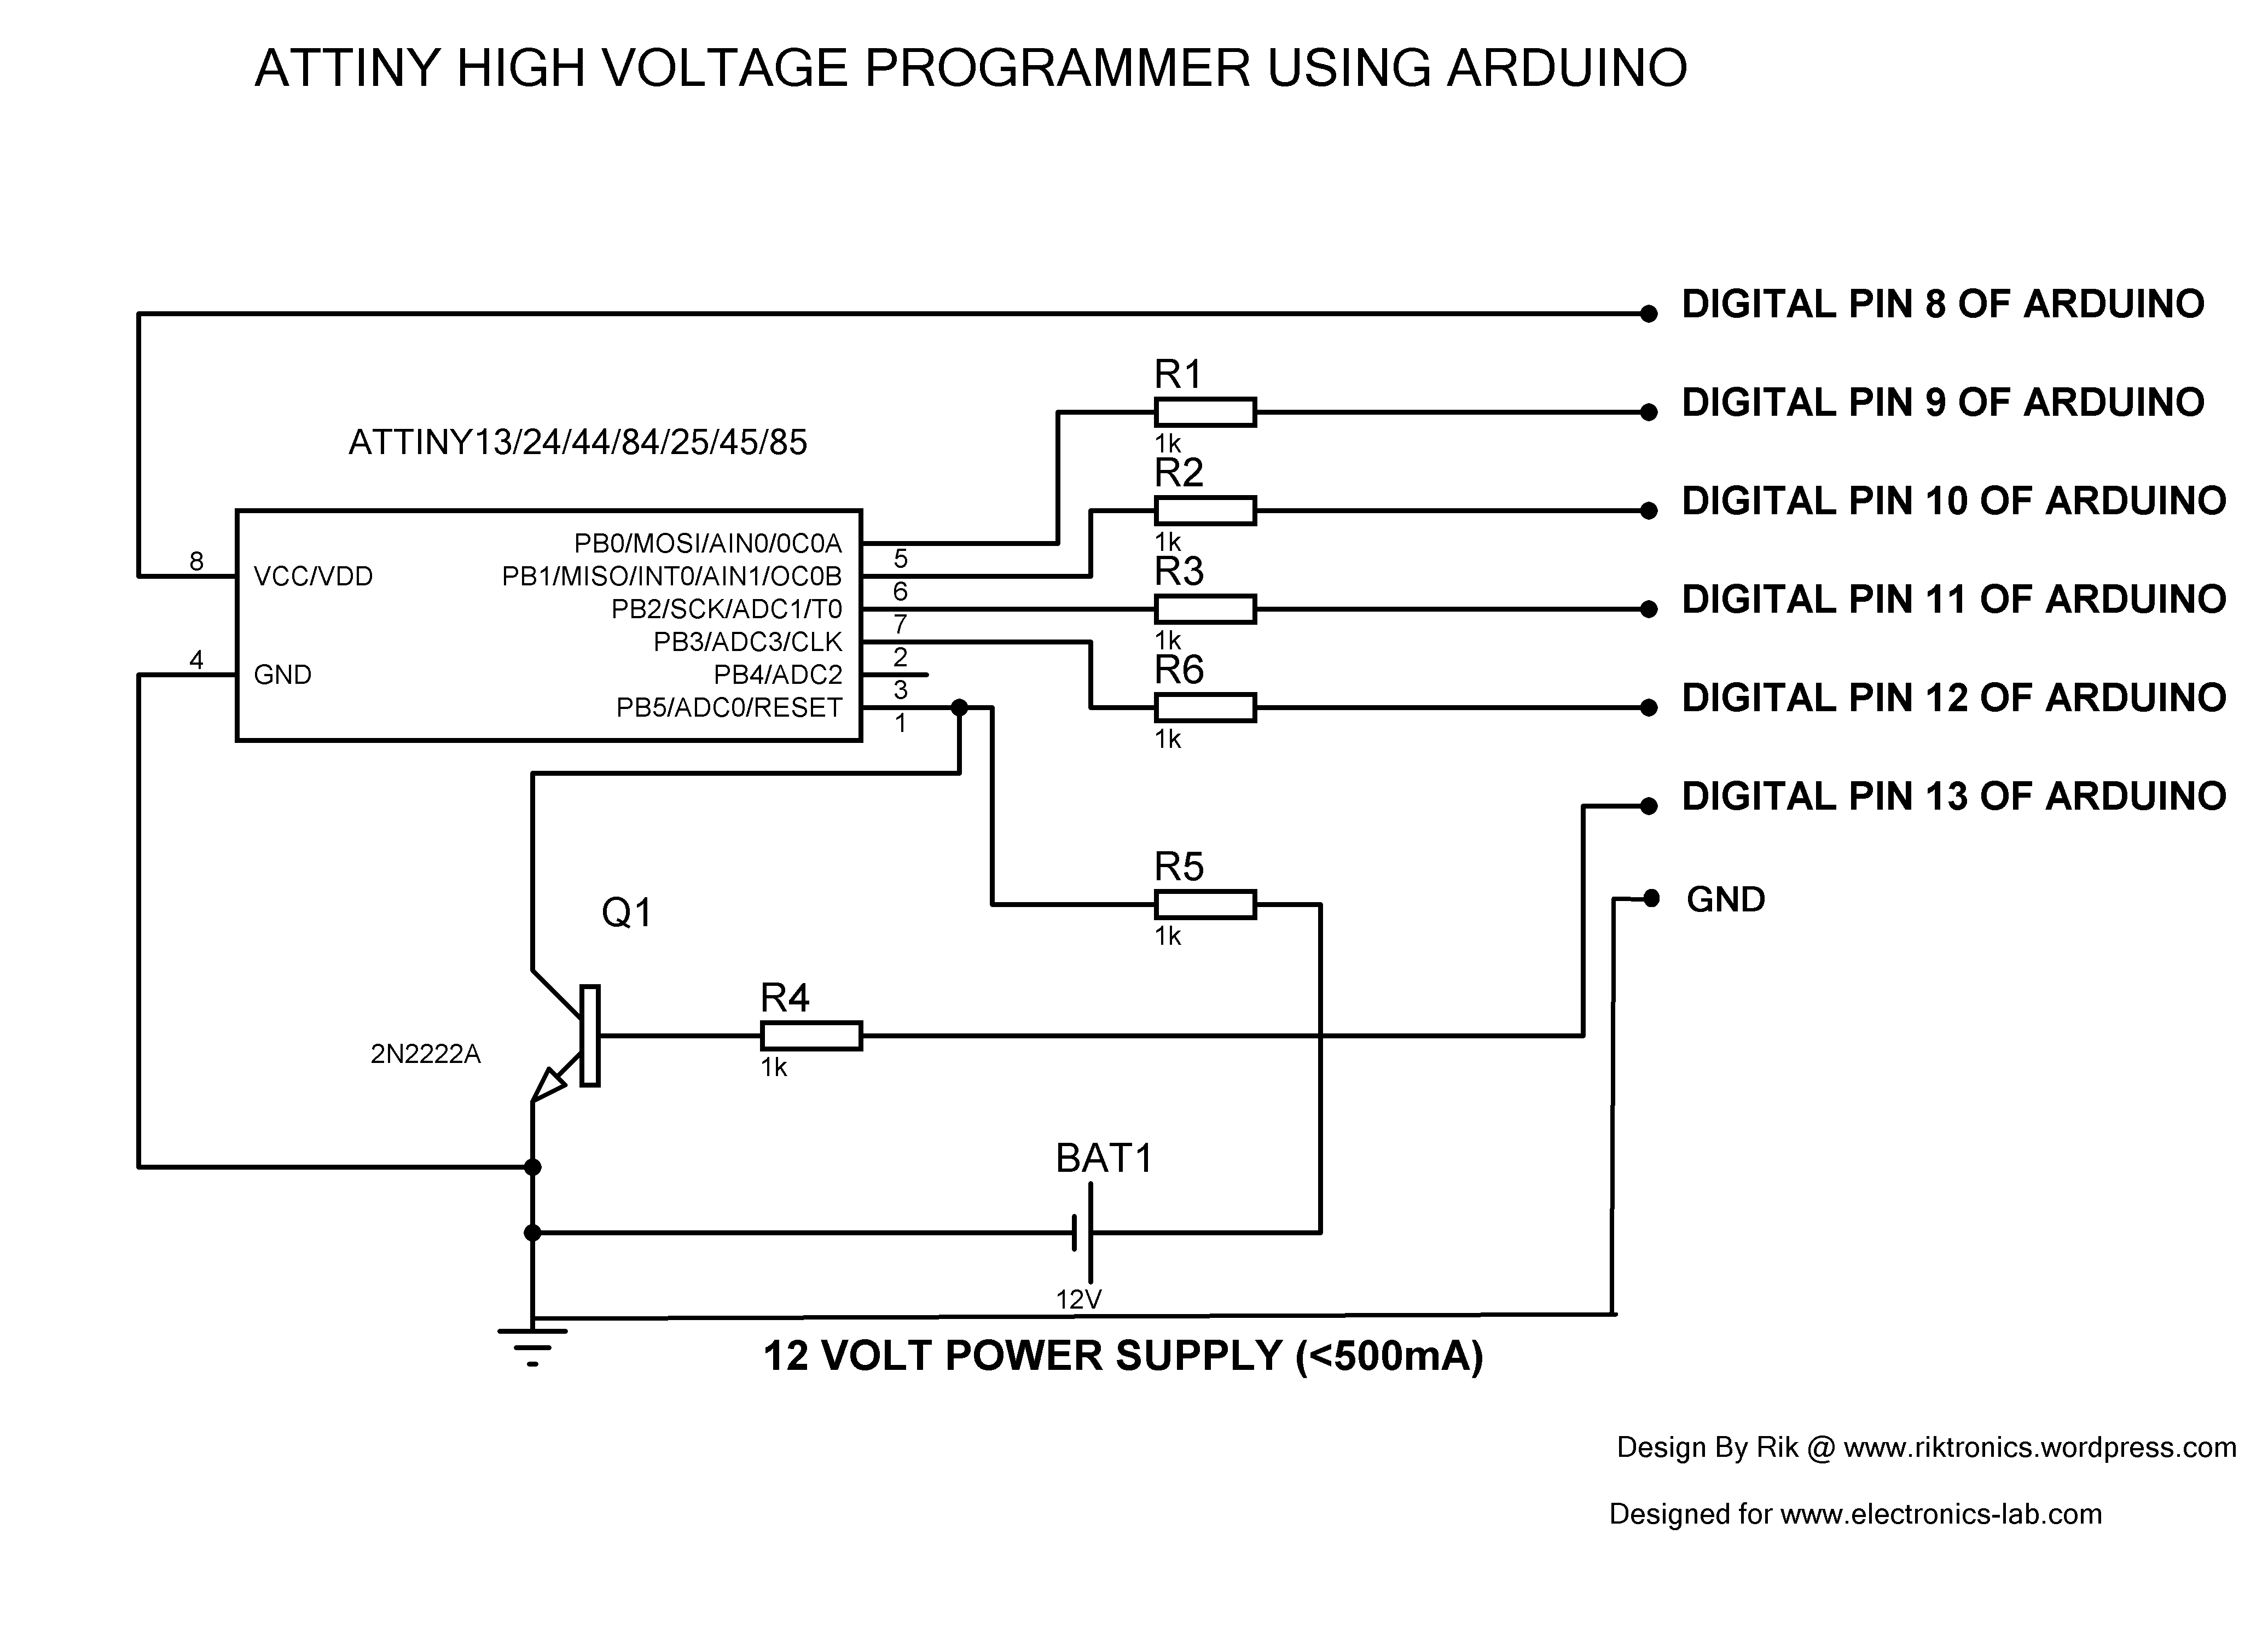
Here we’ll make a High Voltage programmer using Arduino. Arduino has more than enough pins to simulate a HVP. A very minimal additional circuitry is required.
We’ll make the circuit, plug it in to Arduino, Upload sketch in Arduino and we are good to go. The HVP will reset the fuses of ATtiny to default one. So, the ATtiny will again respond to ISP programmer.
Considering you already have Arduino, the cost of rest of the circuitry will be very small.
THINGS YOU NEED
To make the circuit on breadboard, you’ll need the following parts:
- A breadboard
- An Arduino Uno (any Arduino should work fine)
- A 2N2222A transistor (Any NPN transistor should do)
- 6 x 1K resistor
- Some jumper wires
- A 12V power supply @ 500mA.
- If you don’t have 12V source, you may use a boost converter. 5V to 12V converter is a good choice. [PURCHASE LINK]
If you want to make it on vero board or PCB, use an 8 pin IC base (DIL08) and L shaped male header (7 pins required). Making a permanent board is recommended.
CIRCUIT DIAGRAM
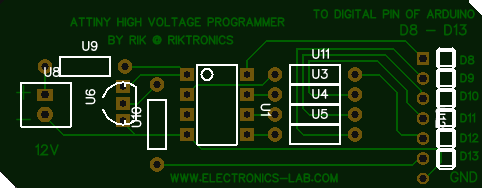
PCB LAYOUT
Use below pdf files to etch your own PCB on copper clad. There are 2 pdfs in .zip file. Consult both of them to get idea about orientation of components. Print the pdf in MIRROR view to get correct orientation after etching.
attiny-hv-programmer-PDF PCB LAYOUT-rik
Below pdf is for colored PCB layout. You may not need it.
attiny-hv-programmer-PCB COLORED-rik
Use below Gerber files to fabricate PCB.
attiny_hv_programmer_GERBER FILE_rik
The following image shows how the PCB looks like:
ARDUINO SKETCH
 // AVR High-voltage Serial Fuse Reprogrammer
 // Adapted from code and design by Paul Willoughby 03/20/2010
 // http://www.rickety.us/2010/03/arduino-avr-high-voltage-serial-programmer/
 // Fuse Calc:
 // http://www.engbedded.com/fusecalc/

 #define RST 13 // Output to level shifter for !RESET from transistor
 #define SCI 12 // Target Clock Input
 #define SDO 11 // Target Data Output
 #define SII 10 // Target Instruction Input
 #define SDI 9 // Target Data Input
 #define VCC 8 // Target VCC

 #define HFUSE 0x747C
 #define LFUSE 0x646C
 #define EFUSE 0x666E

 // Define ATTiny series signatures
 #define ATTINY13 0x9007 // L: 0x6A, H: 0xFF 8 pin
 #define ATTINY24 0x910B // L: 0x62, H: 0xDF, E: 0xFF 14 pin
 #define ATTINY25 0x9108 // L: 0x62, H: 0xDF, E: 0xFF 8 pin
 #define ATTINY44 0x9207 // L: 0x62, H: 0xDF, E: 0xFFF 14 pin
 #define ATTINY45 0x9206 // L: 0x62, H: 0xDF, E: 0xFF 8 pin
 #define ATTINY84 0x930C // L: 0x62, H: 0xDF, E: 0xFFF 14 pin
 #define ATTINY85 0x930B // L: 0x62, H: 0xDF, E: 0xFF 8 pin

 void setup() {
 pinMode(VCC, OUTPUT);
 pinMode(RST, OUTPUT);
 pinMode(SDI, OUTPUT);
 pinMode(SII, OUTPUT);
 pinMode(SCI, OUTPUT);
 pinMode(SDO, OUTPUT); // Configured as input when in programming mode
 digitalWrite(RST, HIGH); // Level shifter is inverting, this shuts off 12V
 Serial.begin(19200);
 Serial.println("Code is modified by Rik. Visit riktronics.wordpress.com and electronics-lab.com for more projects");
 Serial.println("-------------------------------------------------------------------------------------------------");
 Serial.println("Enter any character to start process..");}


 void loop() {
 if (Serial.available() > 0) {
 Serial.read();
 pinMode(SDO, OUTPUT); // Set SDO to output
 digitalWrite(SDI, LOW);
 digitalWrite(SII, LOW);
 digitalWrite(SDO, LOW);
 digitalWrite(RST, HIGH); // 12v Off
 digitalWrite(VCC, HIGH); // Vcc On
 delayMicroseconds(20);
 digitalWrite(RST, LOW); // 12v On
 delayMicroseconds(10);
 pinMode(SDO, INPUT); // Set SDO to input
 delayMicroseconds(300);
 unsigned int sig = readSignature();
 Serial.println("Reading signature from connected ATtiny......");
 Serial.println("Reading complete..");
 Serial.print("Signature is: ");
 Serial.println(sig, HEX);
 readFuses();
 if (sig == ATTINY13) {

 Serial.println("The ATtiny is detected as ATtiny13/ATtiny13A..");
 Serial.print("LFUSE: ");
 writeFuse(LFUSE, 0x6A);
 Serial.print("HFUSE: ");
 writeFuse(HFUSE, 0xFF);
 Serial.println("");
 } else if (sig == ATTINY24 || sig == ATTINY44 || sig == ATTINY84 ||
 sig == ATTINY25 || sig == ATTINY45 || sig == ATTINY85) {

 Serial.println("The ATtiny is detected as ");
 if(sig == ATTINY24) Serial.println("ATTINY24..");
 else if(sig == ATTINY44) Serial.println("ATTINY44..");
 else if(sig == ATTINY84) Serial.println("ATTINY84..");
 else if(sig == ATTINY25) Serial.println("ATTINY25..");
 else if(sig == ATTINY45) Serial.println("ATTINY45..");
 else if(sig == ATTINY85) Serial.println("ATTINY85..");

 writeFuse(LFUSE, 0x62);
 writeFuse(HFUSE, 0xDF);
 writeFuse(EFUSE, 0xFF);
 }

 Serial.println("Fuses will be read again to check if it's changed successfully..");
 readFuses();
 digitalWrite(SCI, LOW);
 digitalWrite(VCC, LOW); // Vcc Off
 digitalWrite(RST, HIGH); // 12v Off

 Serial.println("");
 Serial.println("");
 Serial.println("");
 Serial.println("");
 }
 }

 byte shiftOut (byte val1, byte val2) {
 int inBits = 0;
 //Wait until SDO goes high
 while (!digitalRead(SDO))
 ;
 unsigned int dout = (unsigned int) val1 << 2;
 unsigned int iout = (unsigned int) val2 << 2;
 for (int ii = 10; ii >= 0; ii--) {
 digitalWrite(SDI, !!(dout & (1 << ii)));
 digitalWrite(SII, !!(iout & (1 << ii)));
 inBits <<= 1; inBits |= digitalRead(SDO);
 digitalWrite(SCI, HIGH);
 digitalWrite(SCI, LOW);
 }
 return inBits >> 2;
 }

 void writeFuse (unsigned int fuse, byte val) {

 Serial.println("Writing correct fuse settings to ATtiny.......");

 shiftOut(0x40, 0x4C);
 shiftOut( val, 0x2C);
 shiftOut(0x00, (byte) (fuse >> 8));
 shiftOut(0x00, (byte) fuse);

 Serial.println("Writing complete..");
 }

 void readFuses () {

 Serial.println("Reading fuse settings from connected ATtiny.......");

 byte val;
 shiftOut(0x04, 0x4C); // LFuse
 shiftOut(0x00, 0x68);
 val = shiftOut(0x00, 0x6C);
 Serial.print("LFuse: ");
 Serial.print(val, HEX);
 shiftOut(0x04, 0x4C); // HFuse
 shiftOut(0x00, 0x7A);
 val = shiftOut(0x00, 0x7E);
 Serial.print(", HFuse: ");
 Serial.print(val, HEX);
 shiftOut(0x04, 0x4C); // EFuse
 shiftOut(0x00, 0x6A);
 val = shiftOut(0x00, 0x6E);
 Serial.print(", EFuse: ");
 Serial.println(val, HEX);
 Serial.println("Reading complete..");
 }

 unsigned int readSignature () {
 unsigned int sig = 0;
 byte val;
 for (int ii = 1; ii < 3; ii++) {
 shiftOut(0x08, 0x4C);
 shiftOut( ii, 0x0C);
 shiftOut(0x00, 0x68);
 val = shiftOut(0x00, 0x6C);
 sig = (sig << 8) + val;
 }
 return sig;
 }
PROCEDURE
First of all make the circuit either on breadboard or on PCB/veroboard.
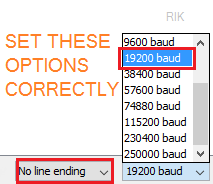
Now, connect your Arduino to PC and open ArduinoIDE. Select correct COM port. Write or copy-paste the given sketch to IDE and upload it to Arduino. Once uploaded successfully, go to serial monitor and set Baud rate to 19200 and No line ending.
Now, connect pins of the circuit you made to respective pins of Arduino. If you have made a PCB with L shape male headers, simply plug it in to Arduino’s D8-D13 (and GND) pins.
If serial monitor is opened already, close it. Reset Arduino by pressing reset button. Now re-open serial monitor. As soon as it’s opened, you’ll see the following message:
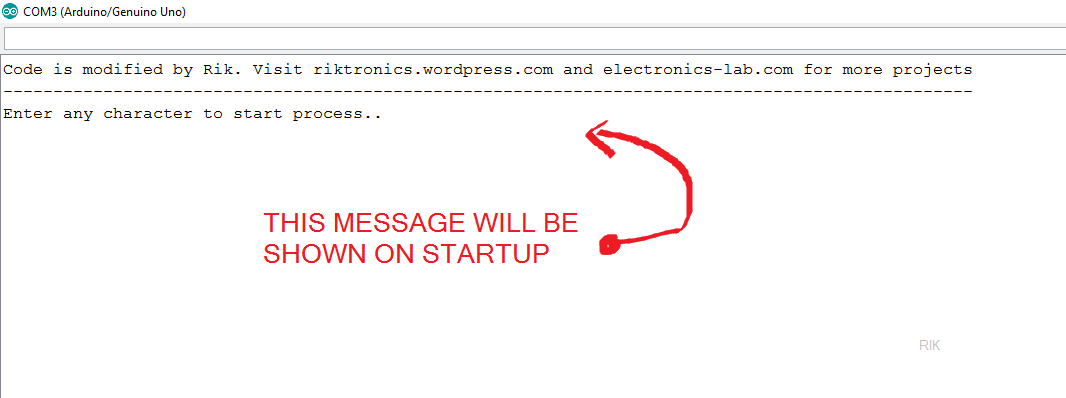
Well, now you need to type a single character like a, b, x etc. and hit Enter↵ to initiate the process. The Arduino code is smart enough to detect your ATtiny model automatically and write correct fuses according to it. You don’t need to specify model or fuse settings. It’ll do all for you. The code can detect 7 different ATtinys. So, after you’ve entered a character you can see the current fuse settings (which bricked the IC) of your ATtiny, and then it will be over-written with correct one, now once again the current fuse setting (which is correct now) is shown. Done.
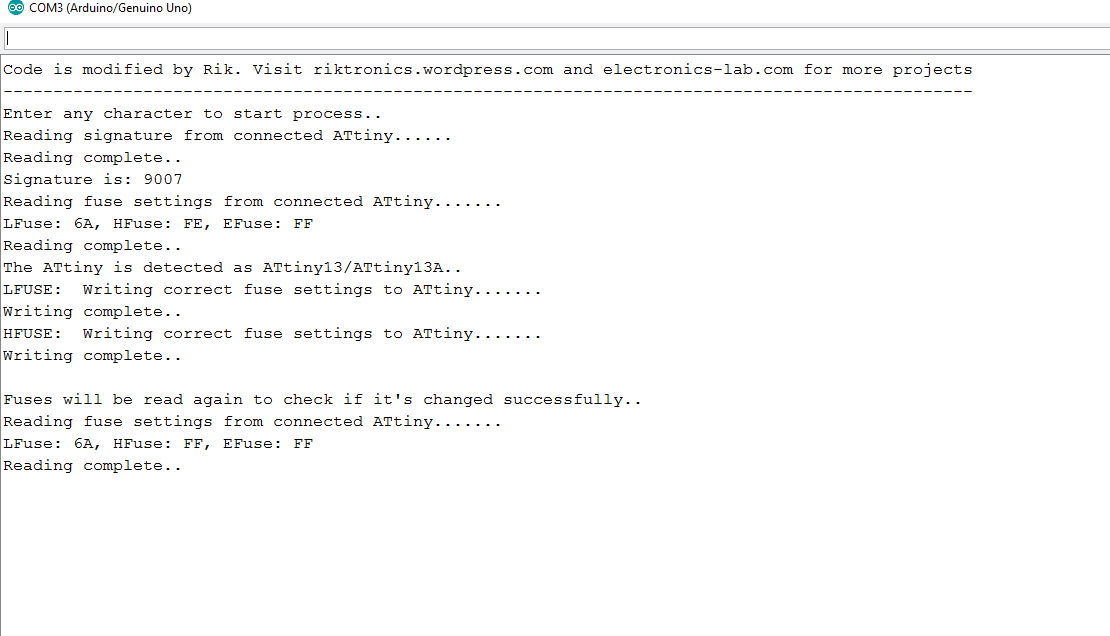
If you look at the image carefully, you can see the initial fuses were LFUSE: 6A HFUSE: FE. That indicate’s, reset was disabled in the ATtiny (as I’ve used it as normal I/O pin because I needed six I/O pins), hence it stopped responding to ISP programmers. The HVP set it to default LFUSE: 6A HFUSE: FF. Now it’s ready to talk to ISP programmer, 🙂
Next, turn off 12V power supply, detach arduino from PC, remove IC from socket and program it using your ISP programmer as you normally do.
SOME PRACTICAL SNAPS
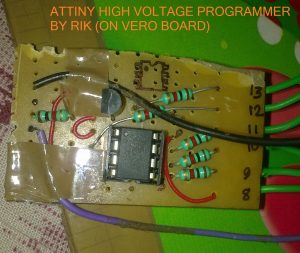
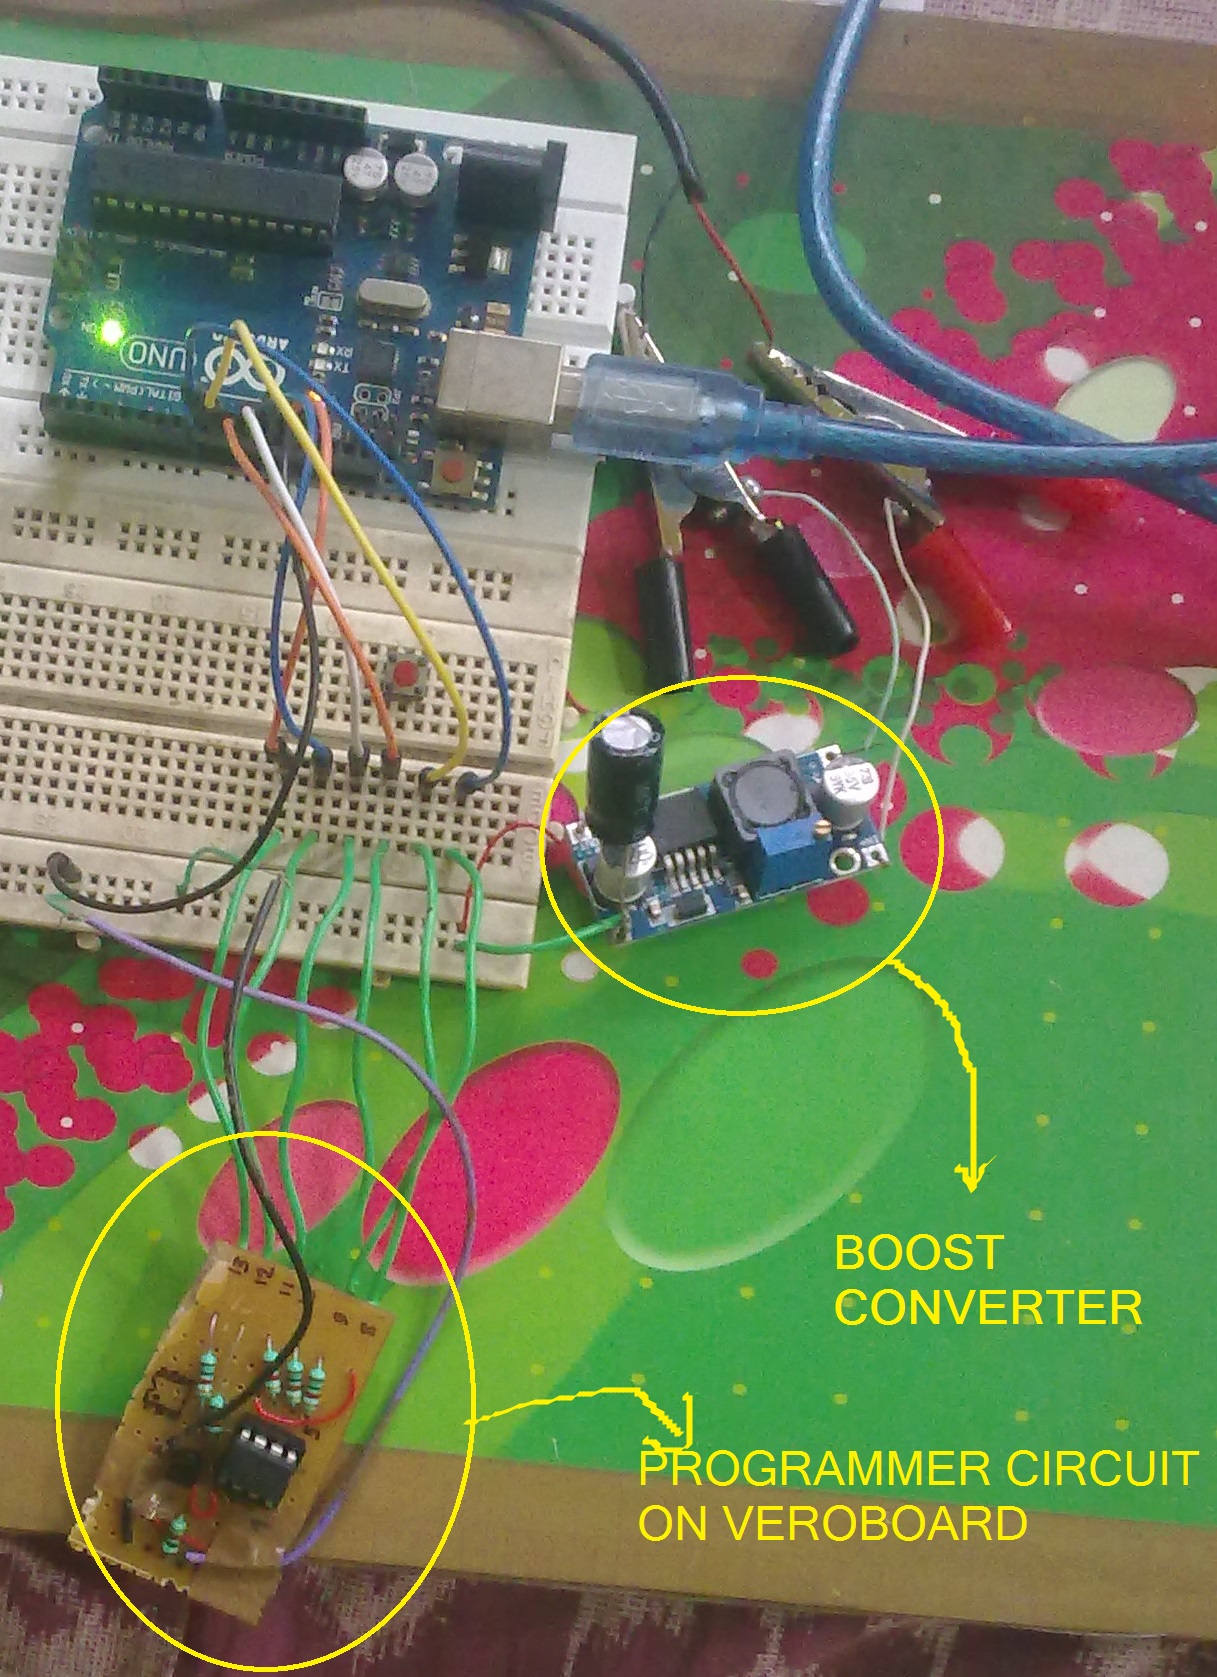
I made the circuit on veroboard, and I was in damn hurry. So the board is not a piece of art 😉 , but it’s working like a charm. Below are some snaps of the board:
So, that’s how it works. I hope you can recover your bricked ATtiny too. If this article helped you, let me know in comments. And if you have any questions, don’t hesitate to ask. Thank you. 🙂




Thanks! This worked great! I was able to unlock the ATTiny RESET pin after I accidentally disabled it.
Thanks.. managed to restore 2 ATTINY13a
Se puede con arduino NANO??
Can it be done with Arduino NANO?
Excelente recupere 2 attiny85
Hi,today microntrollers price is higher to ever.
Thanks for your work, i saved 7 attiny85 with wrong fuse.
In the future i’ll made a pcb with your schema but i’ll add an atmega328 with your sketch.i think it will be complete.
Thanks.
Thank you for this great tutorial! I already had some “dead” chips. This brought them back to life.
Hi there!
Can it be modified to work also with atmega328p?
Thanks
Hi, I am getting signature as FFFF . But in the snaps u have given above signature is 9007
what to do? can u pls help us
Thanks! This worked great! I was able to unlock the ATTiny RESET pin after I accidentally disabled it.
how do i load this code in arduino to use i can get the code in arduino but it wont compile im a newbie at this Thanks in advance for any and all advice.
it worked for attiny85, great, many thanks!