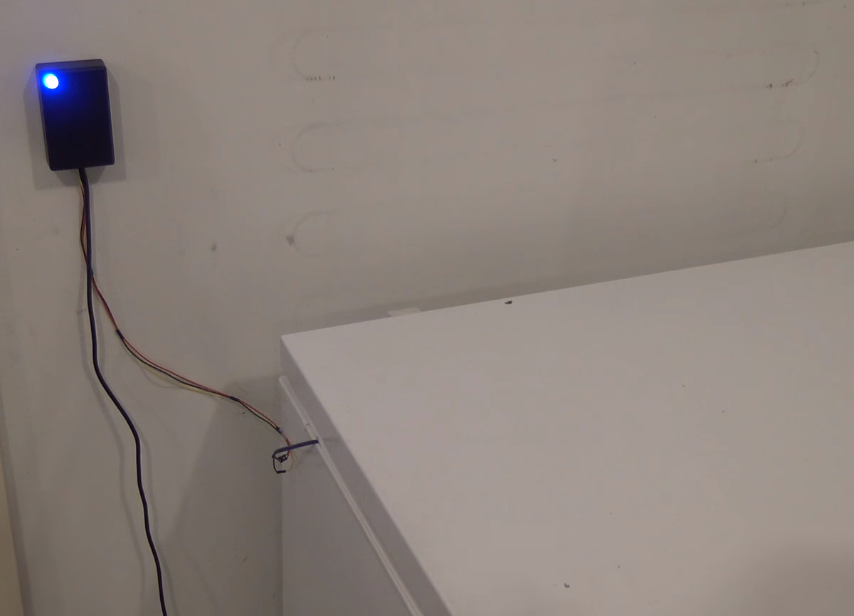
“Arduino Freezer Temperature Sensor” is an Arduino based project which works as an indicator to notify you when the freezer isn’t work properly. This project was created by “John Saunders”.
To make this project, you will need these parts:
- Arduino Nano, most of other Arduino boards can be used.
- USB cable, to connect the Arduino to the computer.
- Power Adapter, with 5V DC output.
- Temperature Sensor, TMP36.
- A project Box.
- A Breadboard.
- A LED.
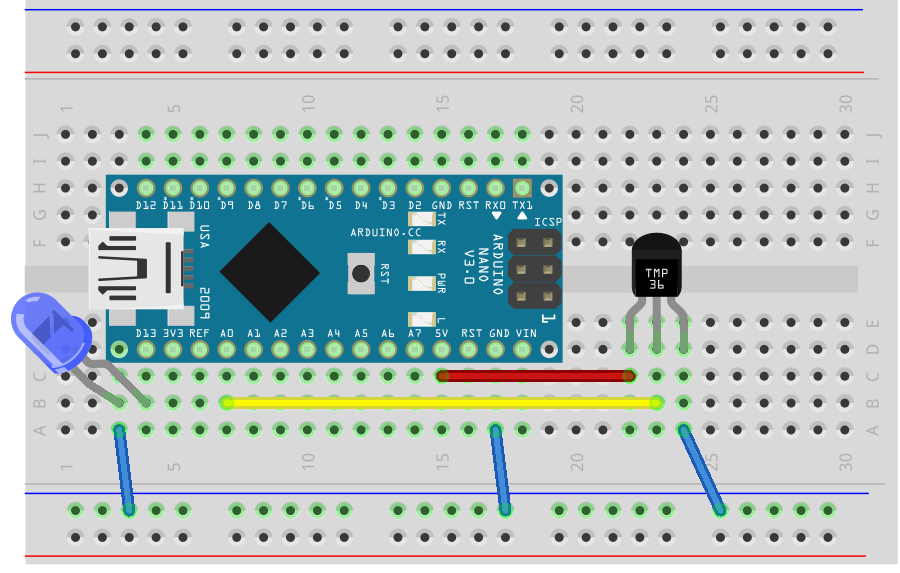
What it is needed is to connect Arduino board , temperature sensor and LED all together. The sensor must be connected to an analog input port, and the LED to a digital output port as shown the figure below:
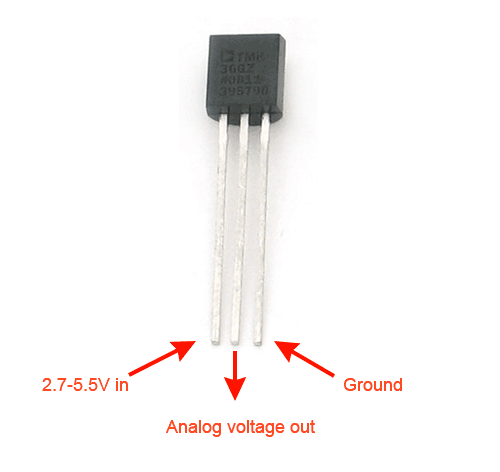
TMP36 is an easy to use temperature sensor with −40°C to +125°C operation range. It has three pins, supply voltage, output voltage, and ground. The input voltage can be between 2.7 and 5.5 V, so we can connect it with the 5V pin in the Arduino. The output voltage is 0.5V for (0°C) and increases by 10 mV/°C. Here is the full Datasheet.
The next step is preparing the code and uploading it to the Arduino board. The code reads the analog value on its pin, and then convert it to the matching temperature degree. If the temperature is in the normal range, the LED will be on, but if it goes above the threshold, the LED will be turned off.
You can download the code file from here.
Watch this step by step guide:


![HyperDisk: Pocket-sized & High-speed Portable SSD [Attention: SCAM reported]](https://www.electronics-lab.com/wp-content/uploads/2019/11/hyperD-box.jpg)
