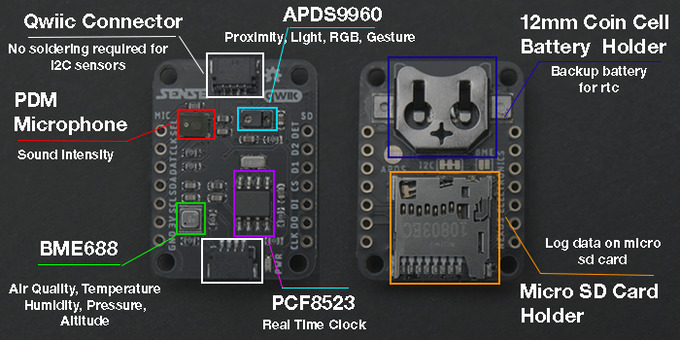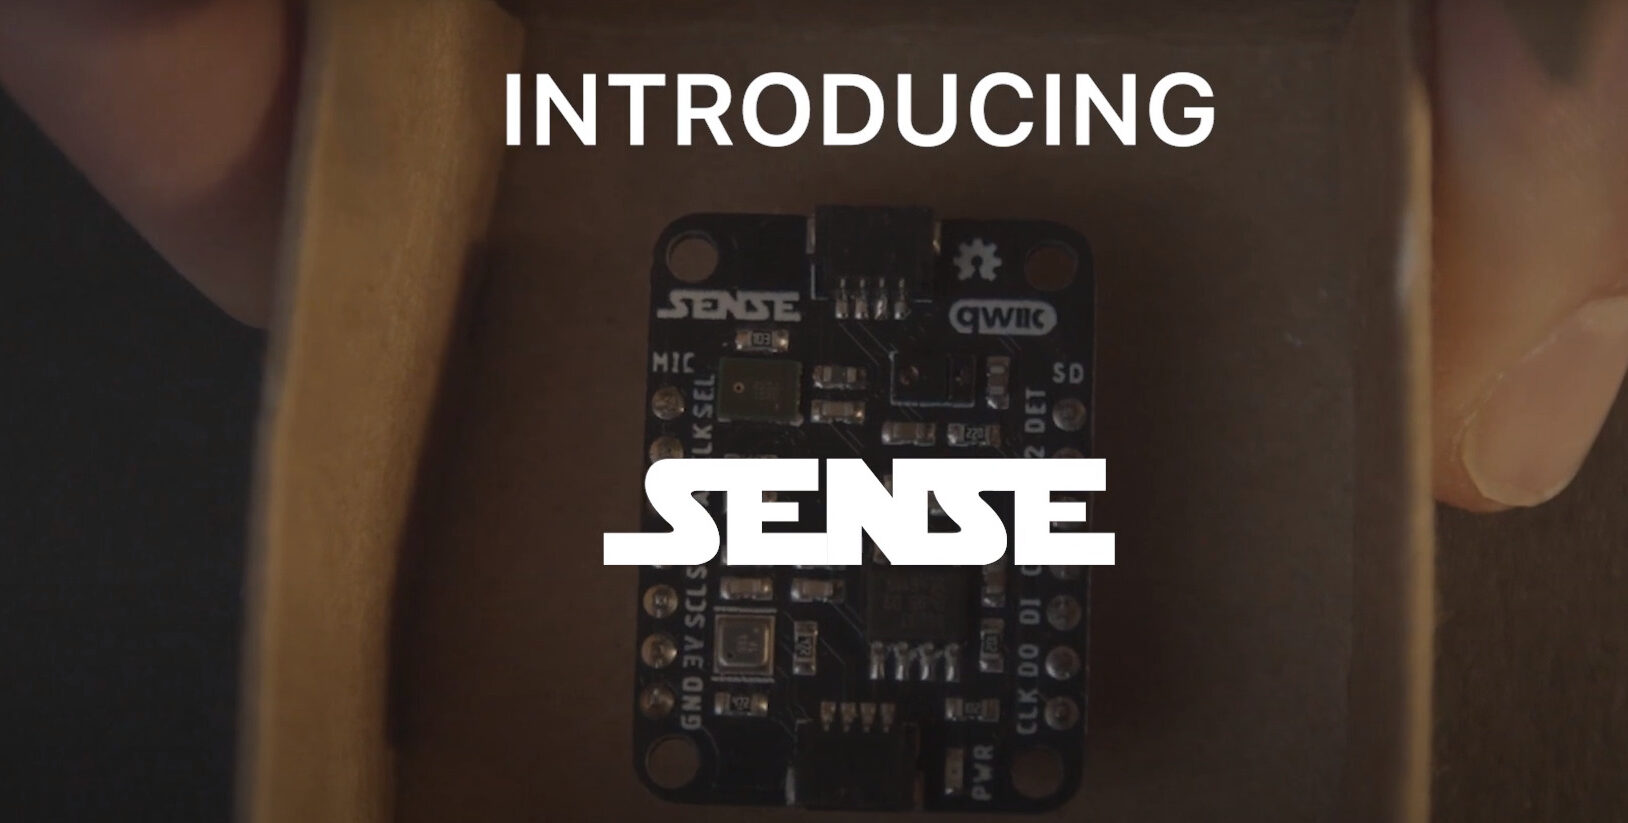
Sense is a multipurpose sensor development board designed by Zack Seifert, an electronics enthusiast. He developed Sense to be a universal sensor board that would be a great addition to provide environmental data and it can be used in any electronics project. Sense is basically a wide variety of sensors all combined into one tiny, compact board. Sense incorporates three sensors, a real-time clock, and a micro SD card holder. With the help of these components, it provides its users with the ability to measure over 20 variables including temperature, air quality, humidity, altitude, RGB colors, sound, light, time, proximity, gestures, etc.
Sense is one of the most efficient devices as it provides its users with ease of development. Instead of connecting multiple different sensors separately we can simply connect the multipurpose Sense board and work seamlessly and efficiently. It is compatible with thousands of microcontrollers including Raspberry Pi, Arduino, and ESP32. With the help of its two onboard Qwiic connectors, there is no soldering or wires required in order to use the I2C sensors. Sense gives its users a full analysis of the environment and allows them to take action and control the environment.
Sense Hardware Components
- BME688 (I2C): It measures temperature with ±1.0 °C accuracy, humidity with ±3% accuracy, barometric pressure with ±1 hPa absolute accuracy, and altitude with ±1 meter accuracy. It can detect gasses and alcohols such as Ethanol, Alcohol, and Carbon Monoxide, and perform air quality measurements.
- APDS9960 (I2C): It detects simple gestures (left to right, right to left, up to down, down to up). It can also return amounts of red, blue, green, and clear light. Additionally, it can tell how close an object is to the sensor.
- SPK0641HT4H (PDM): It has microphone pulse density and modulation output. To use this feature the processors must have a PDM (Pulse-density modulation) interface.
- PCF8523 (I2C): It is a real-time clock and can provide year, month, day, weekday, hours, minutes, seconds, and 100th seconds based on a 32.768 kHz quartz crystal.
- Micro SD Card Holder (SPI): It can log data onto the micro SD card through this feature. It also supports SPI and SDIO interfaces.
Getting Started with Sense
We can begin using Sense in three simple steps:
Step 1: Connect SENSE to a Microcontroller
The first and foremost step would be connecting the Sense board to the user’s desired Microcontroller. If the developers plan on using the I2C sensors, they can connect a Qwiic cable or wire up an I2C bus. If they plan on using the microphone, they can wire up an I2S bus. And lastly, if they are required to use the micro SD card holder, they can wire up an SPI or SDIO bus.
Step 2: Downloading the Code Libraries
The next step in working with Sense is to download and install the code libraries for the respective microcontroller that the developers are using. For example, the Arduino, Raspberry Pi and Circuit Python Libraries. For further help, the developers can refer to the detailed user guide and Github repositories.
Step 3: Upload Code and Start Creating
The last step includes uploading the respective code onto the microcontroller and you are ready to use Sense.
Sense can be used for a multitude of applications including an IoT weather station, home automation using a clap switch, motion-activated smart faucet, volume control using hand gestures, etc. To learn more about Sense, you can head over to the product page.


